How To Repair Concrete Garage Floor Cracks Depends On Type Of Crack
One of the biggest mistakes that homeowners make when repairing cracks in their garage is the failure to first determine what types of cracks they are repairing. Are they shrinkage cracks, active or dormant cracks or structural ones?
Therefore, it’s important to know the different types of cracks and their causes; for the way you repair them and the products that you use will differ based on the type of crack that you’re repairing.
Failure to evaluate what type of crack you’re dealing with and what products to use may result in the repair work popping out, cracking itself or unhappiness with the work that you did. Fortunately, 98% of homeowners can easily overcome this risk by simply taking a few minutes to evaluate the type of cracks they’re repairing and choosing the right products to repair their cracks.
Benefits of Crack Repair

Having a nice looking and well-maintained floor extends the life and use of the floor and your garage. It should be considered part of your home maintenance program; one which increases the value of your home and enriches the look of your garage.
Repairing cracks will help reduce further cracking and work towards maintaining the integrity of the floor.
Ants and other little creatures often lose part or all of their access to the garage or the rest of the house because they cannot come up through the cracks anymore. Should you have ants coming up through the cracks, it would be wise to eliminate or solve the ant problem under the slab, prior to sealing or repairing the cracks.
When cracks are filled then debris and dirt cannot settle in them. This makes cleaning the garage and garage floor so much easier.
Cracks in a garage floor will often allow moisture to reach any rebar reinforcement there is in the floor. Should moisture penetrate through the cracks and get to the rebar, then the rebar may rust and cause damage to the concrete. This can affect the structural strength of the floor and may cause additional cracking and at times spalling of the concrete over the rebar.
Occasionally, hidden in the cracks there may be mold and bacteria that cannot be seen and yet may be a health concern for children or others spending time in the garage. It is even a bigger risk if the cracks are covered by carpeting or similar materials.
In some homes moisture or water will creep up through the cracks in a garage floor. When this is the case, repairing and sealing the cracks may help reduce or prevent water from seeping up. Should moisture be coming up through cracks you should investigate the source of the moisture i.e. is there a leaking water or sewer line under the slab, or a high water table issue and possibly an exterior yard drainage problem; if so these issues should be corrected prior to repairing any cracks.
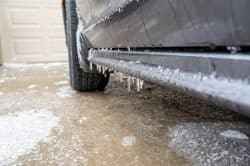
In areas of the country where there is rain, snow or ice, repairing and sealing the cracks will prevent moisture, deicing chemicals and salt from penetrating through the cracks and reaching the rebar, for as we know, this can cause rebar to rust and deteriorate.
Another key advantage of repairing cracks in a garage, is that in the process of evaluating the type of crack and the cause, you may discover an unknown problem that you didn’t realize that you had. Once alerted, you can fix it or solve it before it becomes very costly or unmanageable.
The first step of a repair project is a quick evaluation
In order to repair concrete cracks properly it is wise to do a quick evaluation as to the type of cracks and the causes. By doing this, it will help you decide how you’re going to repair the crack and what products to use.
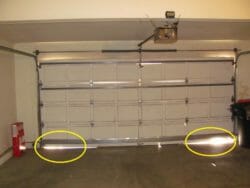
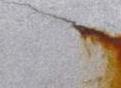
When examining the garage floor, not only do you want to look at the cracks themselves, but you should also check to see if there is a moisture problem. Evidence of moisture issues may include efflorescence on the floor, rust stains at some of the crack areas, and even water seeping up through the cracks from time to time.
One of the biggest mistakes in repairing a crack is the failure to determine if it’s an “Active” crack or a “Dormant” crack
Active cracks tend to get larger and change in direction, width, or depth overtime. They are often associated with:
- Soil movement
- Thermal expansion and contraction of the concrete slab
- Footings shifting due to freezing and thawing of the soil
- Expansive soils with moisture issues
- Slope creep or other types of soil movement
In some instances, the cracks may expand and contract seasonally due to summer / winter seasons or rainy / dry seasons; also many active cracks will stabilize overtime.
If a crack in a garage floor has been there for a long time and hasn’t changed, more than likely it is a dormant crack, however, if external forces change it may become an active crack.
Two key points about active cracks.
- When choosing a product to repair an active crack, choose one that flexes or has elastomeric characteristics. Avoid rigid epoxies or other rigid repair products.
- When possible, try to correct the underlying condition that is causing the crack to be an active crack.
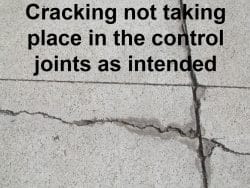
“Control Joints” are not cracks but may have a crack in them
Concrete contractors often say that there are two types of concrete; concrete that has cracked and concrete that is going to crack. There’s a lot of truth in this old saying.
Since contractors pretty well know that most concrete is going to crack, they will often put control joints in the concrete when they pour it or shortly thereafter. In garage floors it is common to have control joints divide the floor into 10 to 20-foot sections.
The purpose of these joints is to weaken the concrete so that if the concrete cracks, often due to shrinkage, it will crack at the weakest point which is frequently where the control joints were put. The end result is that much of the cracking will take place in the control joints and the garage floor looks better than if the cracking just ran all over the place.
The most common types of cracks in garage floors and the causes
There are many types of cracks and reasons for floors to crack; some of which would require forensic testing to determine. However, there are some very common ones that homeowners should be aware of.
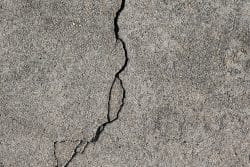
Shrinkage cracks are the most common type of cracks in garage floors
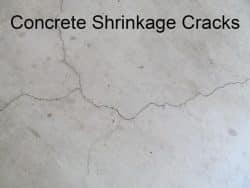
There are two types of shrinkage cracks, plastic shrinkage cracks and dry shrinkage cracks. The first type, plastic shrinkage cracks occur right after the concrete has been poured (in the first few hours) but has not hardened. They are basically from excess water in the concrete bleeding off or out of the fresh concrete as it begins to set up. The cracks are generally very thin, may run parallel to one another (one to 3 feet apart) and usually about ½ to 2 inches deep and generally not considered a structural concern.
Dry shrinkage cracks is the result of the concrete shrinking as it is hardening due to the loss of water through capillary action. A 20-foot square slab may shrink about 1/8 to 1/4 inch during this process. The shrinkage cracks often appear to meander and are typically a hairline width, 1/32 inch or a 1/16 inch wide and may continue to appear for up to 6 or 12 months after the concrete has been poured. Once this initial period of cracking is over, the cracks will generally stabilize and become dormant.
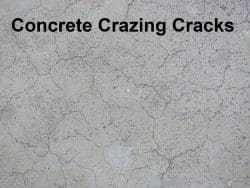
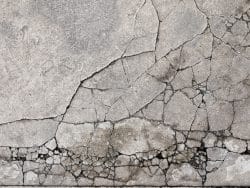
Crazing Cracks
These cracks are a network of very fine hairline or smaller than hairline cracks that are very shallow, usually less than a 1/8 or 1/4 of an inch deep and sometimes hardly visible unless the floor is wet. They often form when the surface of the concrete dries faster than the rest of the slab when the floor is poured.
Their appearance may be irregular spider web looking or like a hexagonal pattern and may be referred to as map cracking.
At times homeowners will merely seal these cracks with a light coating of sealant as part of their maintenance program. It is more important to seal exterior crazing cracks than it is interior ones. If there is a downside to sealing ones in a garage, it would be that some sealing products will visually accentuate them a little; but the upside is that It helps waterproof the floor some and makes it easier to clean.
Thermal Cracking
When concrete is exposed to large temperature differentials, summers to winters, it will expand or contract, and this may cause cracking. Additionally, if the subgrade / the soil beneath the concrete freezes then this can also cause cracking, especially if there’s moisture that has migrated into the soil. If this occurs every year and the slab moves or cracks because of it, then it would be considered an active crack.
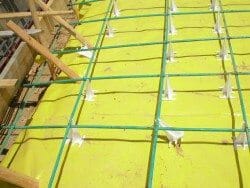
Cracks and “Rebar” issues
Not all garage floors will have rebar in them, some may have wire mesh in them, and other floors will have no reinforcement of any type. Those without reinforcement in the slab tend have more cracking, bigger cracks and cracks that have one side higher than the other side of the crack.
One of the main concerns with cracks and rebar is that if moisture penetrates a crack and reaches the rebar, that the rebar will rust and in doing so, will expand up to 4 times its diameter. This will cause more cracking, at times spalling and will weaken the concrete. Therefore, it is important to repair or seal the cracks so that moisture will not reach the rebar.
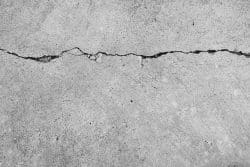
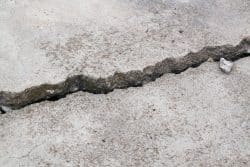
Cracks due to soil movement
Of all the reasons for garage floor cracks, soil movement causes the majority of major issues. The size may vary from hairline to one inch or larger and the importance may range from insignificant to major. Most soil issues include one or more of the following:
- settlement
- expansive soils
- slope creep
- moisture and drainage issues
Nearly all larger cracks in a slab relate to soil movement, especially when there is not proper reinforcement in the slab or to weak (not structually strong) concrete. The two most common causes for weak concrete in garage floors is that there was insufficient cement in the mix of the concrete, thus cheaper, or there was too much water added to the concrete when it was being poured from the truck so that the finishers would have an easier time in placing it.
Replace badly cracked concrete
Trying to repair every little crack in a badly cracked and damaged garage floor is not practical, would look terrible and just break up again.
Areas that are badly cracked and damaged should be removed by saw cutting and jack hammering out the damaged concrete and replacing it with new concrete. When replacing the damaged concrete, it is wise to add steel rebar reinforcement and dowel it into the existing concrete for support. If there are large areas that are damaged and it appears that there is no reinforcement in the slab, then consideration should be given to replacing the entire garage floor.
Structural Cracks
Generally, engineers do not consider cracks in a garage floor to be a structural issue that would require repairing them for structural purposes. However, they may be an indication that there are structural issues with the home.
At times, they may be a warning sign that there is settlement of the structure itself, a foundation concern or that there may be slope creep, all of which can cause structural damage to a home. Occasionally, they may be a yellow flag that there is a water table issue, poor drainage or merely an indication that the compaction under the garage floor was poorly done.
There are a few cases where cracks in a garage floor might become a structural concern. A good example of this would be where a home is built on a hillside and that the garage floor has a living area or an open space under the garage floor, rather than the garage slab sitting on soil.
Should the cracks be a structural concern themselves, then an engineer should be consulted, and any repairs be done per an engineer’s design and calculations. There should also be a permit obtained for the work to be performed.
How to repair
- Evaluate the cracks
- Chose the product and read the instructions on how to use the product
- Preparation of the crack
- Apply or fill the crack with your chosen product
#1 Evaluation
The first step to repairing garage floor cracks is to evaluate the type of cracks and review the possible causes, including whether the cracks are active or dormant.
Active cracks are normally repaired or filled with a flexible or elastomeric type of product, for rigid products will often crack or fail if used to repair an active crack.
#2 Choosing the product
Once the evaluation is complete, then the next step is to decide on what product or products that you’re going to use in repairing or sealing the cracks. When choosing a product, be sure to read what the product is intended for and its instructions on preparing a crack and using the product.
If you are not sure whether a crack is active or dormant, you may want to error on the side of caution and use a product that is flexible and has elasticity, just in case the concrete has movement.
#3 Crack preparation
Prior to filling or sealing a crack there needs to be preparation. The preparation may only be the crack itself or the entire garage floor, depending on the type of cracks and the method used.
Cleaning
Cracks that are going to be sealed, for example crazing cracks which often covers the entire garage floor area, needs to have the entire garage floor cleaned and prepped. Dust, dirt and any oil, paint or chemicals should be removed.
For larger cracks where the repair is going to be just of the crack, then the entire garage floor does not need to be cleaned, only the crack itself.
The crack and floor should be completely dry
Most crack repair products will not bond properly to the concrete edges of a crack if it is damp or wet. Often people will get in a hurry and fill the crack or seal it before it is 100% dry, Therefore, it is wise to wait a day or more to give the crack time to completely dry before repairing it. In cooler temperatures or high humidity, it takes longer for a crack to thoroughly dry.
Horizontal surfaces and low viscosity products
If the crack filler product that you’re using has a low viscosity (more water like or cooking olive oil like), then you may want to partially fill the crack with a dry fine silica sand. This will reduce cost but be sure to check the manufactures instructions.
Loose, crumbled, or fractured edges of a crack should be removed
If the edges of a crack are not solid, then the crack repair filler or sealer will often fall or pop out over time.
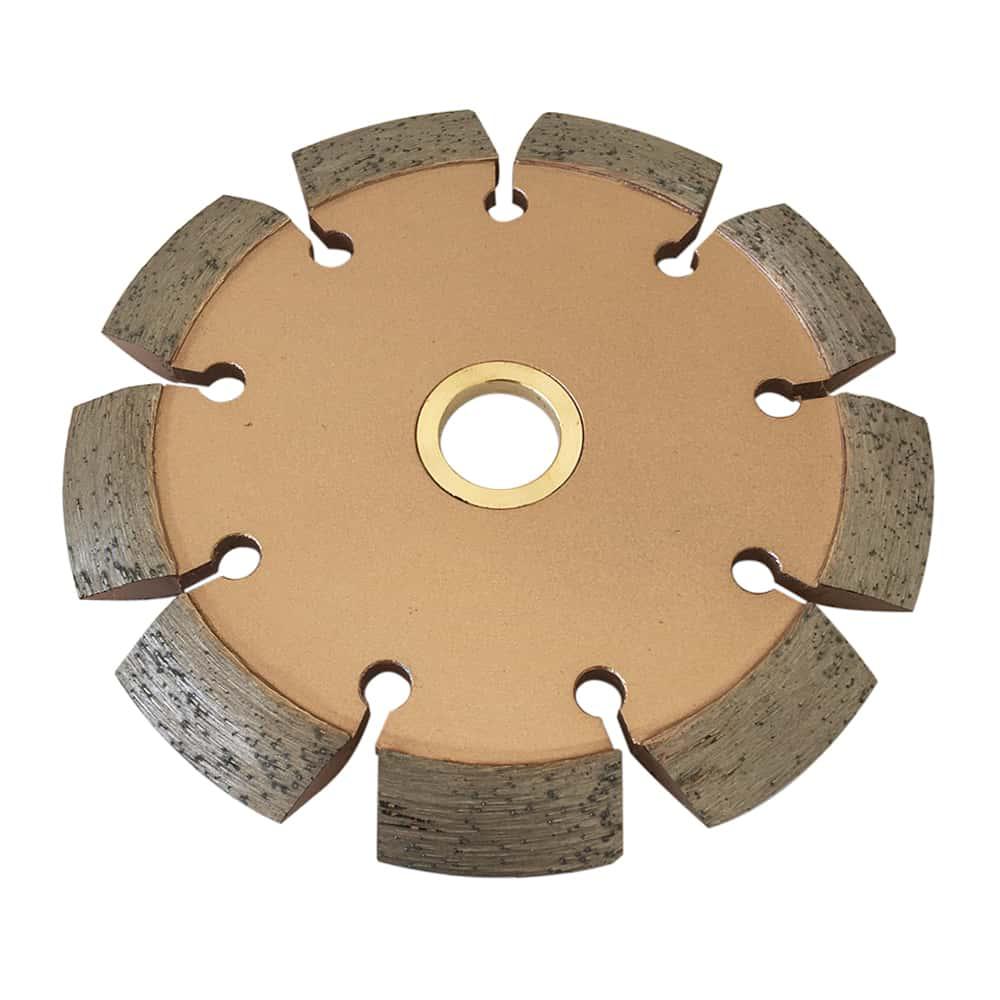
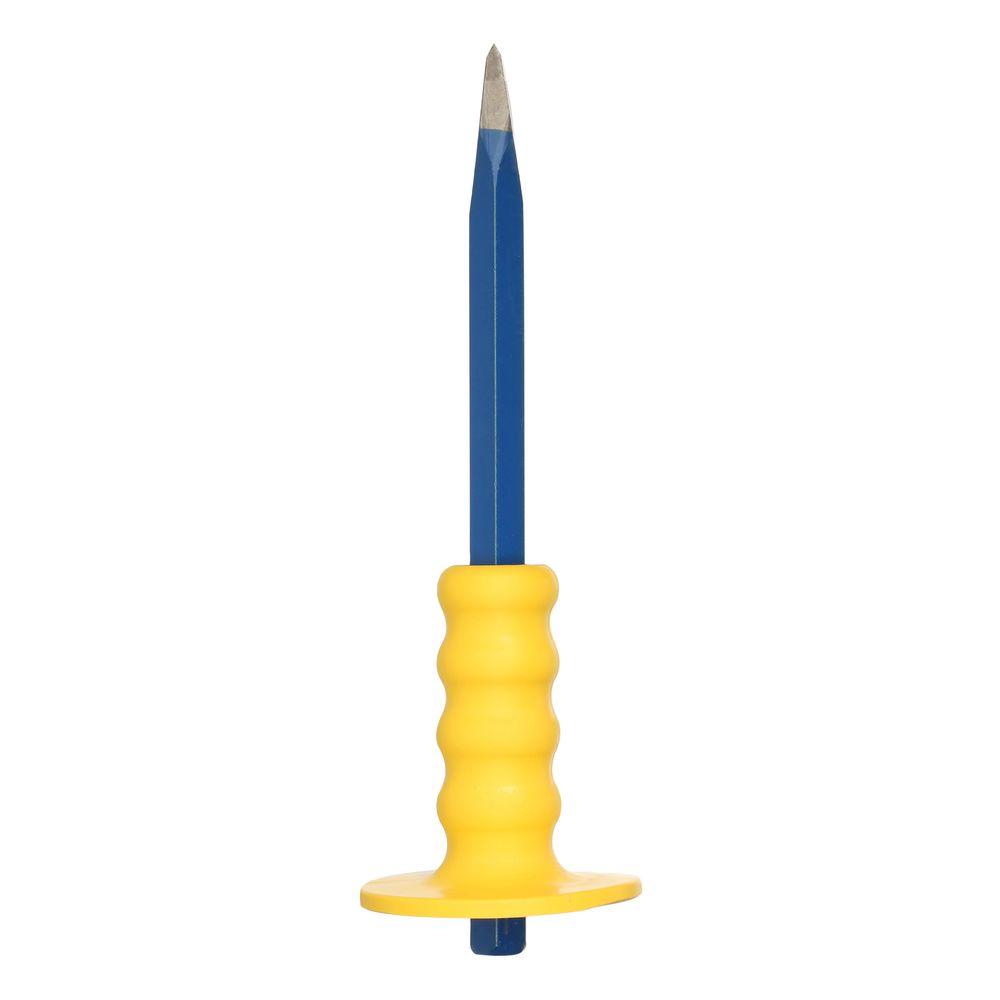
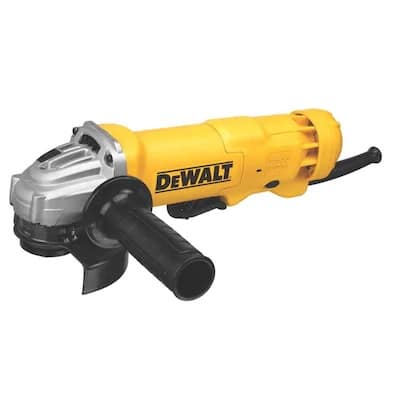
The majority of homeowners will normally use a 1 x 12 inch hand cold chisel or an 4 ½ inch angle grinder with a crack chaser blade to remove loose concrete pieces. Remember to always think safety and wear safety glasses, gloves and a mask.
After all of the loose and fractured portions of a crack have been removed, be sure to vacuum it out thoroughly, no dust or debris should be left in the crack.

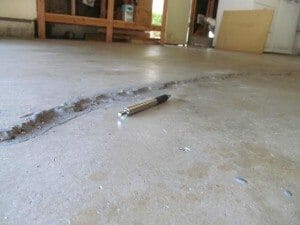
Grinding – One side of crack higher than other side
There are some cracks where one side of the crack is higher than the other side. If there is a difference of 1/8 to a half of an inch, then there is a pretty good chance that there is no rebar or proper reinforcement in the concrete, or there has been significant soil movement under the slab. If there is a significant difference in height, then the home may be experiencing structural problems.
Differences of a 1/16 to a 1/4 of an inch can usually be easily ground down by a homeowner, but bigger differences are more difficult to grind down. Regardless of whether you grind down a little or a lot, it will be easily visible. One of the advantages of grinding down a crack is that it reduces the likelihood of someone tripping over it.
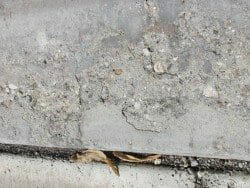
Deep wide cracks
Backer rod
When repairing a deep wide crack many professionals will put backer rod into the crack before filling it with material. Backer rod is a cylindrical type material, a little like a firm sponge that is pushed part-way down into a crack, reducing the need to fill the entire crack with epoxy or sealant material. The backer rod material is very cheap, comes in many sizes, including 3/8, 1/2 and 1 inch diameters, and reduces the amount of costly materials needed to fill or seal a crack. Another product used to place in the lower portion of some cracks is Silica sand, which will also reduce the amount of filler material and cost.
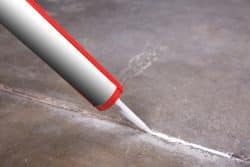
#4 Fill or seal the crack
The last step is to fill or seal the cracks. Remember that some products have a limited amount of workable time that they can be applied before they start hardening up while you are filling a crack , i.e.epoxys and other two part mixtures. Secondly, you should calculate how much product you need to complete the job, so you don’t run short and then have to order more product before you can finish.
The key to success in repairing and sealing cracks is to read and follow the manufacturers recommended instructions. If you’re using the right product and follow the manufacturers instructions, success will be yours.

Identifying the status of a crack, basically whether it’s an active or dormant crack will help ensure repairs will be successful.
- As a homeowner, one of the questions you want to ask yourself, are there more cracks than a year ago and are they getting bigger.
- Even when cracks are microscopic or hairline cracks it is advantageous to seal the floor.
- Cracks that are left untreated may lead to corrosion and deterioration of rebar in the concrete or result in more damage to the floor which can be more expensive to repair later.
- Always read and follow the manufacturers recommended use and instructions on using their product. This is extremely important.
Having a well-maintained garage floor is a plus for ever homeowner, something every homeowner can do and helps prevent future cracking or damage to the floor.
Additional Resources
-

People are surprised about beds in igloos and how they are made. Also, they didn't realize the time it takes to build one and about the entrance feature.
-

Many fires start in the garage. Knowing whether to have a smoke alarm in the garage, as well as the attic, is important.
-

There are a few times that cracks in a garage floor are a warning sign of foundation or other problems; can you recognize them?
-

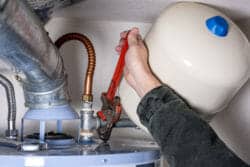
As codes change over time and it's wise to safely install a new water heater,
-
How long will a house last is a question that many wonder about when they buy a house.
-

Cracks develop in wall and ceiling areas. What are they a sign of and what can be done?
-

Deteriorated concrete may be a sign of a number of things. For example, the area at the bottom of the garage door is deteriorated. Buyers often wonder if this is structural.
-
Are post tension concrete slabs better than slabs with rebar or no re-reinforcement?
-
Hardly anyone notices a gap at the bottom of a garage door. Mice and a few structural engineers might.