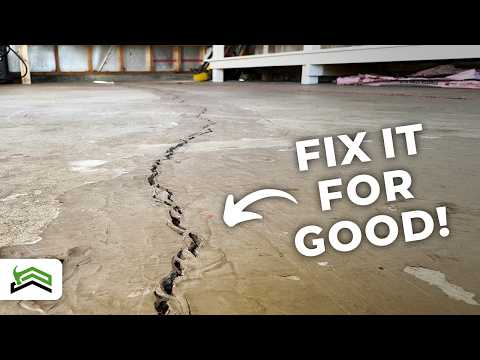
Step-by-Step Guide to Repairing Cracks in Your Garage Floor
Properly Repairing Cracks in a Garage Floor
Dealing with cracks in your garage floor can be frustrating, whether you’re preparing for an epoxy floor finish or simply looking to improve the appearance of your garage. Here’s a detailed guide on how to properly repair those unsightly cracks. This method is versatile and suitable for both minor and extensive damages.
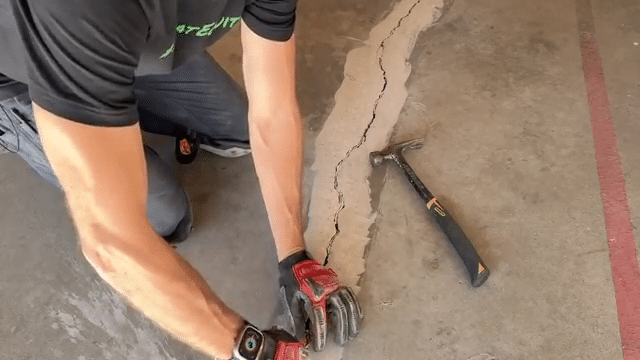
Initial Steps: Removing Old Sealants
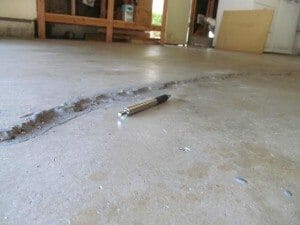
Begin by removing any old sealants or DIY repairs from the cracks. Using a floor scraper, work along the crack to lift and remove as much of the material as possible. This step is crucial as it prevents the grinding discs from gumming up due to residual sealant, thereby saving you time and resources.
If your garage floor is bare concrete, you can skip the scraping step and proceed directly to prepping the crack. Between each step, it’s advisable to clean up the area to keep debris away from the crack, ensuring a smoother application of repair products later.
Grinding the Crack
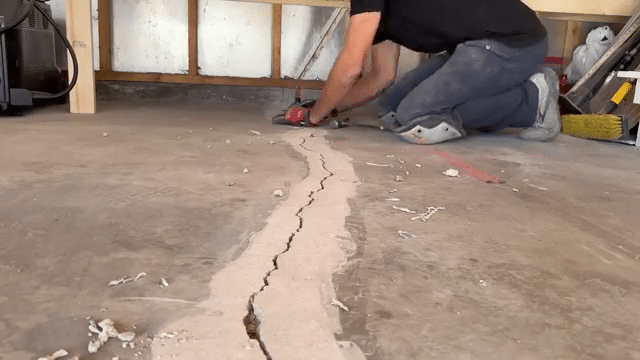
Next, break out a grinder with an abrasive wheel to further clean the crack. Make sure to wear a respirator and safety glasses as this process generates a lot of dust. Grind along the crack, starting from the garage door threshold. The goal here is to remove any remaining paint, sealant, or other materials, making the surface smooth and ready for repair.
If the surface has unevenness, consider using a diamond cup wheel, which can grind and clean simultaneously. A dust shroud connected to a vacuum can help manage the dust produced during this process. The finished product should be smooth to the touch, without any noticeable lips or bumps.
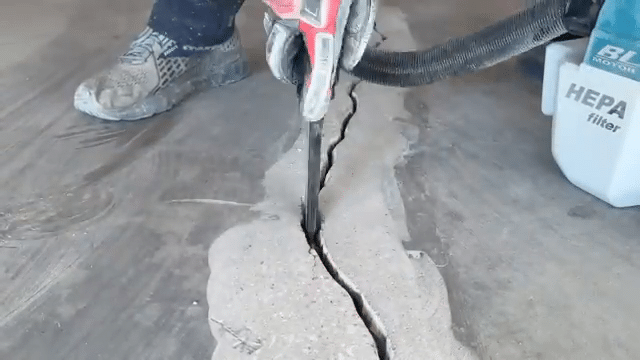
Preparing the Crack for Filling
Once the grinding is complete, use an old flathead screwdriver or chisel to clean out the crack. This step may involve removing loose chunks of concrete or sealant that the grinder couldn’t reach. Two types of grinding wheels can be used for this process: a thin diamond blade for hairline cracks and a V-notch blade for larger cracks.
The thin diamond blade allows you to follow the hairline cracks and open them up slightly, making it easier for the epoxy to settle in. For larger cracks, the V-notch blade will help remove loose edges and create a wider opening for the epoxy. After grinding, vacuum out any remaining debris from the crack.
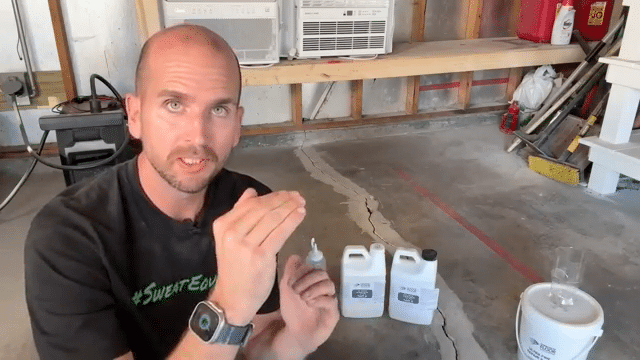
Applying the Epoxy
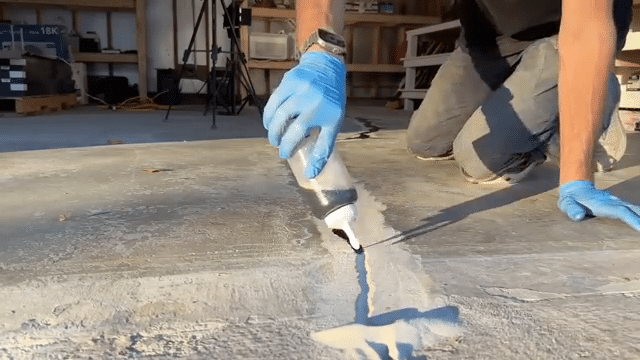
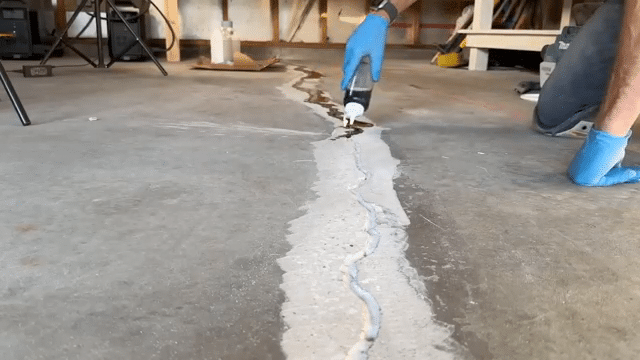
Now, it’s time to fill the crack. Use a high-quality fast-set epoxy from a reputable supplier like Concrete Floor Solutions. They offer various sizes depending on the extent of your repair needs. Before applying the epoxy, fill the crack with ultra-fine sand up to an eighth of an inch from the surface. This sand acts as a base for the epoxy, helping it to adhere better and fill the crack effectively.
Mix the epoxy in small batches, as it sets quickly. Using a marked ketchup bottle can help maintain the correct ratios. Fill the bottle with equal parts of epoxy components A and B, shake it well, and promptly apply it to the sand-filled crack. Overfill slightly, allowing the epoxy to soak into the sand and fill any voids.
Smoothing the Surface
After the epoxy has set for about 30 minutes, you’re ready to grind it down. The goal is to achieve a smooth, even surface that blends seamlessly with the surrounding concrete. Use the grinder to level off the overfilled epoxy, creating a uniform surface. If you encounter any low spots where the epoxy didn’t fill completely, you can apply another layer of epoxy and grind it smooth.
Remember to wear your respirator during this process to protect yourself from dust inhalation. Take your time to ensure the surface is entirely smooth, as this will provide a solid base for any further coatings, such as an epoxy floor finish.
Considerations for Different Environments
This repair method isn’t limited to garage floors. It’s equally effective for basement floors or any other concrete surfaces that require a durable and smooth finish. Proper crack repair is essential before applying any type of flooring to ensure longevity and aesthetics.
Besides the functional benefits, repairing cracks can also prevent further deterioration. Unrepaired cracks can widen over time due to temperature changes, moisture, and stress, potentially leading to more significant structural issues.
Choosing the Right Products
Selecting high-quality products for your repair is crucial. Companies like Concrete Floor Solutions offer specialized products that professional contractors use, ensuring durability and effectiveness. They also provide valuable customer support, helping you choose the right materials for your specific needs.
In addition to epoxy, consider using other concrete repair products for different applications. For instance, polyurethane sealants can offer flexibility for exterior repairs where temperature fluctuations are more significant. Epoxy, however, remains the best choice for indoor repairs due to its strength and quick-setting properties.
In conclusion, repairing garage floor cracks requires careful preparation, the right tools, and high-quality materials. By following these steps, you can achieve a smooth, durable, and aesthetically pleasing surface ready for any finish you plan to apply. Whether it’s for a garage, basement, or other concrete surfaces, these methods and products will ensure a long-lasting repair.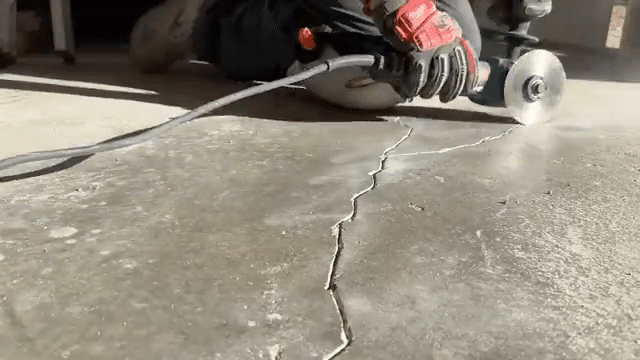

Additional Resources
-

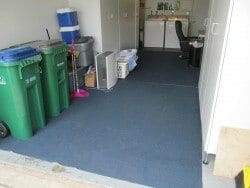
Many people put carpet on the garage floor. Especially for kids to play on or if the area is used for gym type work out area. However, there is a danger...
-

There are a few times that cracks in a garage floor are a warning sign of foundation or other problems; can you recognize them?
-

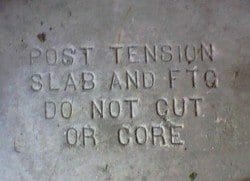
Concrete slabs may have a sign saying "Post Tension Slab, Do Not Cut..." Is this a good thing? The answer is...