Step-by-Step Guide to Building a Weather-Resistant Outdoor Chessboard
Creating a Durable Outdoor Chessboard
Creating an outdoor chessboard is a fun and rewarding project that combines creativity with functionality. Starting with basic materials from your local hardware store, you can produce a beautiful and durable chessboard designed to withstand the elements. The project involves using mosaic tiles, mortar, grout, and construction adhesive, ensuring the final product is both sturdy and aesthetically pleasing. This guide will walk you through the steps to create your own outdoor chessboard, perfect for enhancing your garden or patio space and enriching your mind due the many benefits of playing chess.
Materials and Preparation
The first step in creating an outdoor chessboard is to gather all necessary materials. You’ll need two different colors of mosaic tiles, which can be found at stores like Home Depot. These tiles will form the chessboard pattern. Additionally, you’ll need mortar and grout, which are essential for setting the tiles in place and filling the spaces between them. For the base of the chessboard, use two by fours and coat them with Hardiebacker, a cement board that provides a durable and stable foundation for the tiles.
Constructing the Base
Begin by cutting the two by fours to the desired height and attaching a Hardiebacker board on top using construction adhesive. This creates a strong frame for the chessboard. Next, carefully measure and cut the Hardiebacker to fit the frame, ensuring there is enough room around the edges for a border of tiles or another material of your choice. Screw the Hardiebacker directly onto the frame to secure it in place. This preparation is crucial as it dictates the stability and appearance of the final product.
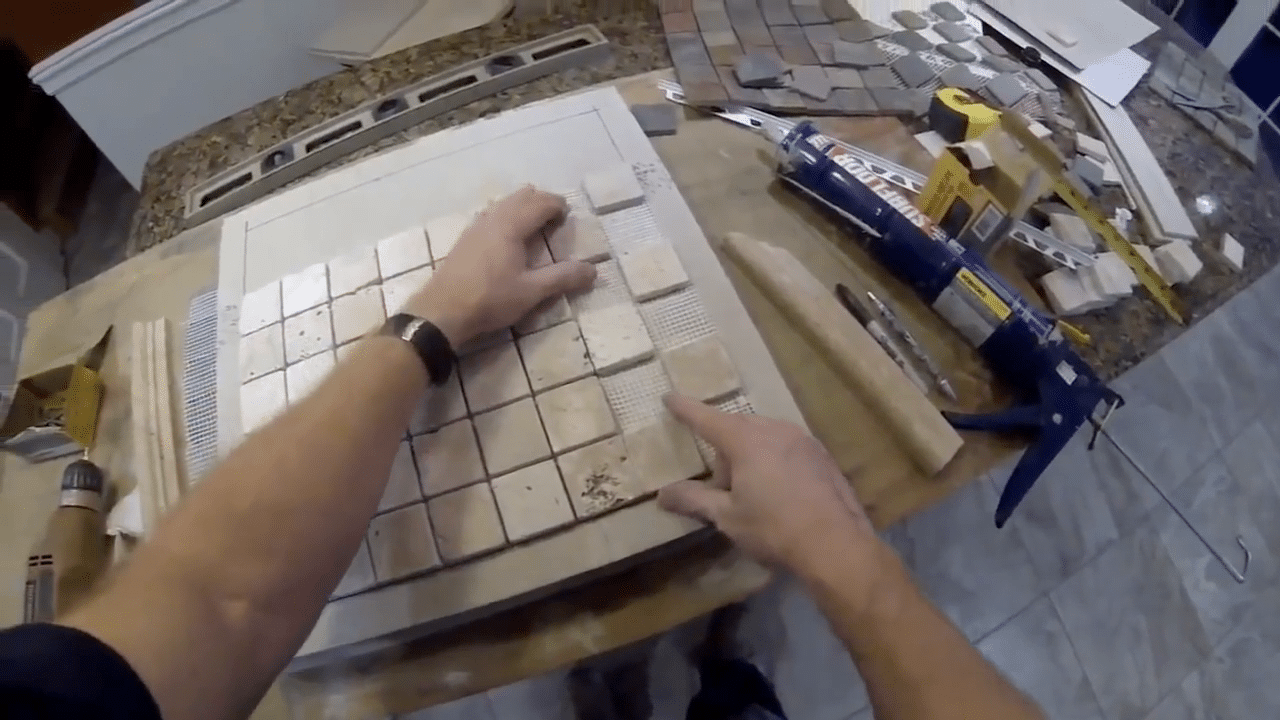
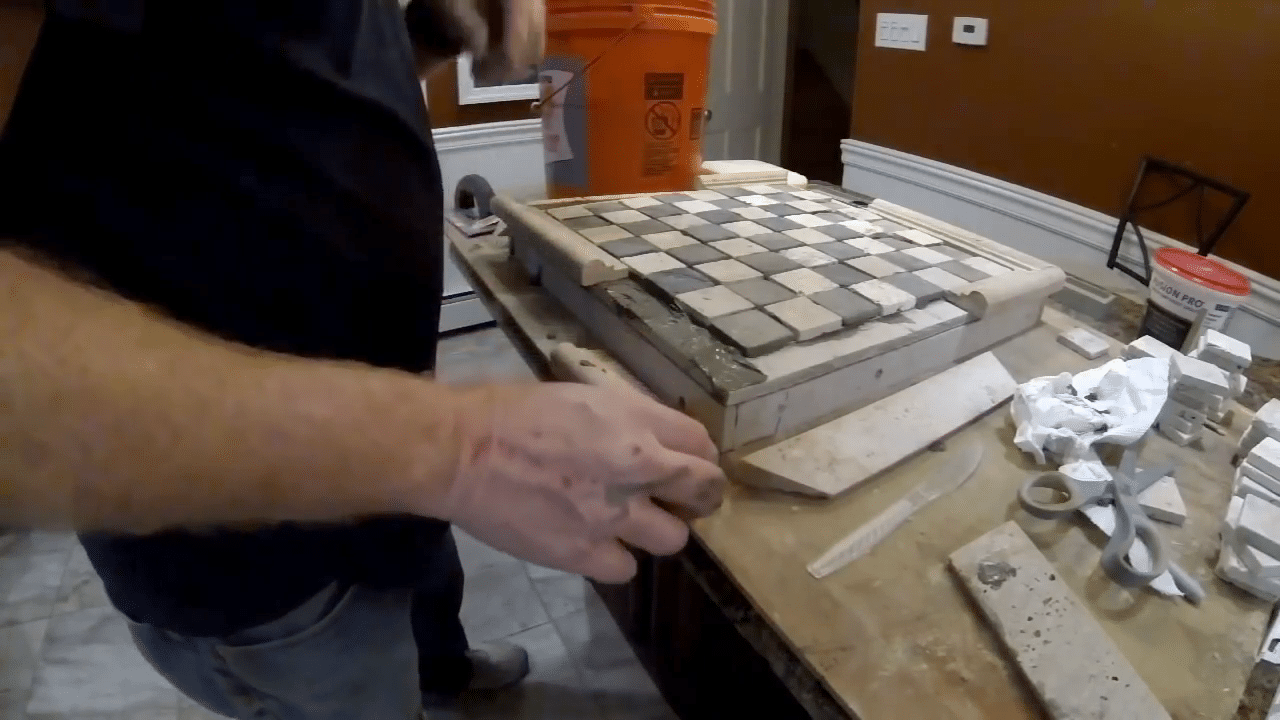
Laying Out the Tiles
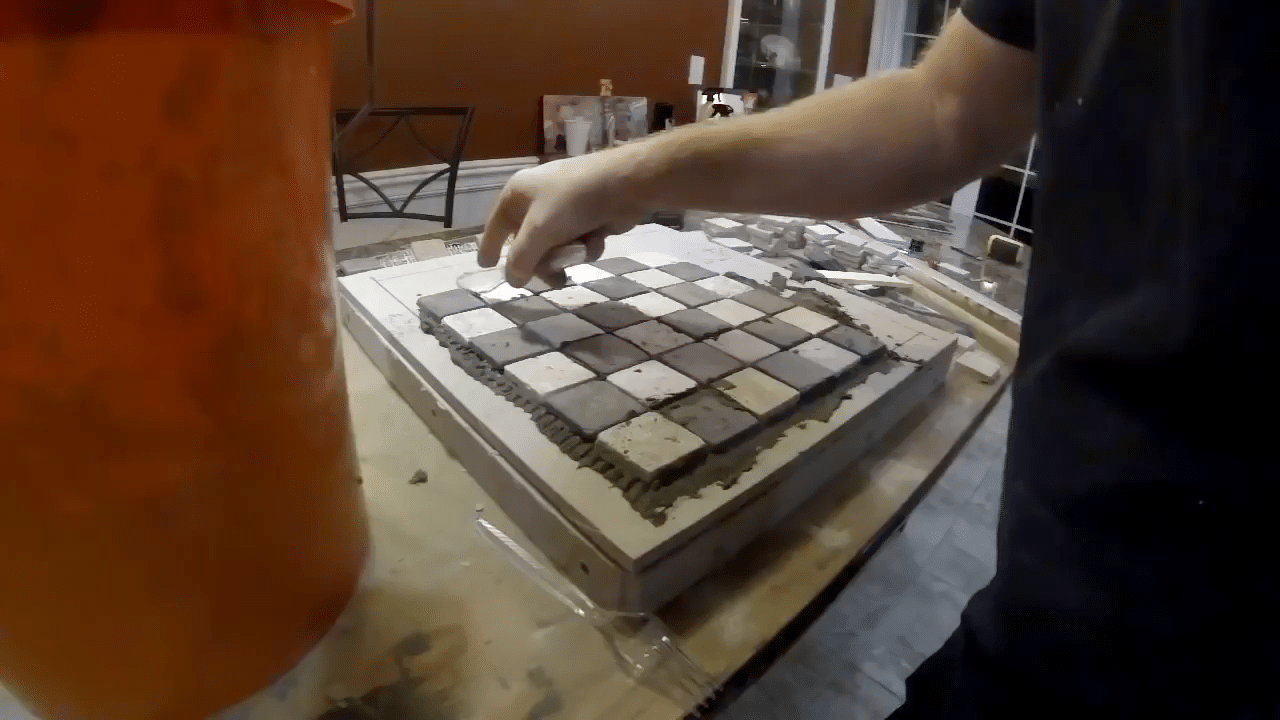
Once the base is ready, lay out the tiles on the Hardiebacker to visualize the final design. For a traditional chessboard, alternate the colored tiles to create a checkerboard effect. This step may involve cutting tiles to fit your board’s dimensions, which require precision and careful measurement. Using a Flexbond mortar, apply it evenly on the Hardiebacker and begin placing the tiles, ensuring each one is pressed firmly in place. A rustic look can be achieved by intentionally not aligning the tiles perfectly, adding character to the chessboard.
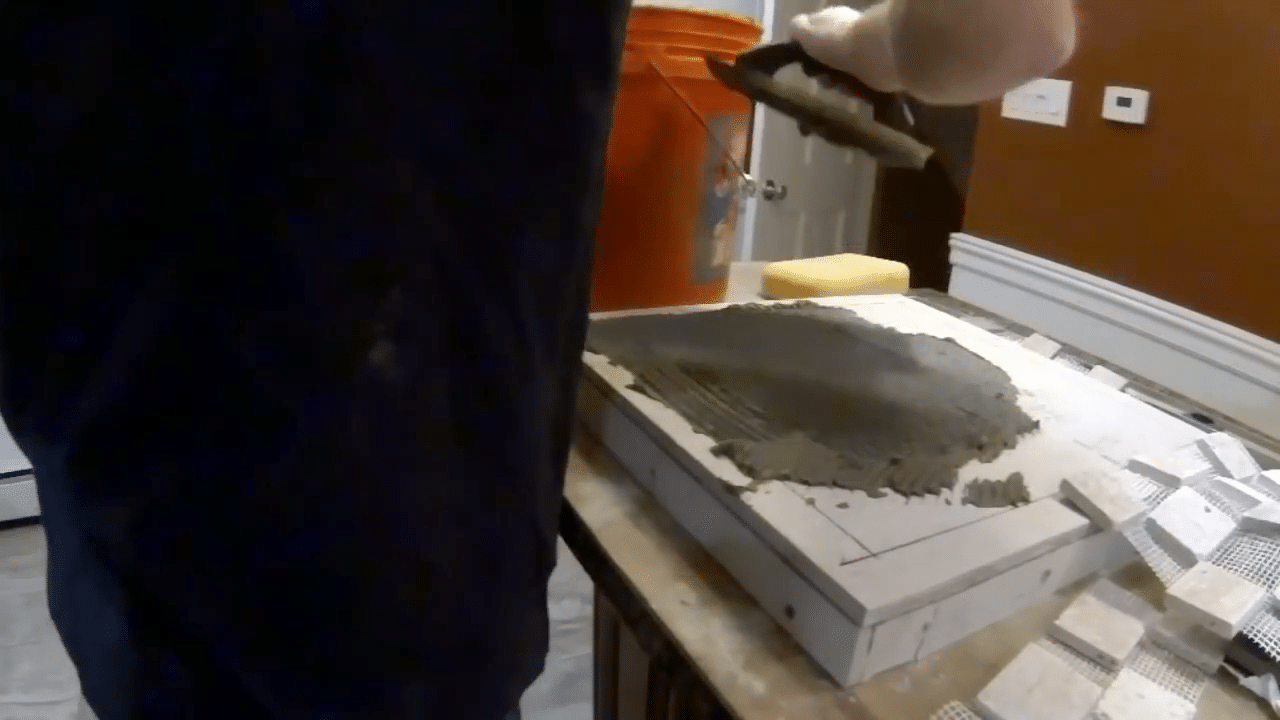
Setting and Sealing the Tiles
After all the tiles are laid out and pressed into the mortar, use a small piece of wood to apply additional mortar between the tiles. This ensures that they are well-embedded and secure. Remove any excess mortar with a plastic knife to prepare the spaces for grouting. It’s important to allow the mortar to dry completely, typically taking around 24 hours, before moving on to the grouting stage. Choose a grout color that complements the tiles to enhance the overall look of your chessboard.
Finishing Touches
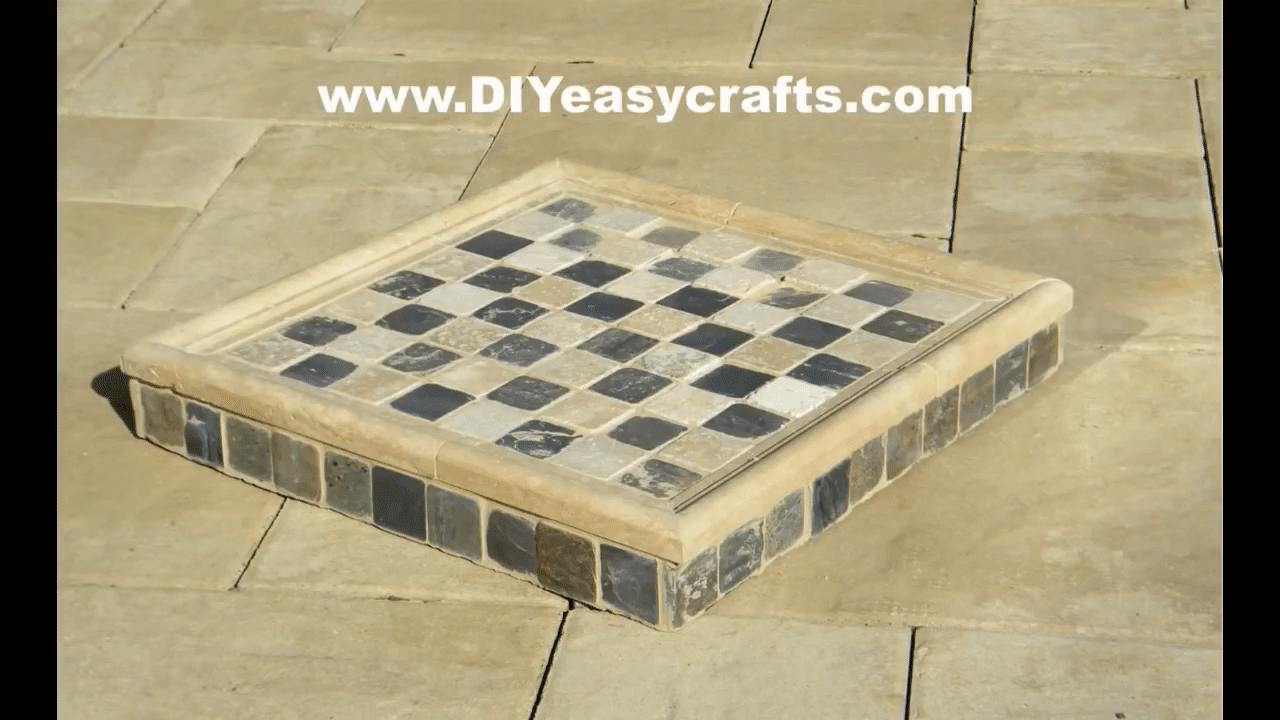
Applying grout is the final step in solidifying your chessboard. Using a gloved hand, press the grout into the spaces between the tiles, ensuring it fills them completely. Afterward, use a damp sponge to wipe away excess grout from the tile surfaces, being careful not to pull grout out from between the tiles. This may take a few repetitions to ensure the tiles are clean and the grout is smoothly applied. Once the grout has dried, you will have a beautiful and functional outdoor chessboard ready for many enjoyable games.
Maintenance and Longevity
To ensure your outdoor chessboard lasts for years, regular maintenance is key. This includes sealing the grout and tiles periodically to protect against moisture and weather conditions. Additionally, during extreme weather, consider covering the chessboard or moving it to a protected area to prevent damage. Maintaining the chessboard also involves cleaning it with gentle, non-abrasive cleaners to avoid scratching the tiles.
The beauty of creating your own outdoor chessboard is not only in the act of making it but also in the enjoyment it brings. Whether playing a game on a sunny afternoon or simply admiring it as part of your garden decor, this chessboard is sure to be a centerpiece. With proper construction and maintenance, it will serve as a functional and decorative element in your outdoor space for years to come. Having a relaxing and peaceful backyard can benefit you and your family and friends in so many ways. Consider reading about how to build a rock fountain, or fake grass backyard ideas.


Additional Resources
-

Ground level deck construction is a fast and easy way to build a deck in most climates.
-

There are many building codes, such as the NEC, IBC, UPC, etc. but the IRC is the most common code referred to for residential construction.
-

