Why is the bottom row of tiles leaning out at an angle and how can I safely remove them to replace my cracked shower base with a new one?
1 year ago
Last Updated: May 11, 2024
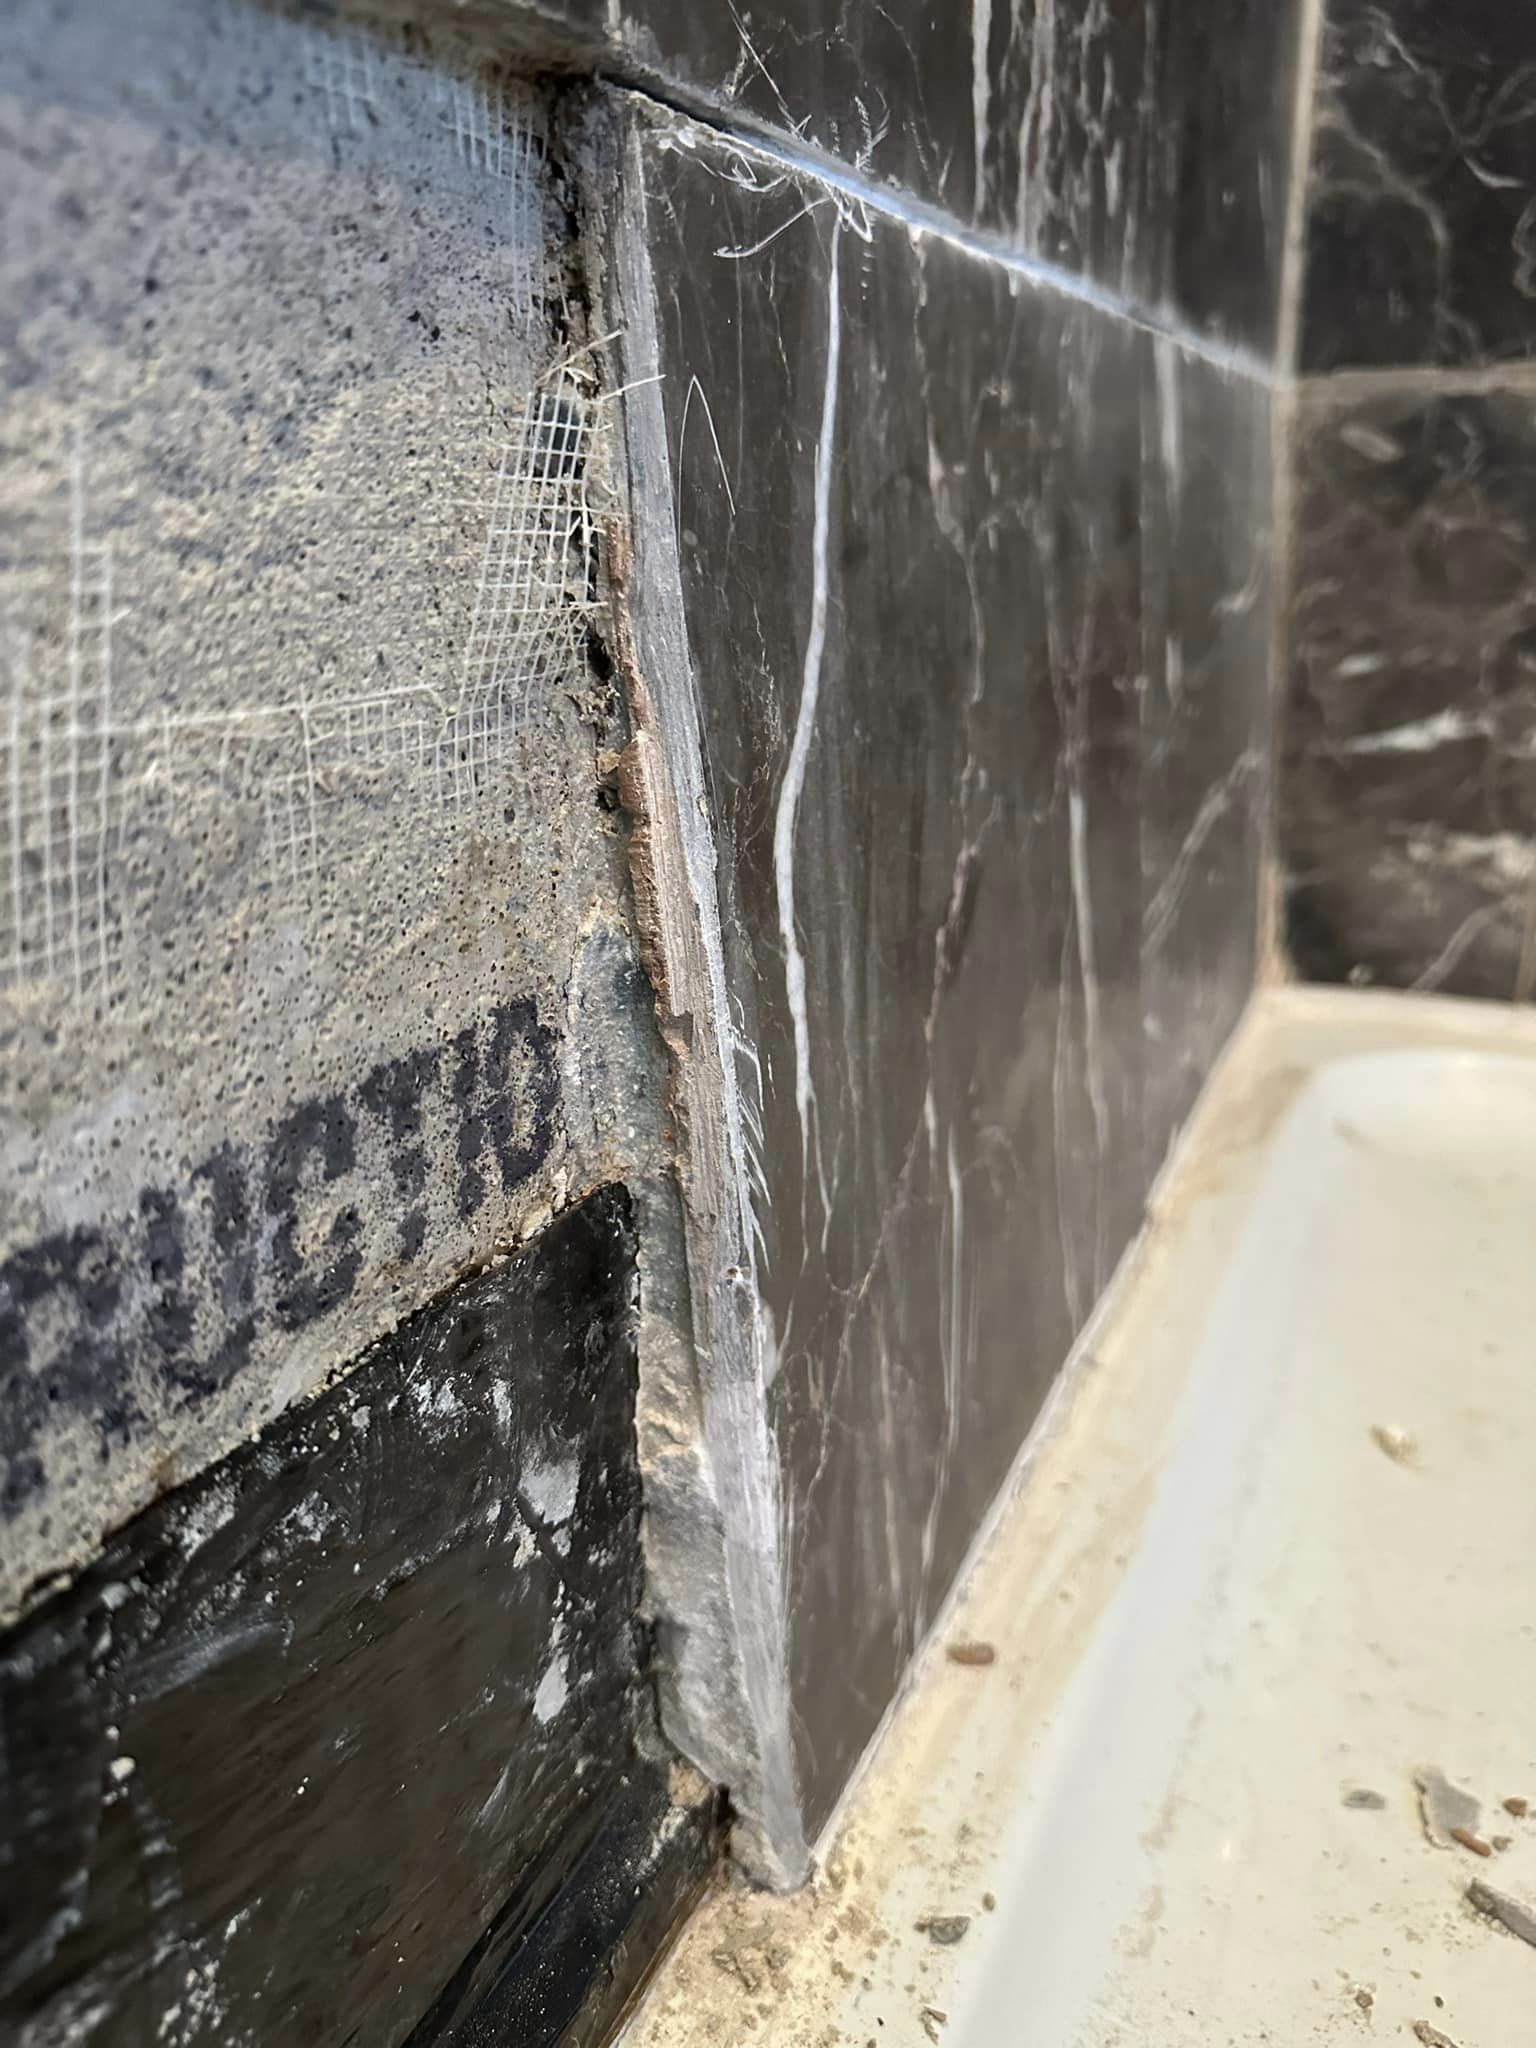
Does anyone know what this is or why it was done this way? My shower base is cracked, so my idea is to take out the bottom row of tiles to remove the old base and install a new one. I’m being careful with this because the tiles are expensive marble at $30 each!
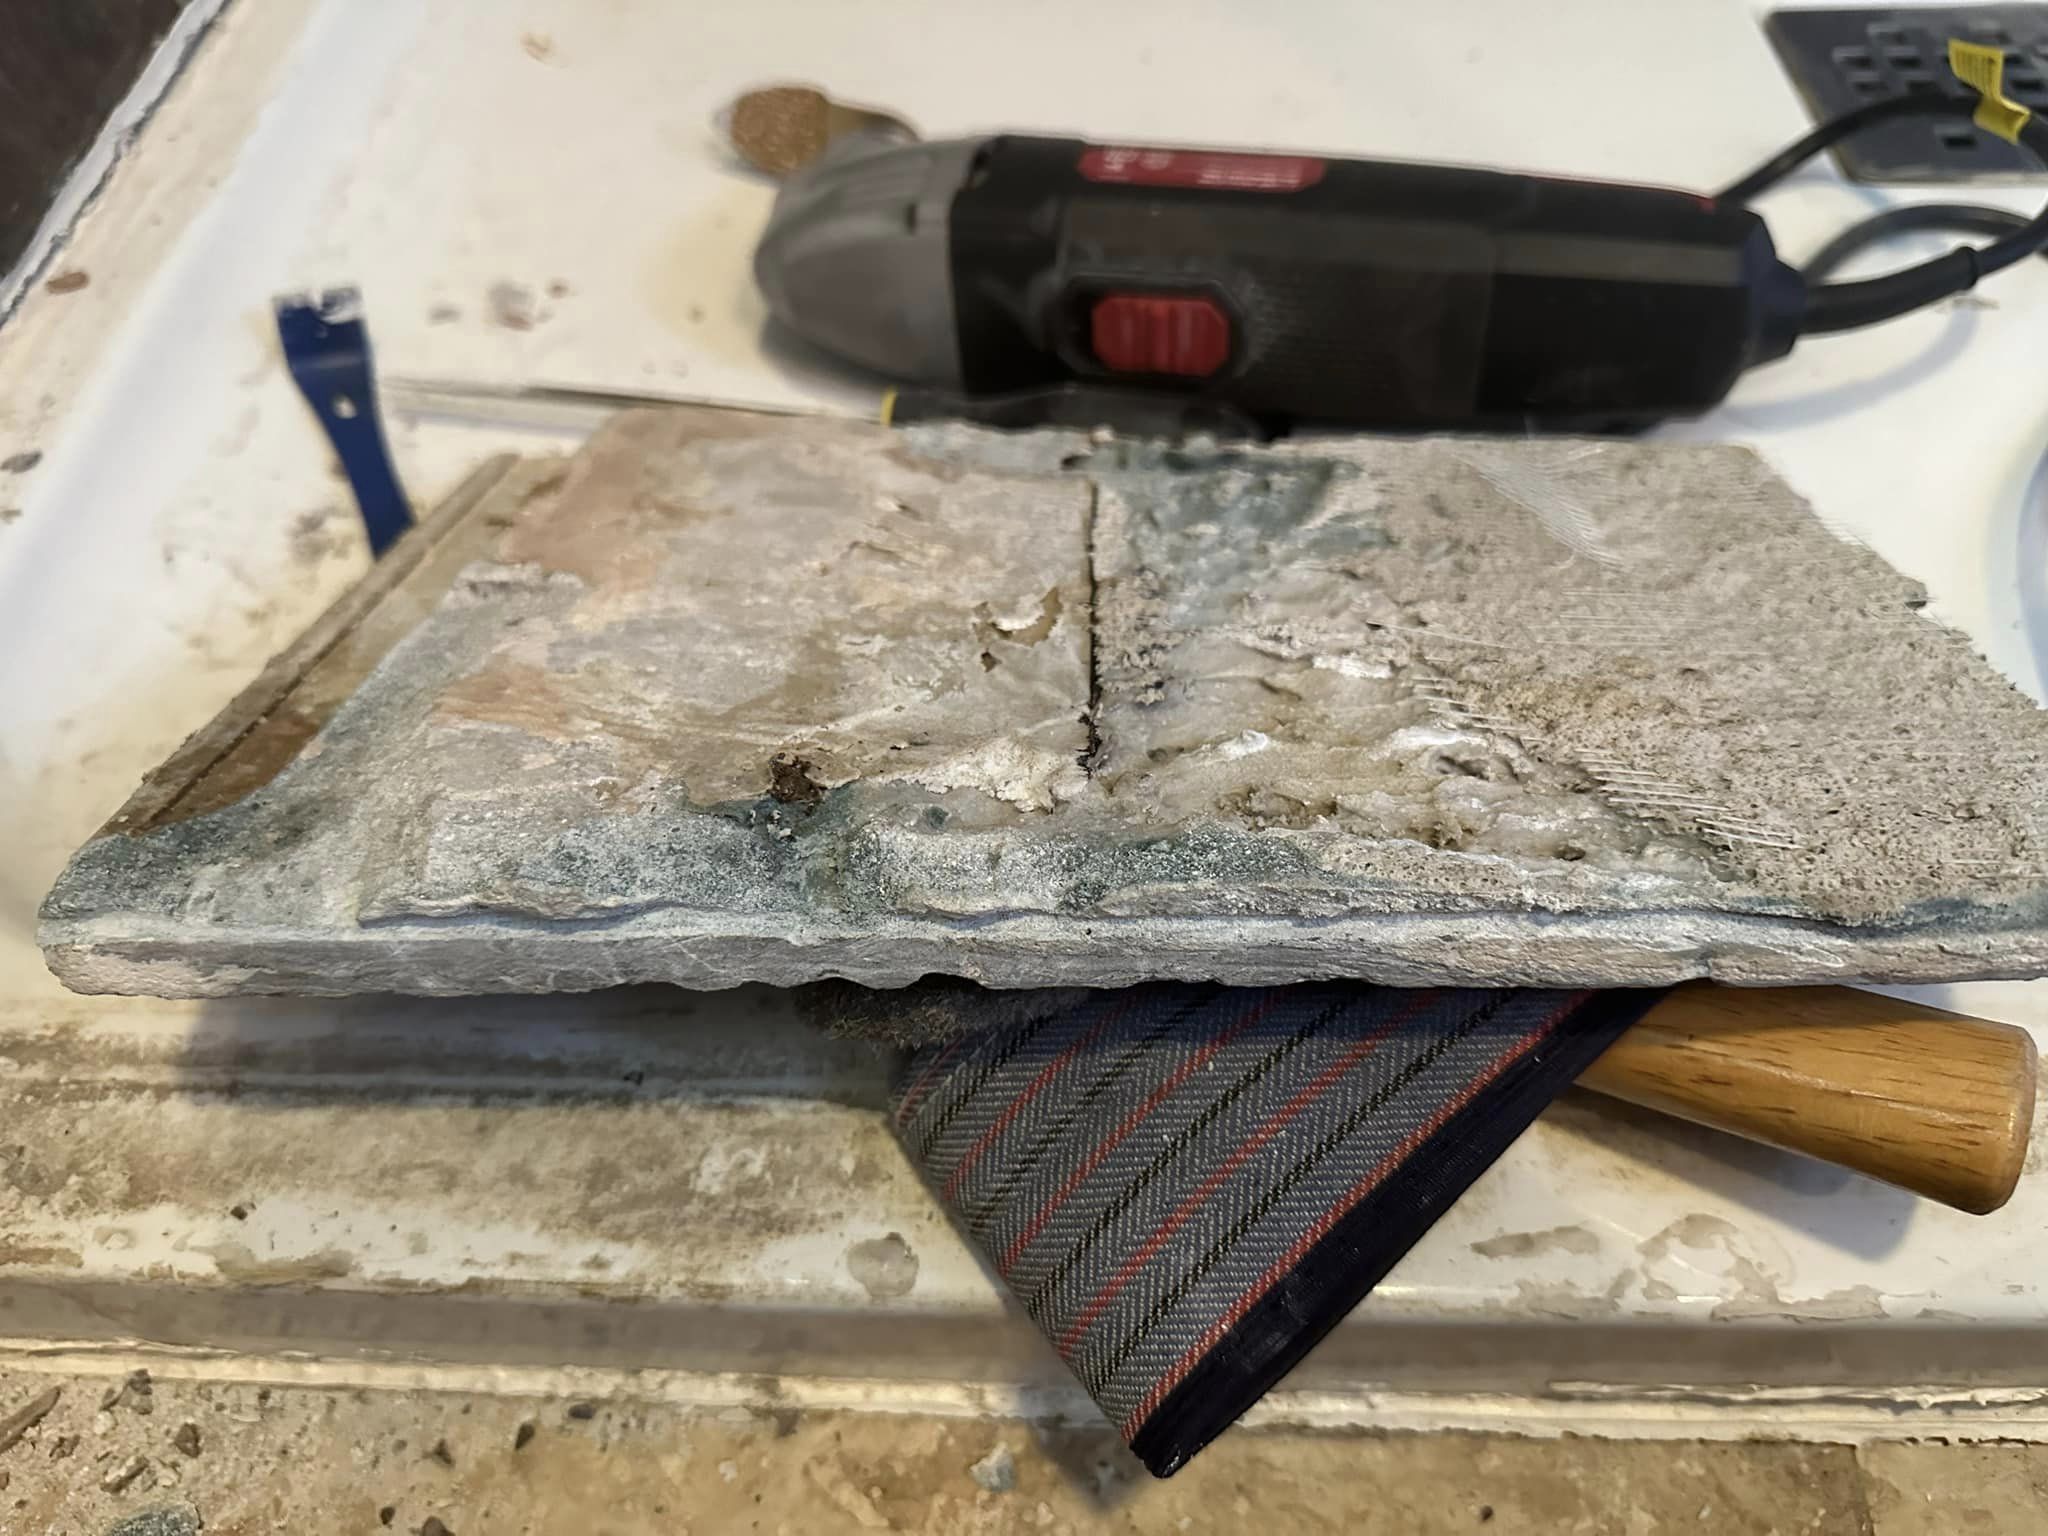
I’ve always noticed that the bottom row is leaning out at an angle. I’m curious about why that might be. These tiles are 3/8 inch thick. You can see how thick the cement on here is.


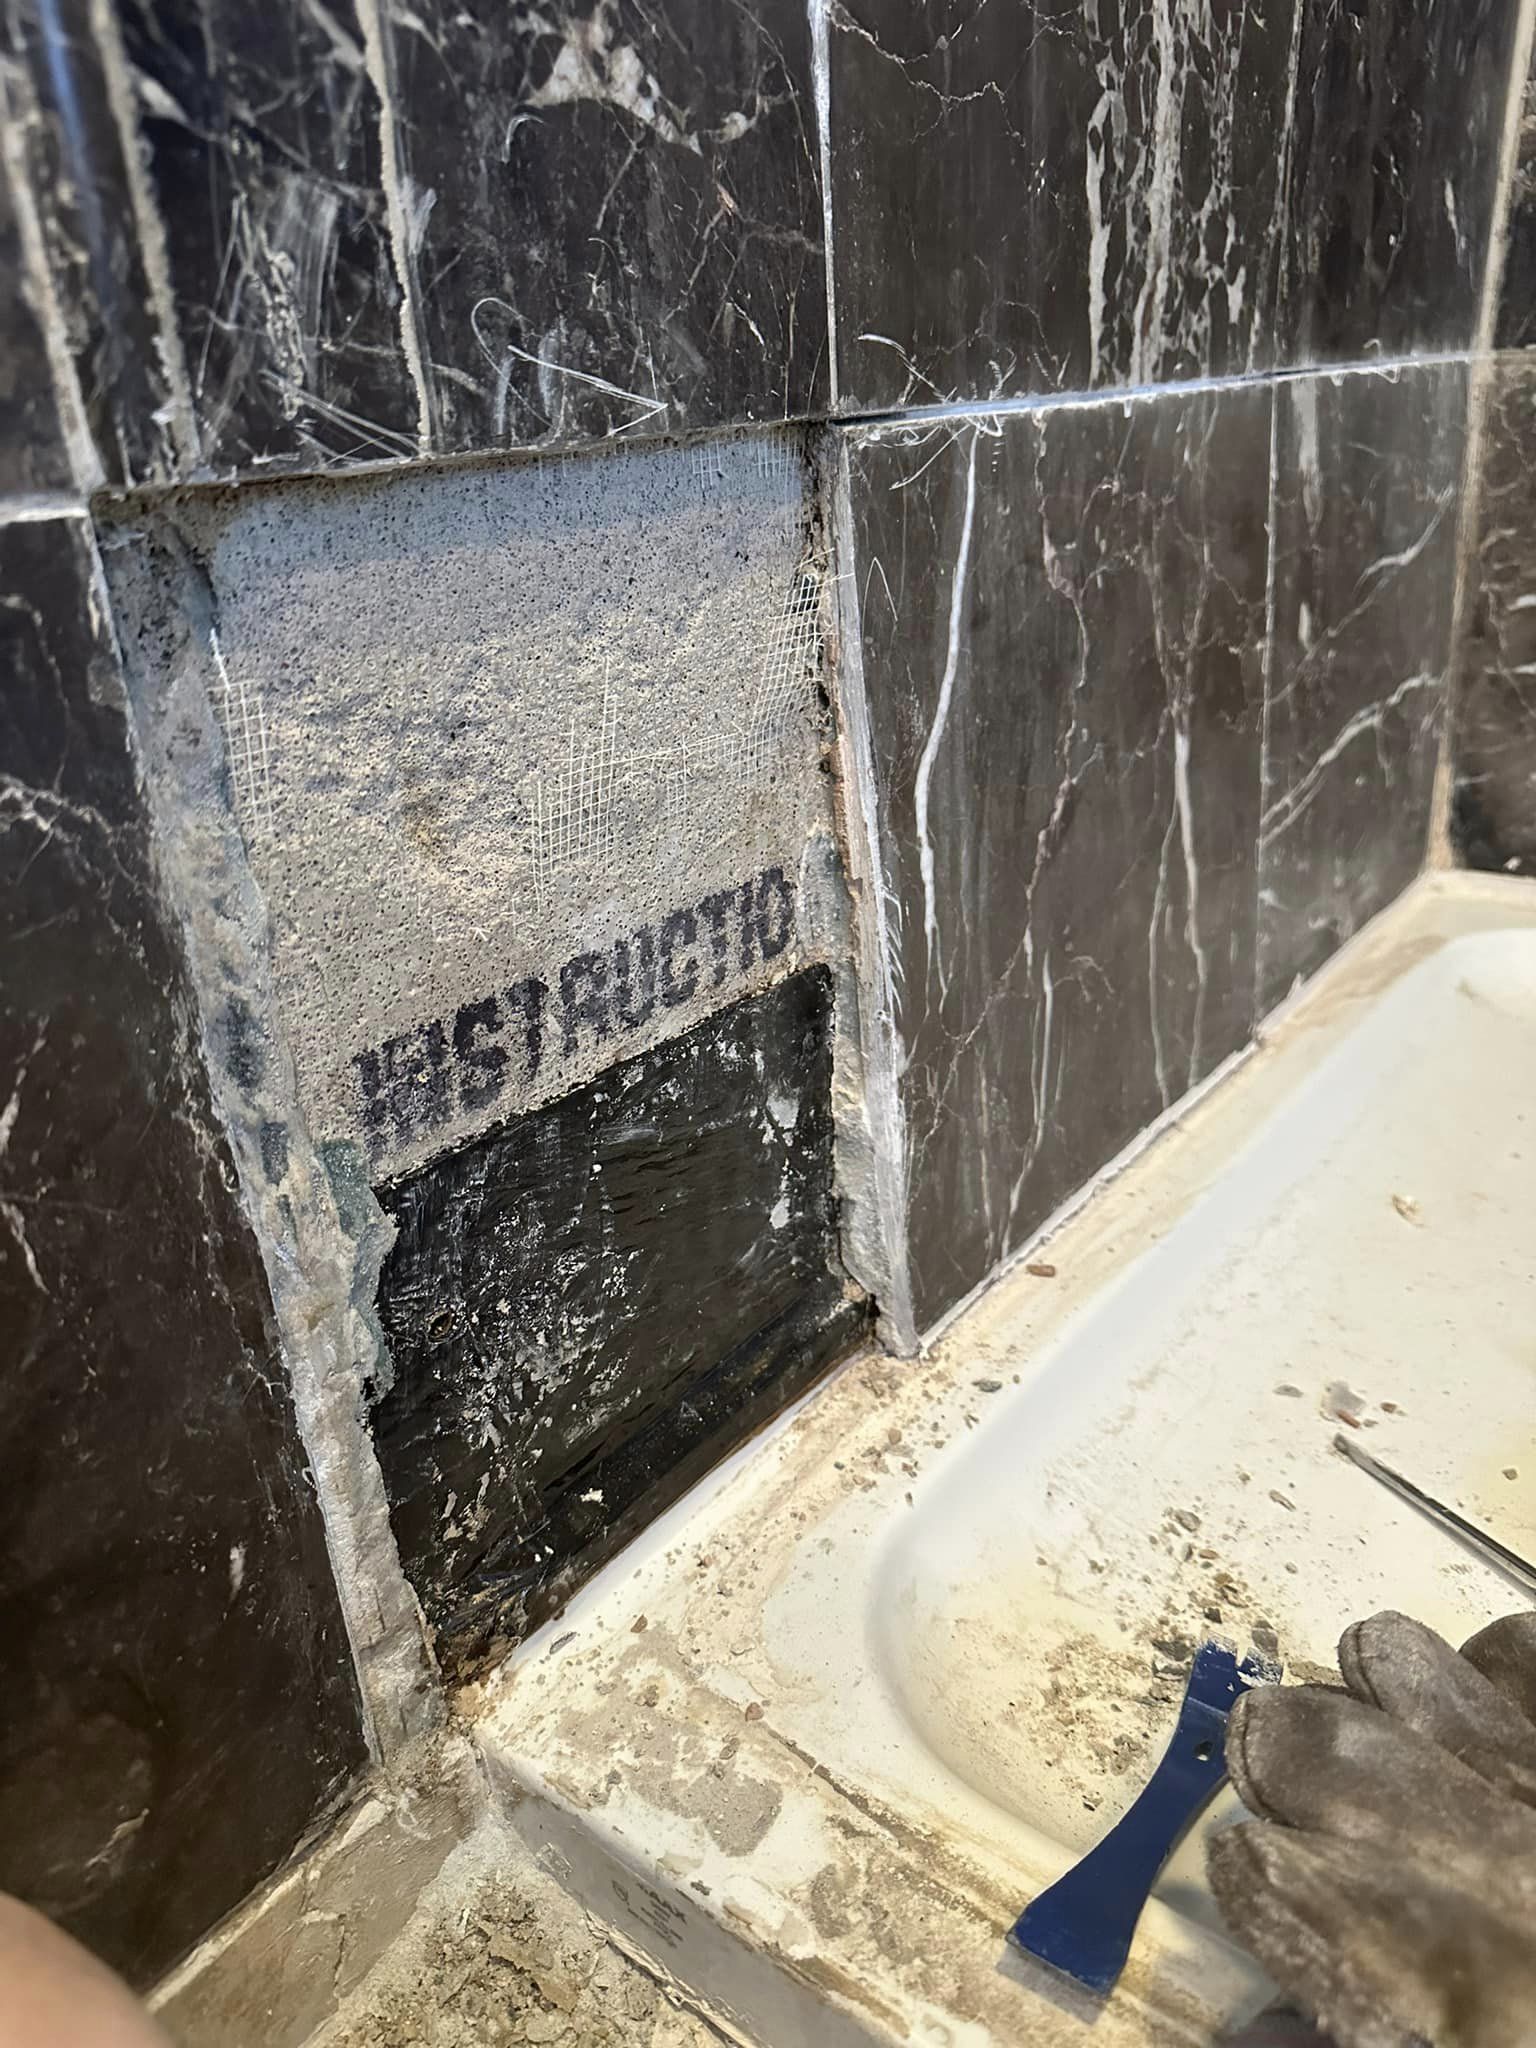
Check out how they were set up – they had to angle out to avoid the black flashing, which is covering the flange on the tub. The second picture illustrates that.
It’s not waterproofed, for starters. I dread looking behind that cement board. It seems like it protrudes due to the lip at the top of the pan, that’s my best guess. The lip extends beyond the wall like most do. This might turn into one of those situations where you take on more than you can handle. However, make sure to get a grout scraper to remove the grout from the joints before taking out the tiles. A razor knife could do the trick as well.
Back in the day, about 20 years ago, Redguard wasn’t even a thing. You’d install tar paper on the studs first, then Wonderboard. That’s the way to do it.
Is this a shower or a bathtub?
Looks like you’ve stirred up a hornet’s nest unfortunately… the original installation wasn’t done properly. They tilt inward because they wanted the tile to reach the pan, but didn’t consider the pan lip (maybe because the backboard wasn’t thick enough?) Once you remove that tile, you’ll see it’s loaded with mortar that needs to be cleaned off if you plan on reusing it… You might need more space to remove/install the pan… Have you thought about fixing the crack before tearing down the wall? It would’ve saved you a fortune.
Chances are, the base wasn’t set in mortar… I always place my Fiberglass Bases in a layer of Mortar, and I’ve never had one fail in 40 years…
Hey guys, so we’re talking about a shower here. I attempted to patch up the base, but there were too many cracks to deal with. It was clear that a replacement was necessary to avoid just postponing the issue. I’m no pro, but I’m picking up things as I go, and this situation is unlike anything I’ve come across in all my research. I’ll keep you updated as I delve deeper into this. Appreciate all the feedback!
This repair is no walk in the park. No matter how you tackle it, there’s a good chance of ending up with a leak behind the tile and water seepage in the future. If this were my place, I’d start from scratch to ensure it’s waterproofed properly. Tile installation techniques and materials have come a long way in the past decade, promising a longer-lasting shower if done right.
I’m and I’m only beginning to work on it. I plan to remove the bottom row and take out the old base at least. I need to understand what I’m up against. That black flange seems to be wrapped in plastic.