How should I address gaps between backer boards and drywall in my bathroom shower, and is my plan for waterproofing the pipes and valves sufficient?
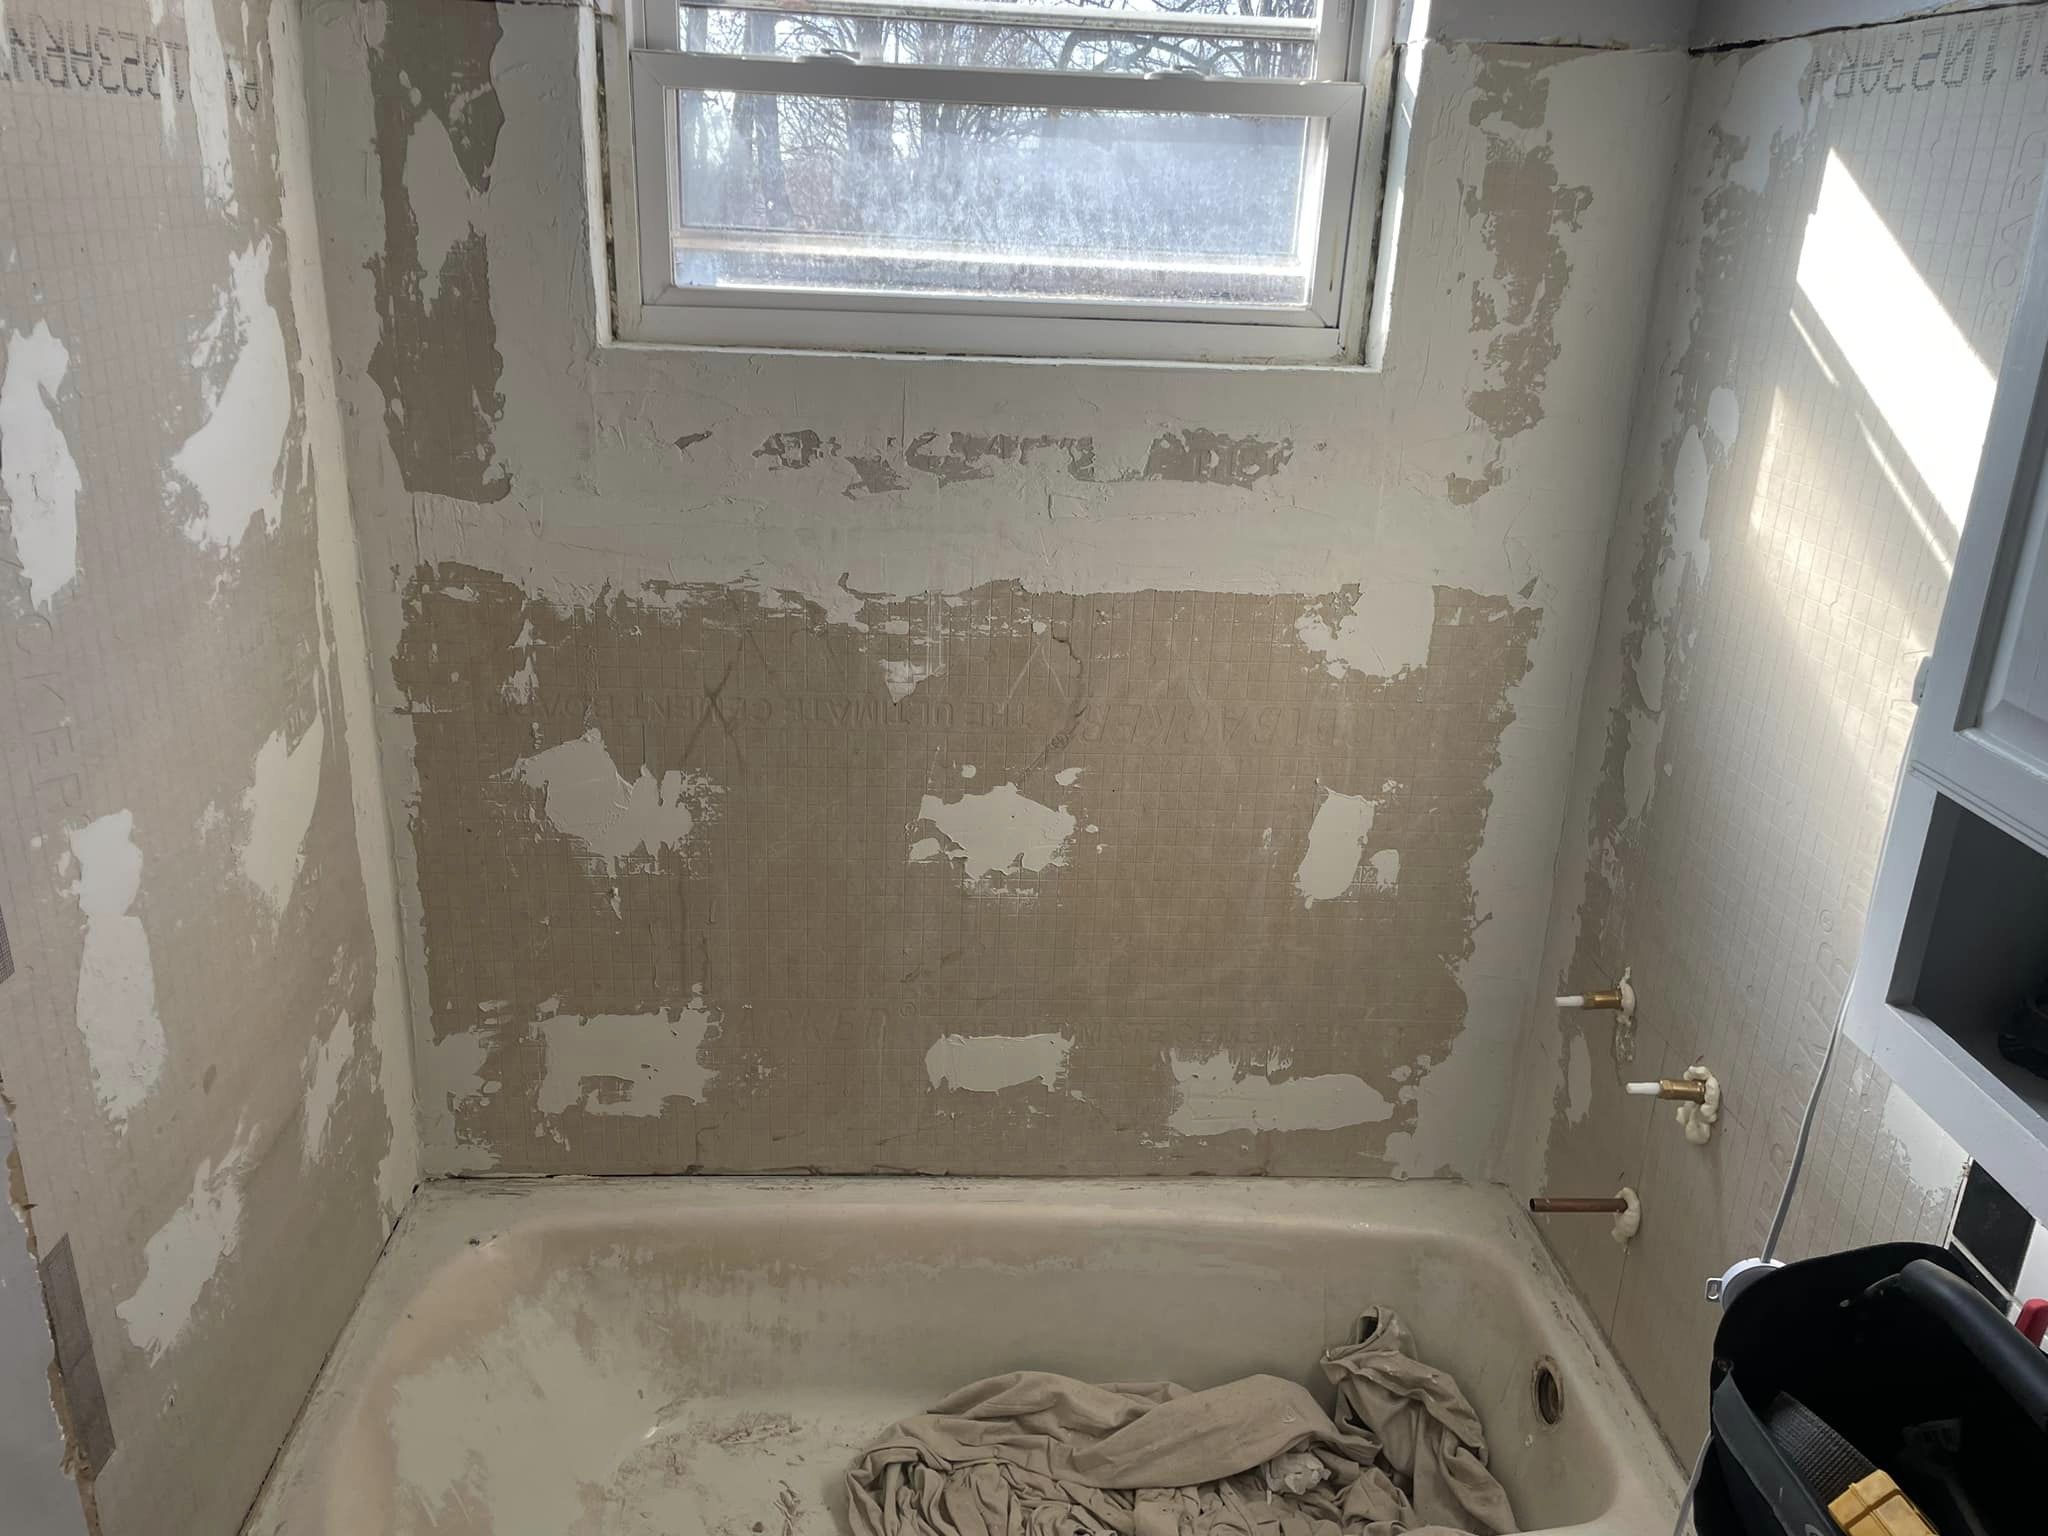
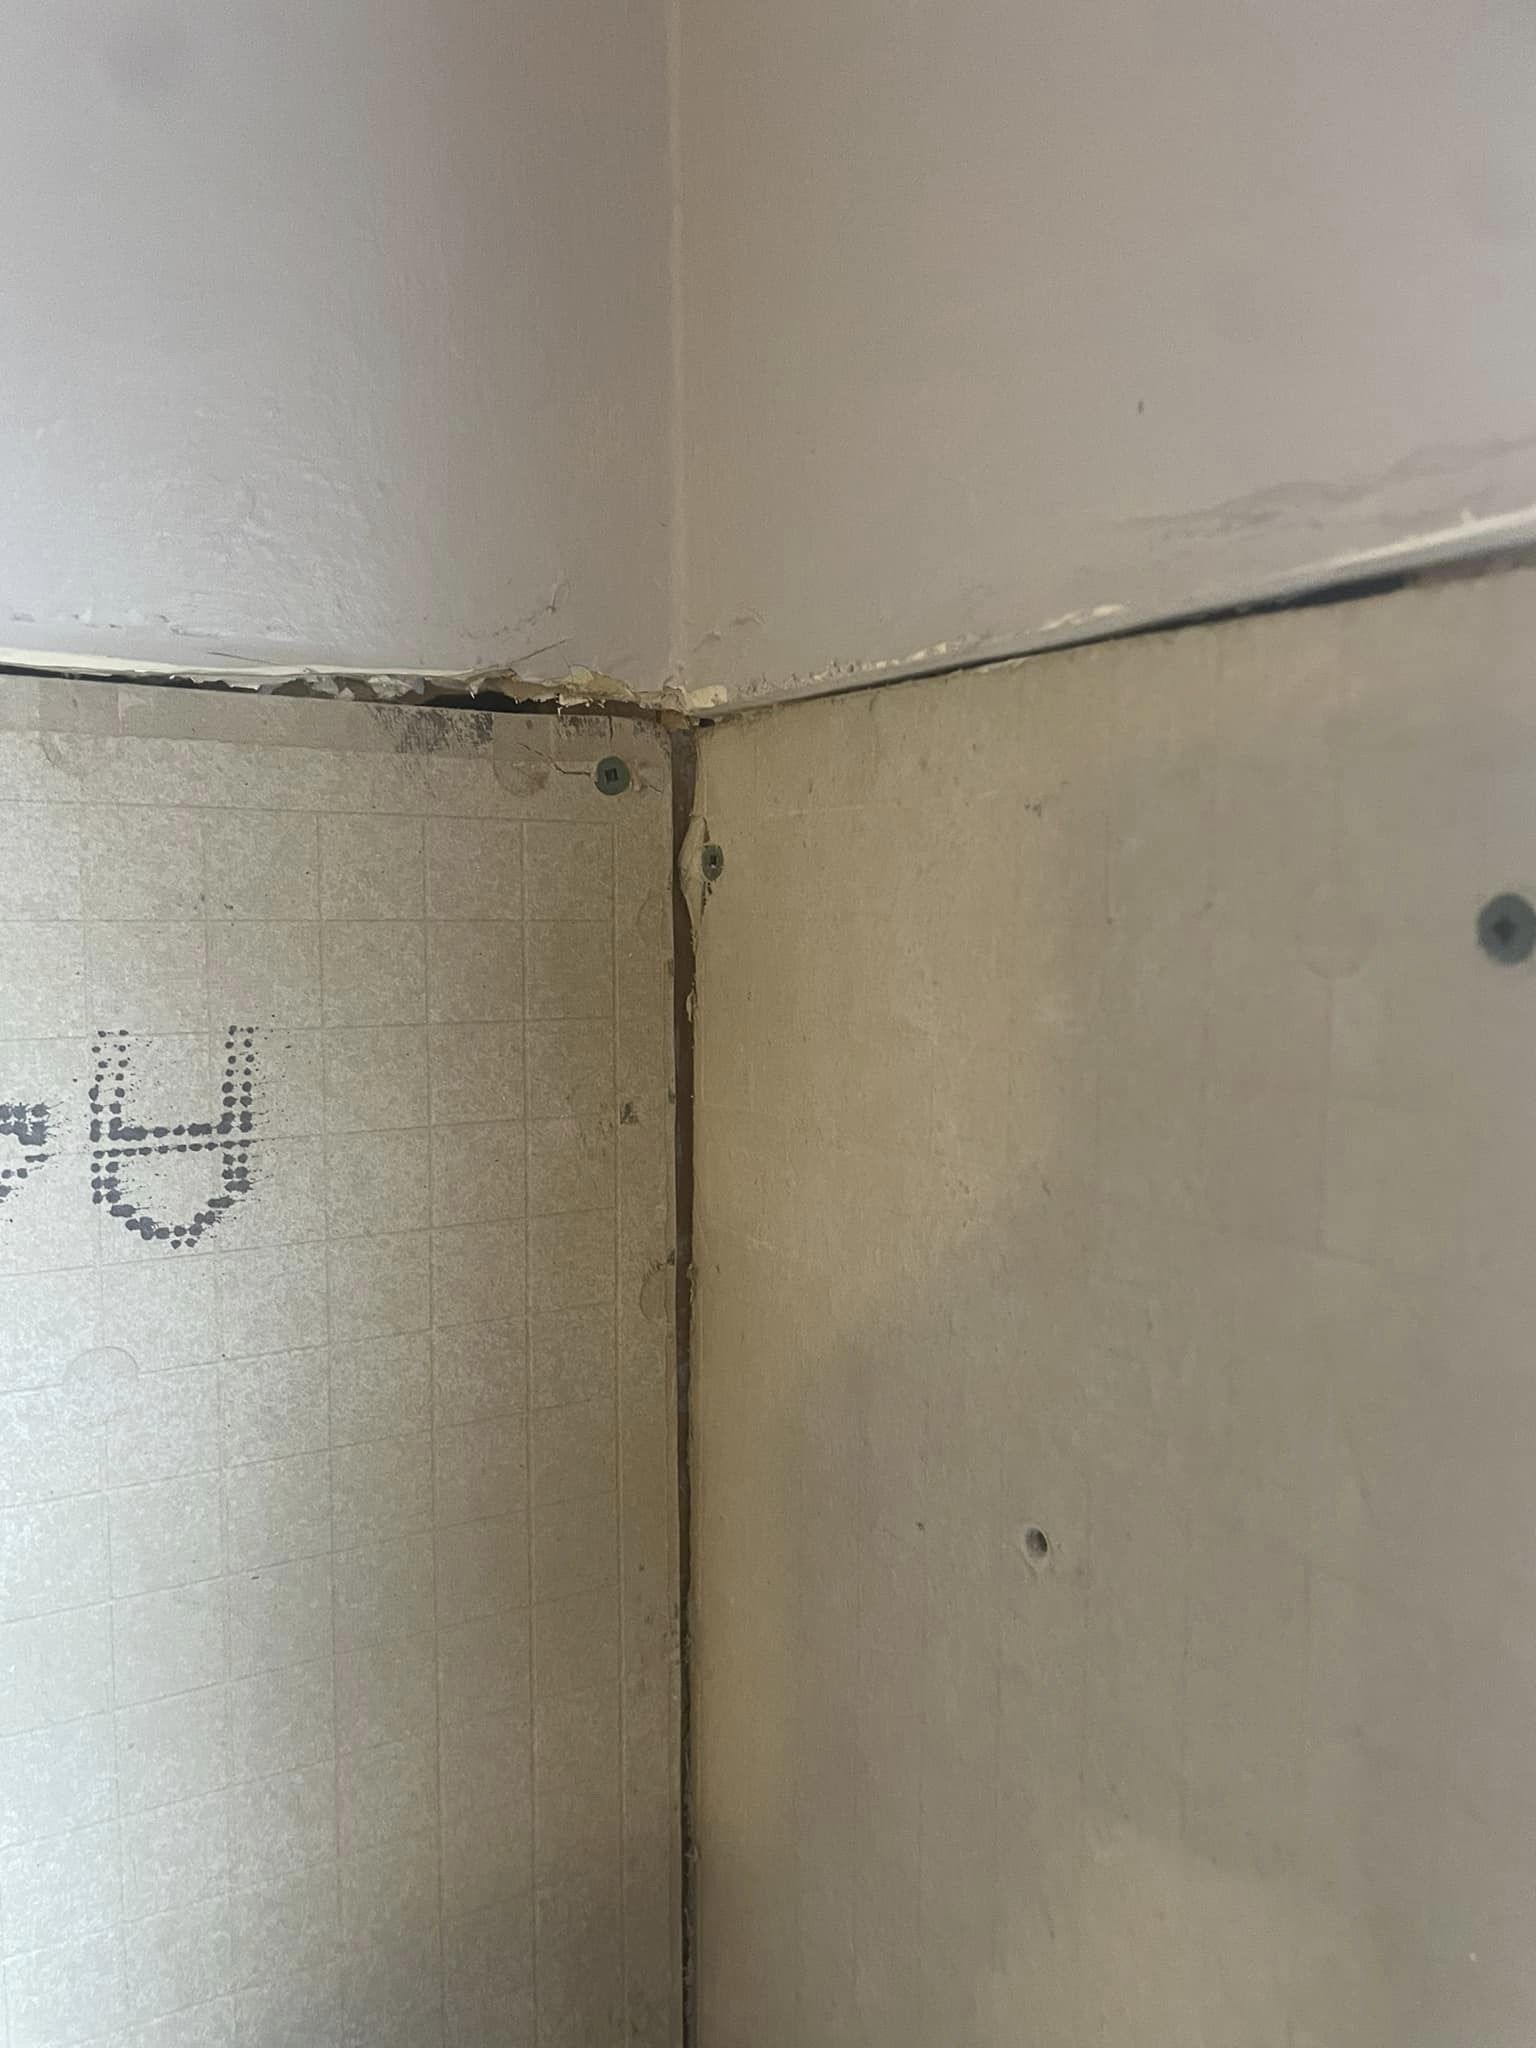
Hey everyone, just joined the group to get some advice on my bathroom shower walls. I’ve already got the backer boards up, taped, and mudded the joints. My plan is to use redguard paint next and then move on to tiling. The issue I’m facing right now is that the backer boards are only 1/4″ thick and the drywall is 1/2″ thick, so they’re not flush. Any suggestions on how to bridge the gaps? Also, when I was demoing the old shower surround, I noticed that the drywall wasn’t cut evenly or level.
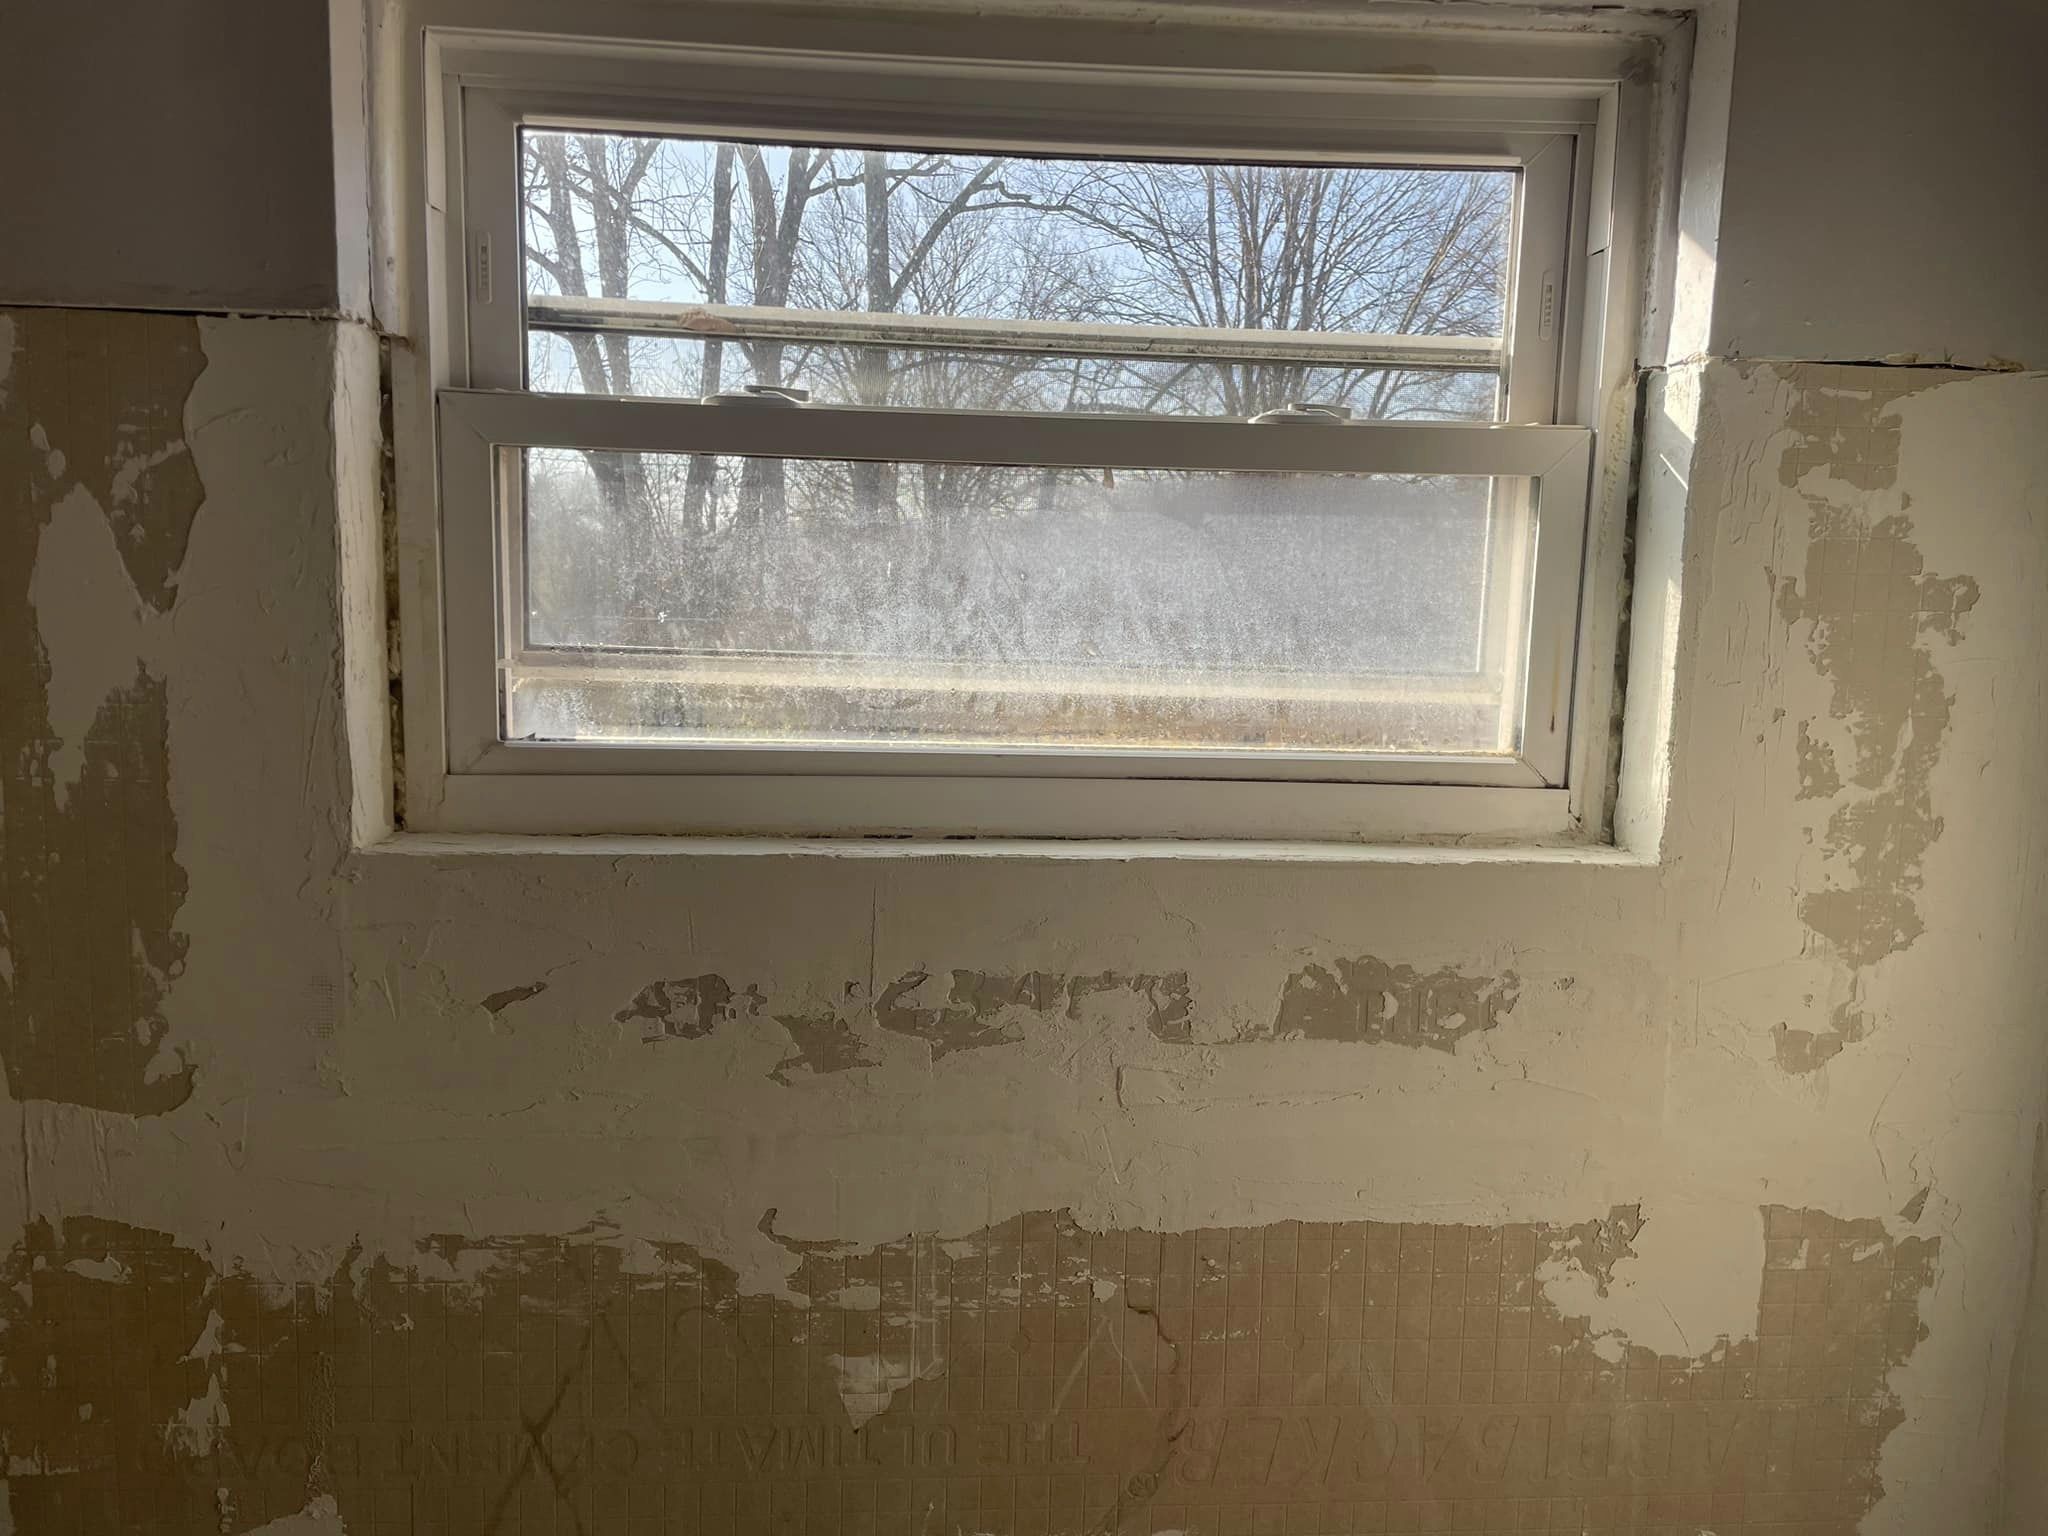
Another concern I have is about the gaps around the window sill that have thinset. Should I caulk the gaps or fill them with thinset before applying redguard paint?
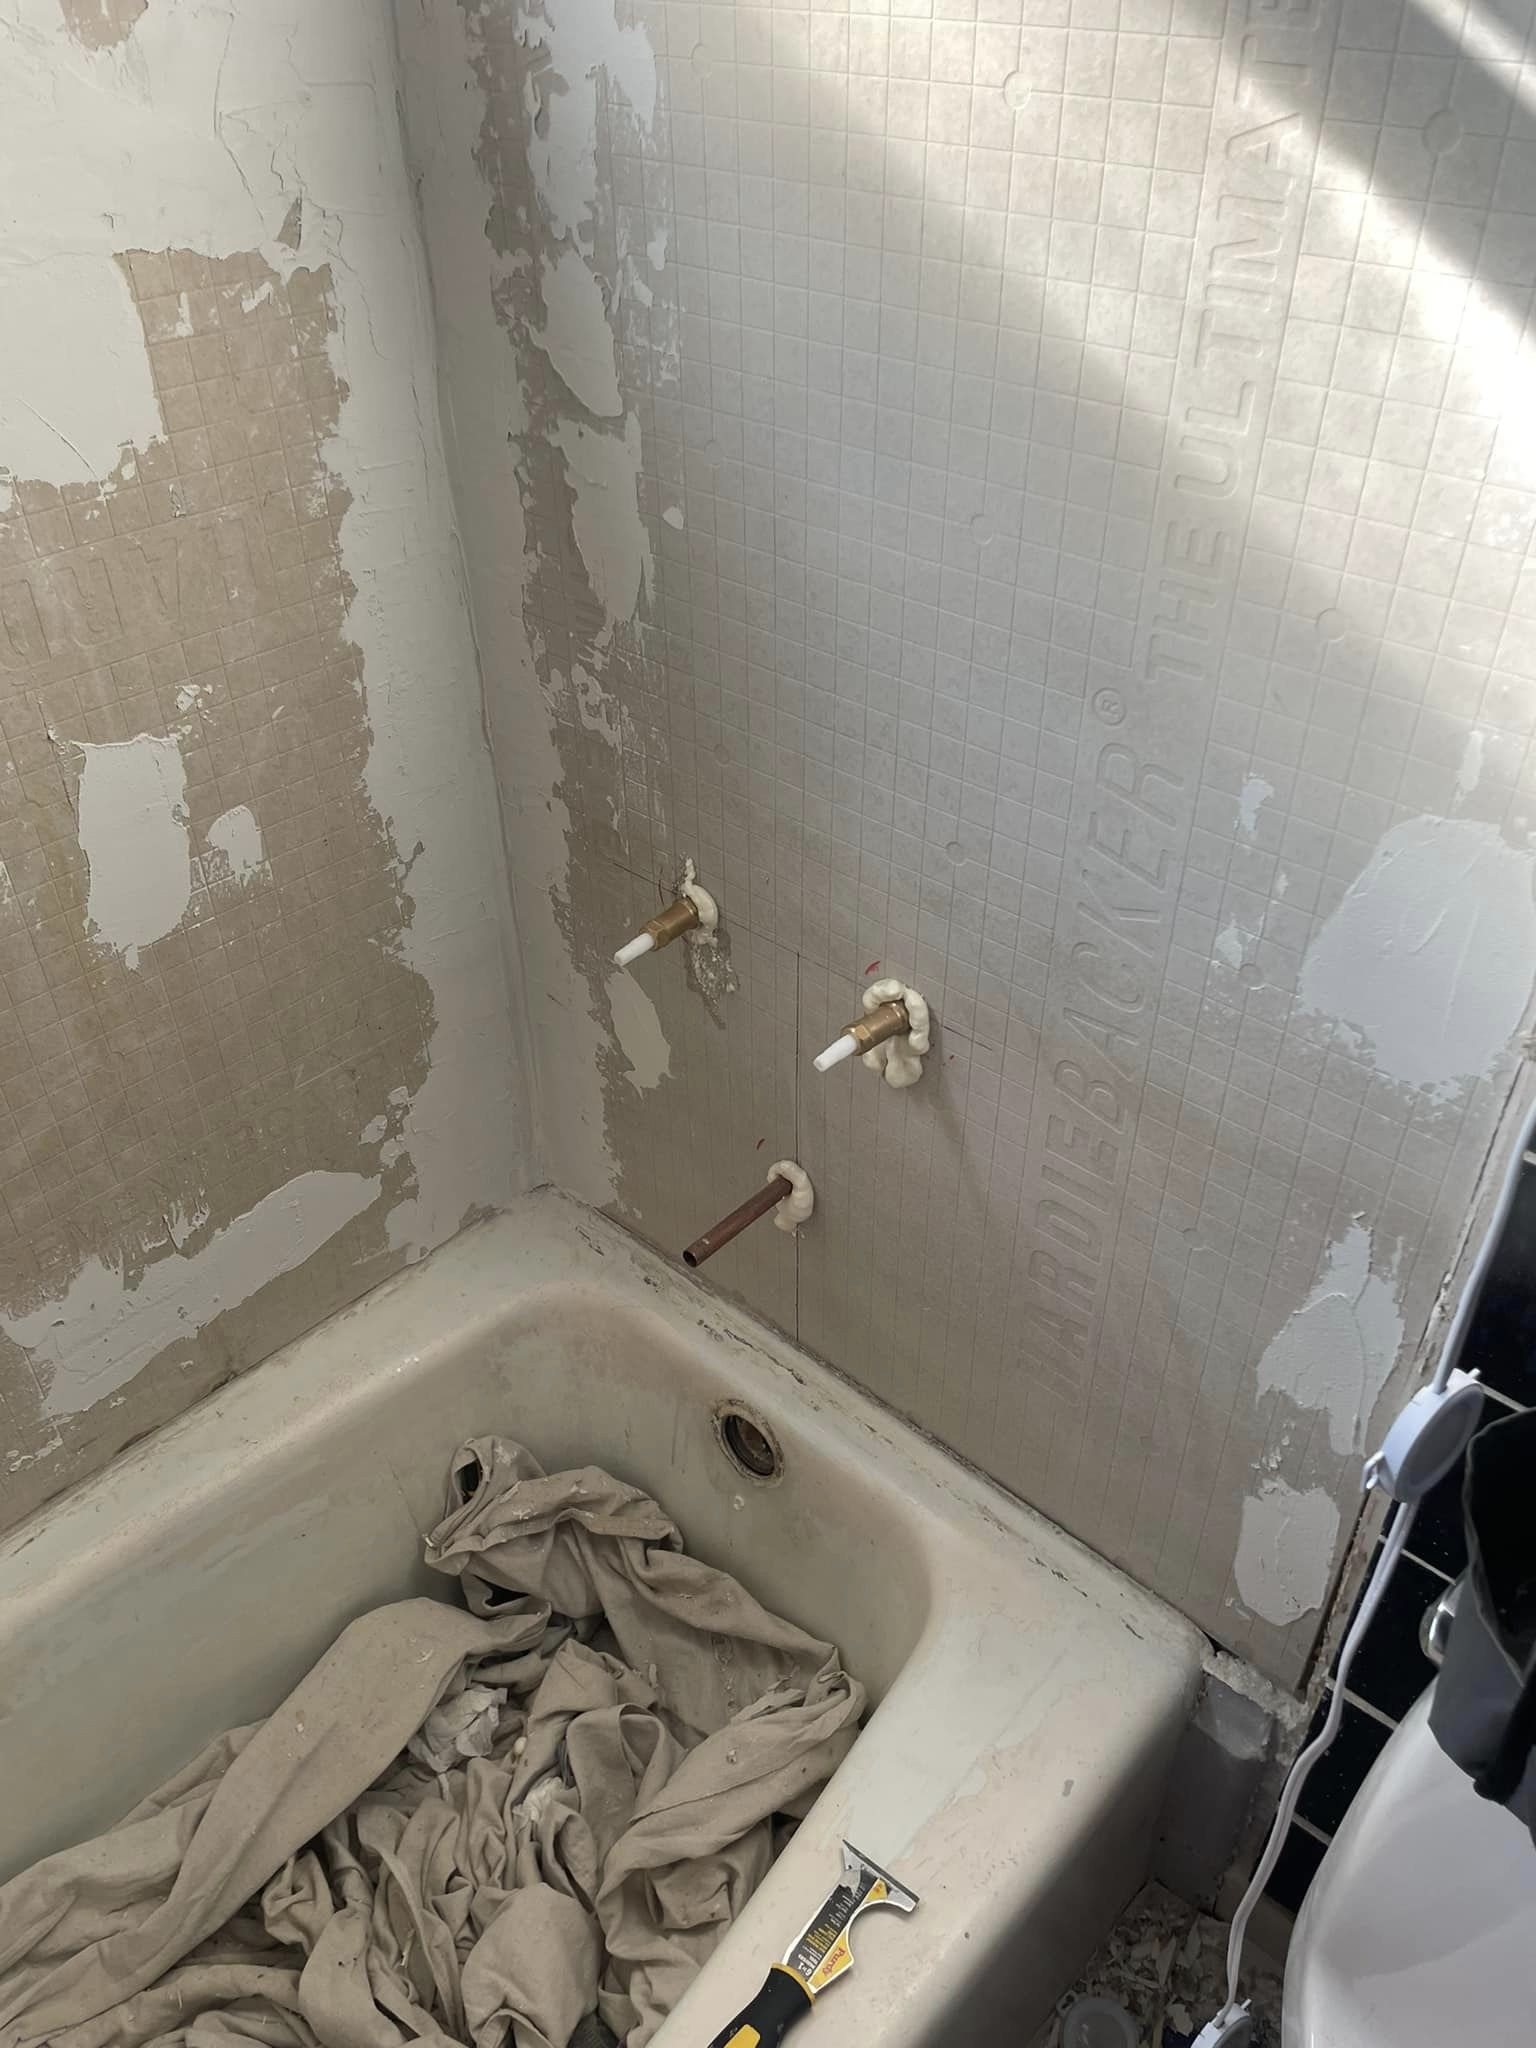
Lastly, I’m wondering about waterproofing the valves and faucet pipe. I’ve applied some gap sealer around the pipes and I plan to cut back the thinset over that and apply a waterproof membrane. Does that sound like a good plan?
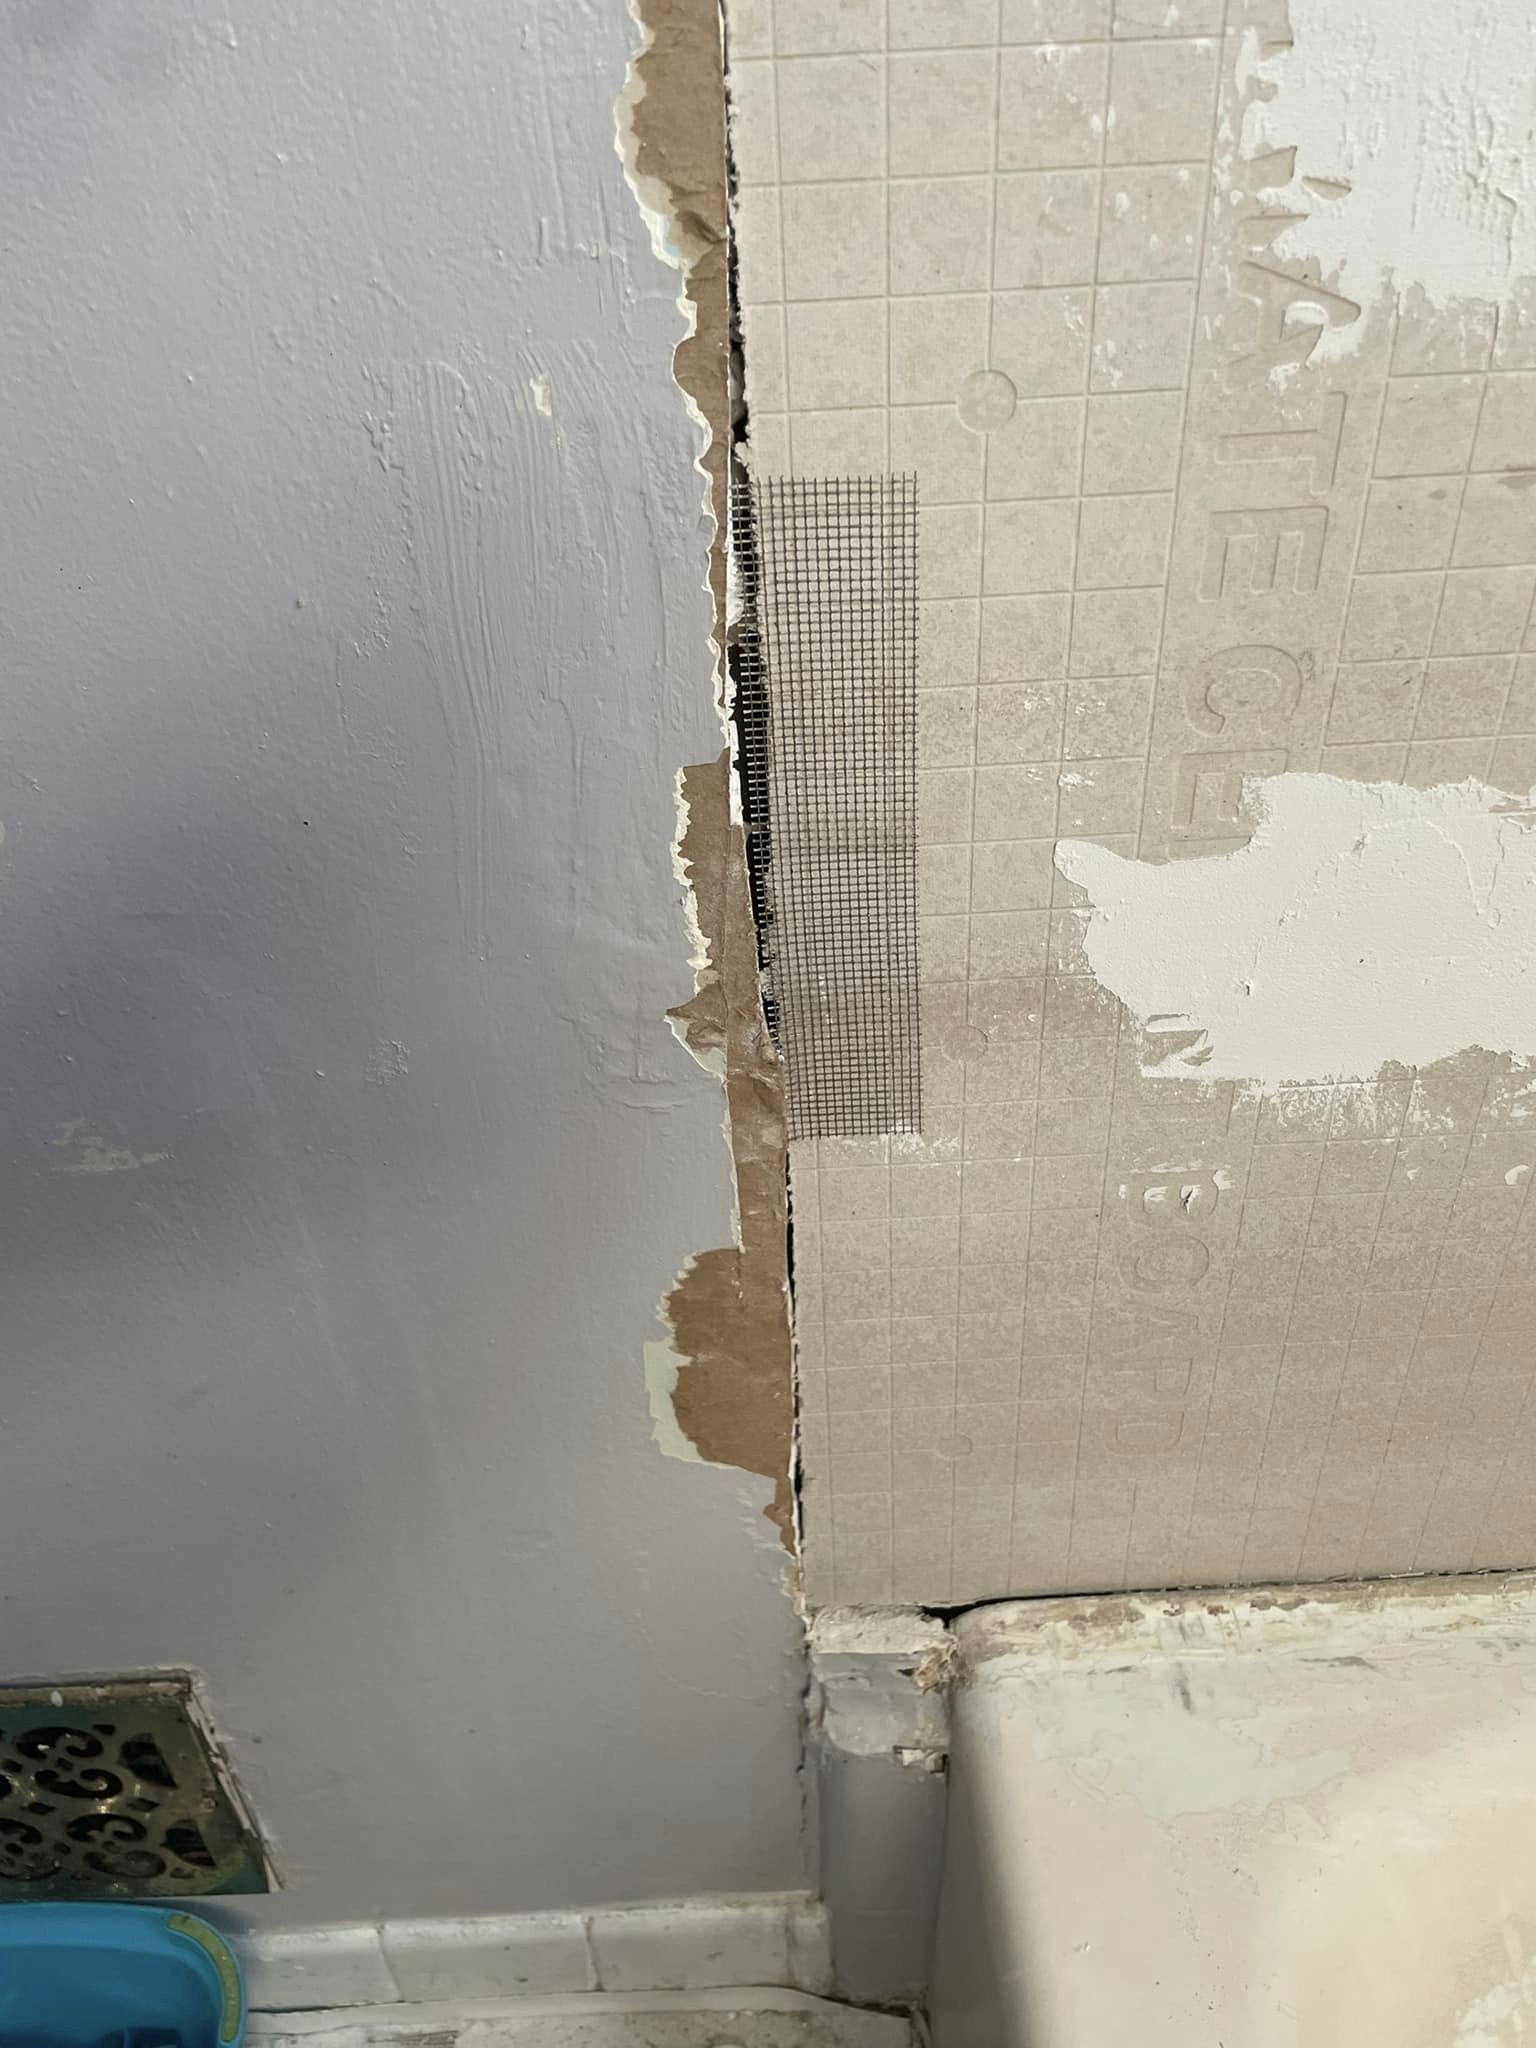
Wondering why you didn’t opt for a 1/2 inch backer board?
Was taking direction from my dad, who has 30 years of experience in carpentry. However, he definitely led me astray, haha.
Looks like the backer board you used was the wrong size. You should have used 1/2” or shimmed it to align with the drywall.
You’ll want to use a 1/2″ backer to give the tile the support it needs. No need to add foam around the faucets.
If you’re working on floors, 1/4” board is sufficient. You can consider adding another 1/4” layer, leveling out the walls with thinset, or redoing it with 1/2” board.
For walls, it’s recommended to use 1/2” board instead of 1/4”. The latter is more suitable for floors.
You might want to consider using 1/2” backer/cement board instead of 1/4” since it is too thin to span 16” on center. I suggest attaching another 1/4” board with glue and screws on top of that.
I’m hearing the same question from everyone… why go with a 1/4″ board? Using 1/2″ would eliminate the seam with the drywall. Ultimately, it’s your call… you can extend the tile over the seam or stop before it and finish the wall. Most people extend the tile over the seam, in my opinion.
I appreciate all the advice. My plan is to sand it down and add another layer of the 1/4″ on top. The previous setup had 1/4″ so we just replicated it, even though it wasn’t tiled.
To do it correctly, remove 1/4 inch first, then 1/2 inch, and you can begin tiling on the same day with Kerdi membrane
I’m planning to follow ‘s advice. I already got a gallon of red guard paint. Do I still need the kurdi tape, or can I just use mesh tape on the seams, thinset, red guard?
I don’t even bother with Redguard anymore. I use Kerdi for everything when tiling. It’s so much faster since they already have a backerboard. Just do the seams and you’re done!
Do I need to do anything else before re-installing after tearing it all out to get 1/2″?
Here’s my soldering job on the pipes. The reason I did this was because I accidentally broke the copper pipe on the faucet.
The tub is positioned directly next to the studs in the back, so the 1/2” will cover the flange. Do you think that will be okay?
Hey Justin! Since you have everything already torn out, now would be a great time to consider getting a new tub.
Was planning on painting it.
I’ve had a lot of work done on my rentals. It cost around $600-700. Make sure to hire a good company, otherwise the paint will start peeling and won’t look like a professional job. I’ve even had weird puddles form in the tubs if the paint isn’t perfectly even. I considered replacing the tub, but it might be too late now! 😜
I plan on removing it.
That’s a great suggestion. If you’re willing to put in all that work and expense, I definitely agree. It will look much better once you’ve finished.
You are absolutely correct. It needs to be installed in the bathroom though, haha. The entire bathroom is approximately the same width as the tub.
I’ve managed to do it in small spaces before. It’s tough but achievable 😜
I recommend changing the faucet to a single handle for easier future repairs.
David has some good advice for you. As a contractor with over 40 years of experience, I agree with what he’s said. I also want to commend you for being willing to do the right thing by removing the first application and starting over. It’s definitely worth it to ensure everything is done correctly while you have it all out.
This whole project began with me accidentally breaking the pipe on the faucet, and now the entire bathroom is completely gutted down to the studs! It’s kind of funny, actually. I posted about it because I want to hear what professionals have to say. The new bathtub is sitting in a box in our living room, just waiting to be installed. I have to figure out how to remove the old cast iron tub first, which is going to be a tight squeeze. We also have a new toilet and vanity ready to go. The floors need to be redone because the previous owners added three layers of flooring, and there were cracks all over the place.
You just need cement board, Thinset with mesh for seams, and then you can start tiling
Is your window made of vinyl? If not, consider swapping it out while it’s easily accessible. Regardless, make sure the vinyl returns 1/4”-1/2” past the wall tile and pin the corners.
Hey , it’s about the vinyl.
Hey , can you explain what you mean by the vinyl return? I’m new to this, sorry.
: Normally, the return pieces around the window are flush before adding trim. If you extend the return, you can tile right up to it and skip the window trim. The picture shows Corian, but I would opt for vinyl instead.
: Oh, I see what you mean. I was planning on tiling the sill too, but never considered using a vinyl sill. I know it needs to be sloped for proper drainage though.
: I’ve noticed a problem with tiling the sill – the grout isn’t waterproof, so water ends up seeping in behind the window.
Make sure not to cover the tub lip with the backer board, use tile instead
Once the tiles are in place, apply some butyl silicone around the pipes and fixtures.
If you are tiling all the way up to the ceiling, consider using a pencil tile or another material to serve as a transition after installing the 1/4” HardiBacker. It’s important to inspect your pipes before closing up the walls. Personally, I like to add a membrane around the pipes for extra waterproofing.
Hey , I recently replaced those pipes. I checked them and there are no leaks so far. Ran the shower head to confirm. I removed the 1/4″ so I’ll just keep the existing drywall.
What did you use to fill in the joints?
Mentioned something about “thin-set”.
Make sure to shim your backer board, level them, and keep them slightly away from the tub, not right up against it. Then use alkaline resistant mesh tape, unmodified thinset, and waterproof with two coats of aquadefense or red guard before setting your tile. Calculate the layout first and when it comes to faucets, Schluter offers waterproofing that can be installed around them. Also remember to set with unmodified thinset. Good luck!
You’ll want a 1/2” backer for the walls