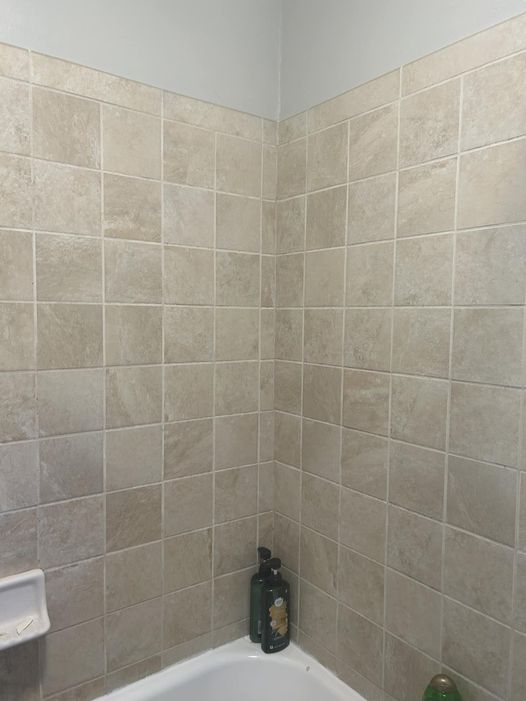
“How do I tile from tub to ceiling after a demo step by step?”
9 months ago
Last Updated: September 23, 2024
So, after the demo, what’s the next move here? I really want to tile all the way from the tub to the ceiling.

If you’re able to find a matching tile, simply remove the top row and continue tiling up to the ceiling.
Do I have to swap out the boards under the tile?
If you’re patient, you can remove the tiles without causing too much damage. The tile adhesive will help cover up any imperfections. You should be fine. YouTube has a variety of videos you can check out.
Do you know how I should approach cutting a niche?
Check with your friends to see if any of them have a tile cutter.
Have you thought about renting one from Home Depot?
YouTube is a good place to begin. Really useful.
I’d recommend using an oscillating saw to carefully cut along the grout lines in your specific area. If that’s not possible, try using a diamond-tipped blade to scribe a line where necessary. You may need to remove the bullnose to begin adding new tiles if you want to match them.
Make sure to have them put green board back there. Regular sheetrock can easily mold and soften in that environment. After removing the tiles, use a stiff trowel to scrape off any remaining glue. Try to get it as smooth as possible. Red Guard skim is highly recommended but not necessary – it’s essentially a plastic coating that you trowel on. Make sure it’s very smooth or the tiles won’t set flat. You’ll need a wet tile saw (Harbor Freight), tile adhesive, grout, spacers, and a plan. Start in the corner that’s most visible with full tiles, and save the less visible areas for cut tiles. Another good option is aluminum edging that goes on vertical edges before tiling, for a clean finish. And don’t forget to seal the grout after a few days of drying.
Replace the mixer valve.
Are you really trying to start unnecessary trouble? Installing a niche could be problematic. It’s difficult to ensure it’s waterproofed properly. It might be better to opt for a complete tear-out. Many tile backer brands offer pre-made niches. Avoid cutting into it until you’re ready. Make sure it’s within the stud bay. If you can, wait until the remodel is necessary.
Demo
Make sure the valve is positioned at the correct depth from the wall for the new tile installation.
Install Hardi backer cement boards.
Waterproofing is essential.
Proceed with tiling and grouting.
There are many small steps involved in these processes, so make sure to do your research diligently.
Disclaimer: I’ve only tried this once before
Here’s a helpful tip – a laser level can always be useful.
Top quality removal and installation of Schluter shower system. Exceptional waterproofing.
That product is really expensive!
Is definitely worth the money unless it’s a house for flipping.
Is located in the UK, right?
3. Like others have mentioned, this is also the perfect time to swap out the tub. A plastic tub can be cut apart while a cast iron tub can be broken with a sledgehammer (just remember to cover it with a moving blanket first). Make sure the tub is installed on a solid mortar base.
2. It’s necessary to strip it down to the studs. This is a good opportunity to check behind it and make any necessary fixes or upgrades (such as shower valves, insulation, etc).
1. ‘t attempt to elongate the tile. If you want it to reach the ceiling, you’ll have to take it all out.
I concur with this statement
You might want to consider removing the bull nose from the top and tiling up the rest of the way. It’s important to use the right tile adhesive and spacers for the job. ‘t forget to grout with a matching grout.
I’m quite puzzled. Are you looking to demolish and replace? Or extend the existing tile to the ceiling?
Kevin s demonstration and replacement
Has done nearly 50 bathrooms before. When starting the demolition, remember to turn off the water to the shower. If there is no access panel, make sure to turn off the water to the entire house. You definitely don’t want to accidentally cut a water line under pressure. Instead of just swinging hammers, use an oscillating saw to cut along the edge of the tile, then make a second cut about 3 inches away. This will create a handhold to help you remove the walls more efficiently. Based on the tile installed, it’s likely from the 90s and probably doesn’t have wire lath and mud set walls, so you can likely rip off an entire section at once.
Is going to remove the tub, even if it seems to be in good shape it’s better to replace it now while you can. Also, replace the shower mixing valve with a Delta valve. They have been using the same valve body since the 70s and it doesn’t look like they’ll be changing it anytime soon. This way, if you ever have a problem or want to replace the trim in the future, it will be much easier.
Hop on a call and recruit a professional. 😂😂
When laying tile, make sure not to lay it directly on top of existing tiles. It’s best to remove drywall and waterproof the area first.