How can I frame the second cement pad to create a step while ensuring it touches the edge of the existing pad and remains form-removable?
11 months ago
Last Updated: July 26, 2024
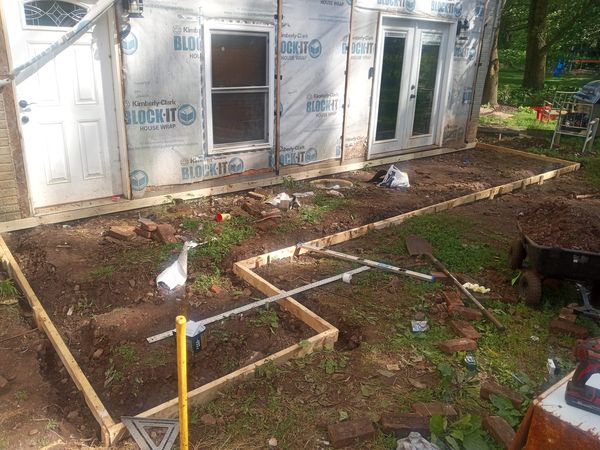
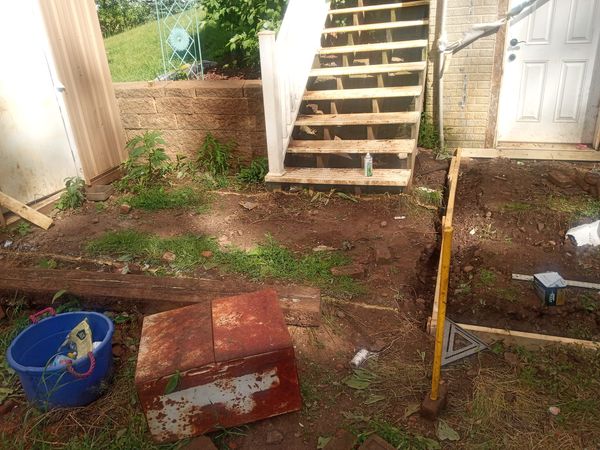
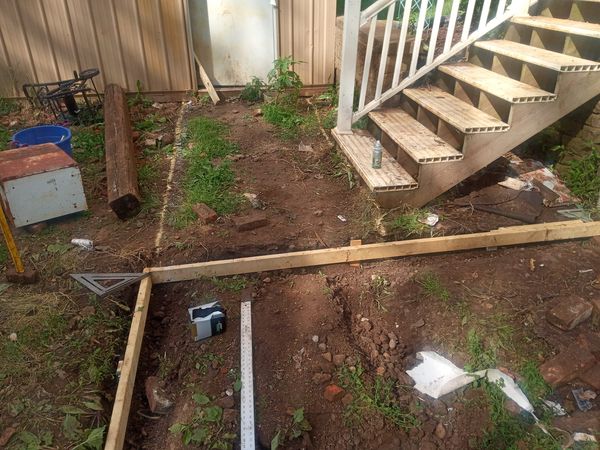
I’m about to pour some cement in front of my basement steps and barn. I’ve got the forms ready for two separate pads – one already framed on the right, and one marked with gold paint but not yet framed. The one with the gold paint should ideally sit about 4 inches higher than the framed one. I’m wondering how to frame the second pad so that it touches the edge of the other one to make a step, but still allows me to remove the forms. The framed pad will be sunk into the ground, while the second one will be on top of the ground. Got any ideas on how to do this?


Once the pad is cured, build a frame on the edge. Consider avoiding a step altogether to prevent trip hazards and create a level surface.
Overlap the pour or consider sloping it to eliminate the step.
Fasten the forms to your initial pour.
Frame the top step on the face side only, but leave the bottom open so the concrete can flow underneath. Pour it all at once. Frame a 48” wide area on top for a stress cut or saw cut when it’s green. Pour your concrete there so it flows down to the bottom level. I’ve done many like this. Concrete stairs and patios.
I would personally slope it to get rid of the step. If not, place the higher section on top of the lower one, remove the form section, then connect the upper and lower forms. Pour the mixture into the top form and let it flow underneath or into the lower part.
Make sure you pour the bottom first and let it cure before pouring the top section. If you pour it from the top, it will just keep running out over your boards and won’t stop.
Make sure to dig down more, add gravel, and compact it before pouring. Pouring as is will result in a deteriorating slab.
If you can avoid a step, I would recommend it. It’s too easy to trip over. Make sure the slab is pitched away from the house to prevent water from flowing back. Watch out for organic matter in your forms – remove it to prevent slab cracking. Dig out the decayed matter, then add sand or gravel base. A solid base is essential for a concrete slab. The amount needed depends on location. The concrete company should provide guidance.
Let’s get that slab reworked to one happy height, like others have suggested. It’s important to make sure the subgrade is prepped correctly, and there are resources available to help guide you through the process if needed. Especially if you’re in a cold climate with a frost line to consider.
Oh, and that form board by the house? Definitely take that out and replace it with a 1/2″ fiber expansion strip at the right level. Fiber expansion strips are designed for this purpose, unlike wooden forms which can cause issues.
Make sure to create square slab sections by striking many joints, this will help control cracking to some extent.
Having an experienced concrete crew is crucial. I’ve learned the value of skilled workers in this trade, and the importance of having enough of them on the job.
I’ve also found that investing in a pump and pump mix is worth it. Using a wheelbarrow can be exhausting and actually take away from the quality of the final product. It
I’m not really into concrete work, but if you’re looking to step in it, maybe you should start by forming and pouring the higher part first. Then pour the lower part and use it as a guide to pour up to the edge. ood luck!
It’s actually concrete, not cement.
No worries! Just make sure that the inside of the form board where the step will be is flush with the inside of the other form. The 2×4 will sit on top of the lower pour. Cut out the lower form where the step is going to be. You can still finish the slab underneath the overhanging form board. This is the standard way to do steps.
Start with the higher one, and the lower one won’t require a form to connect to the existing one.