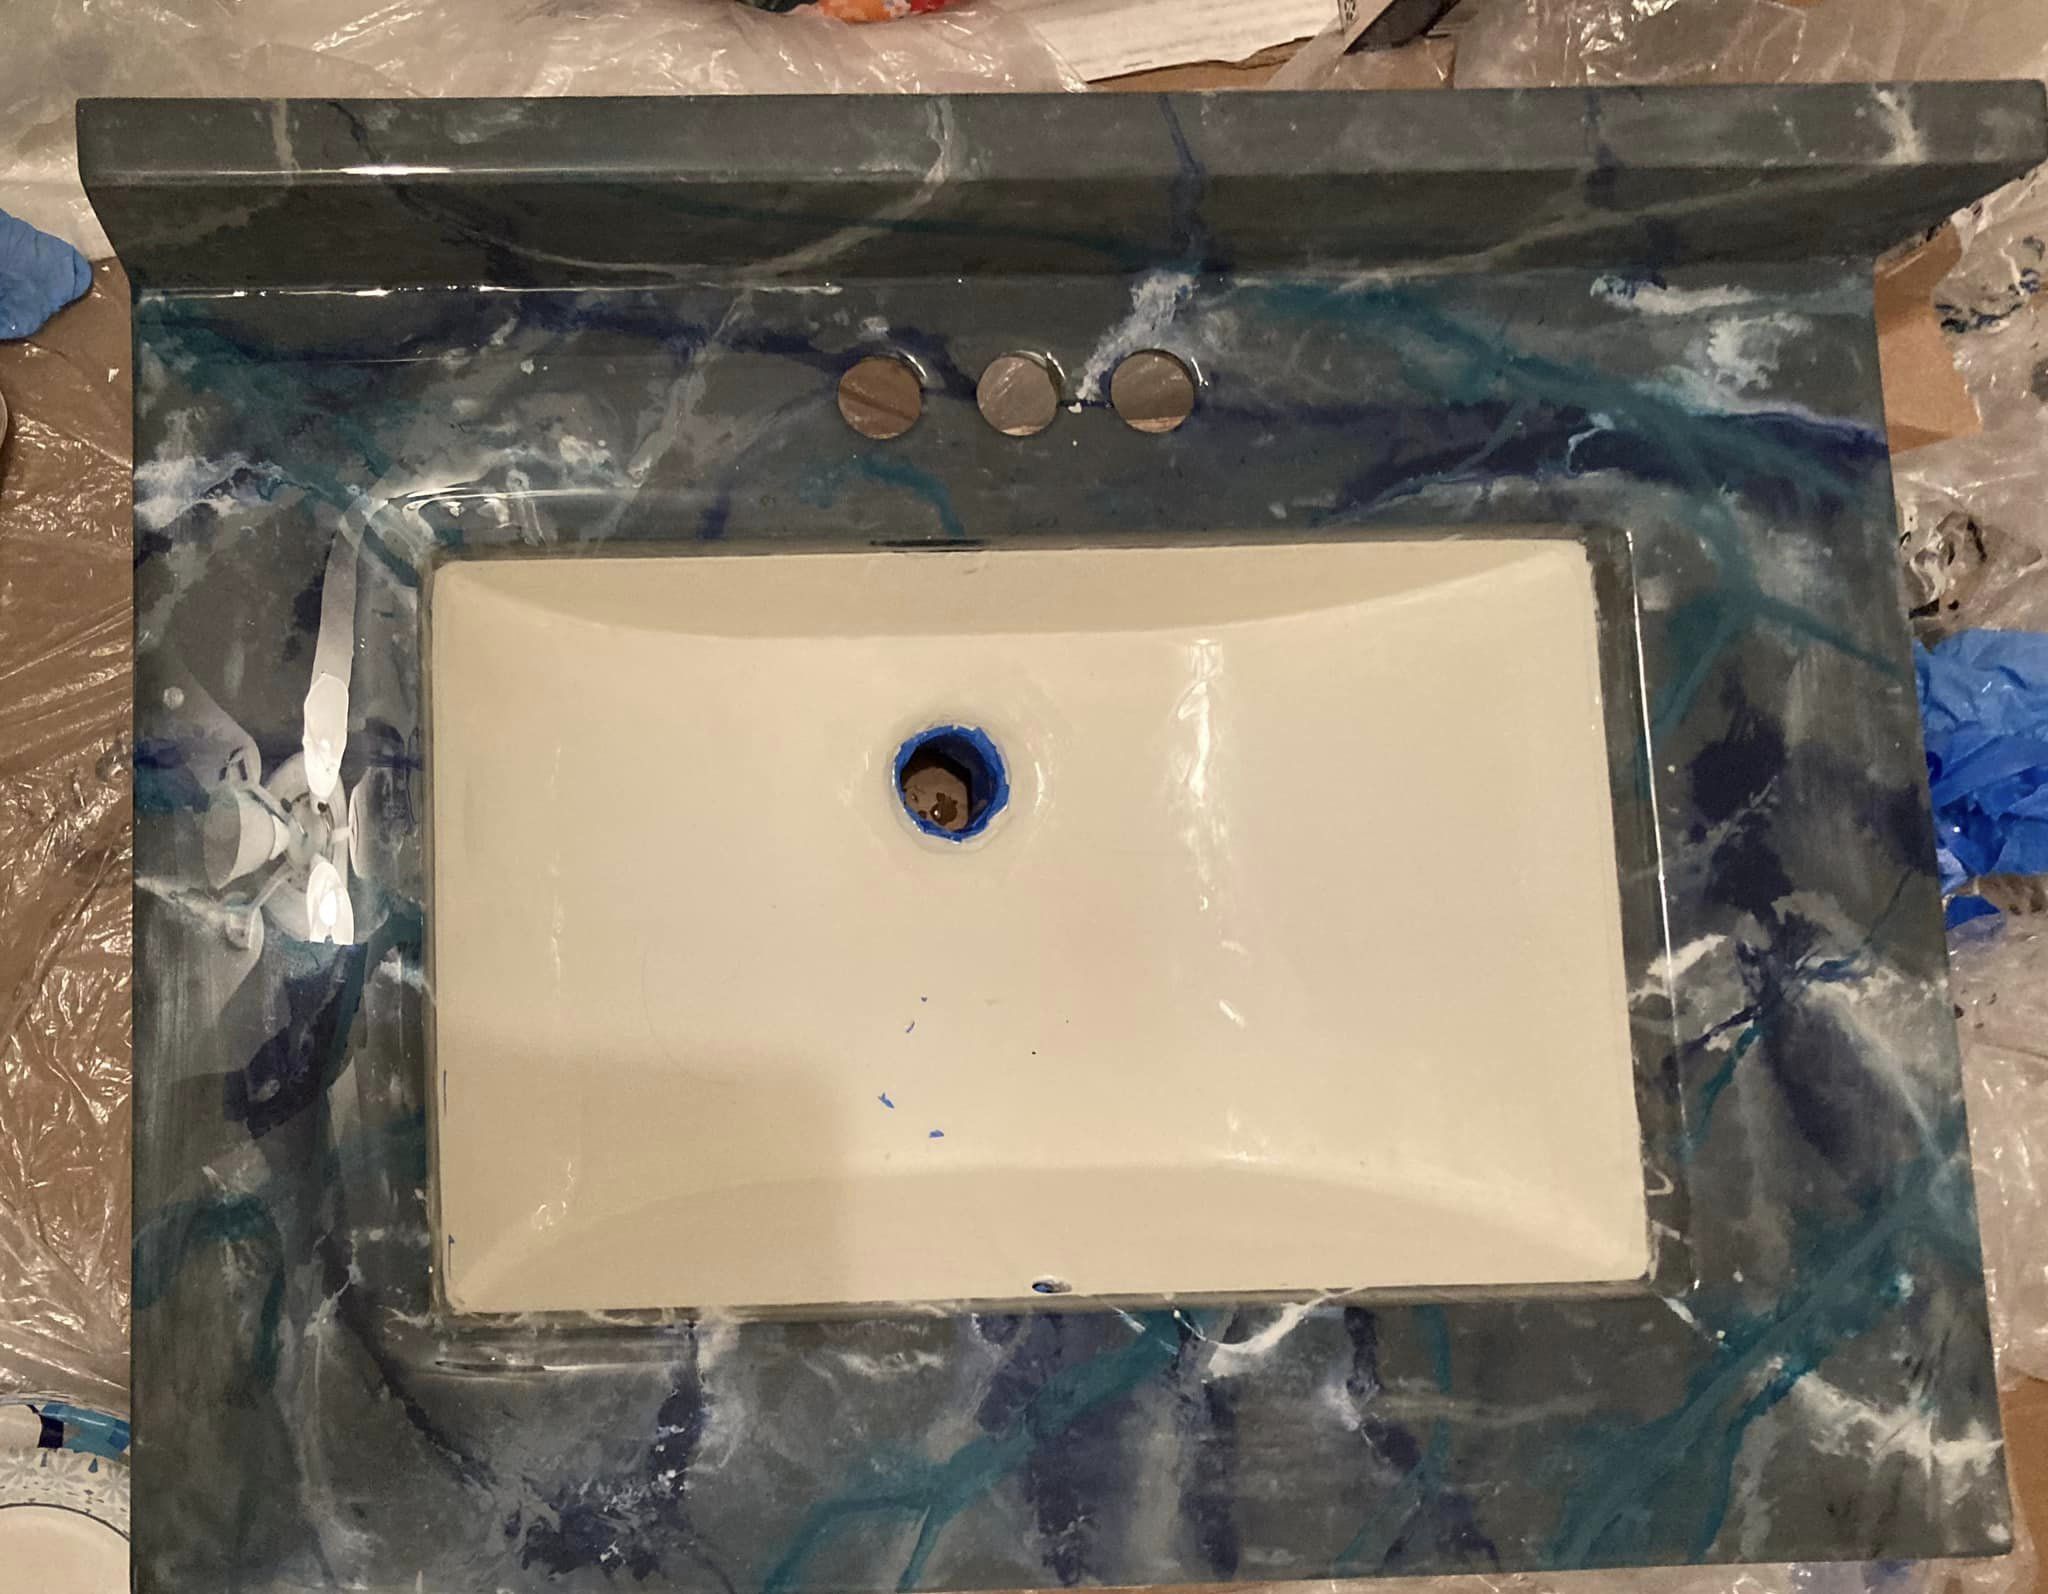
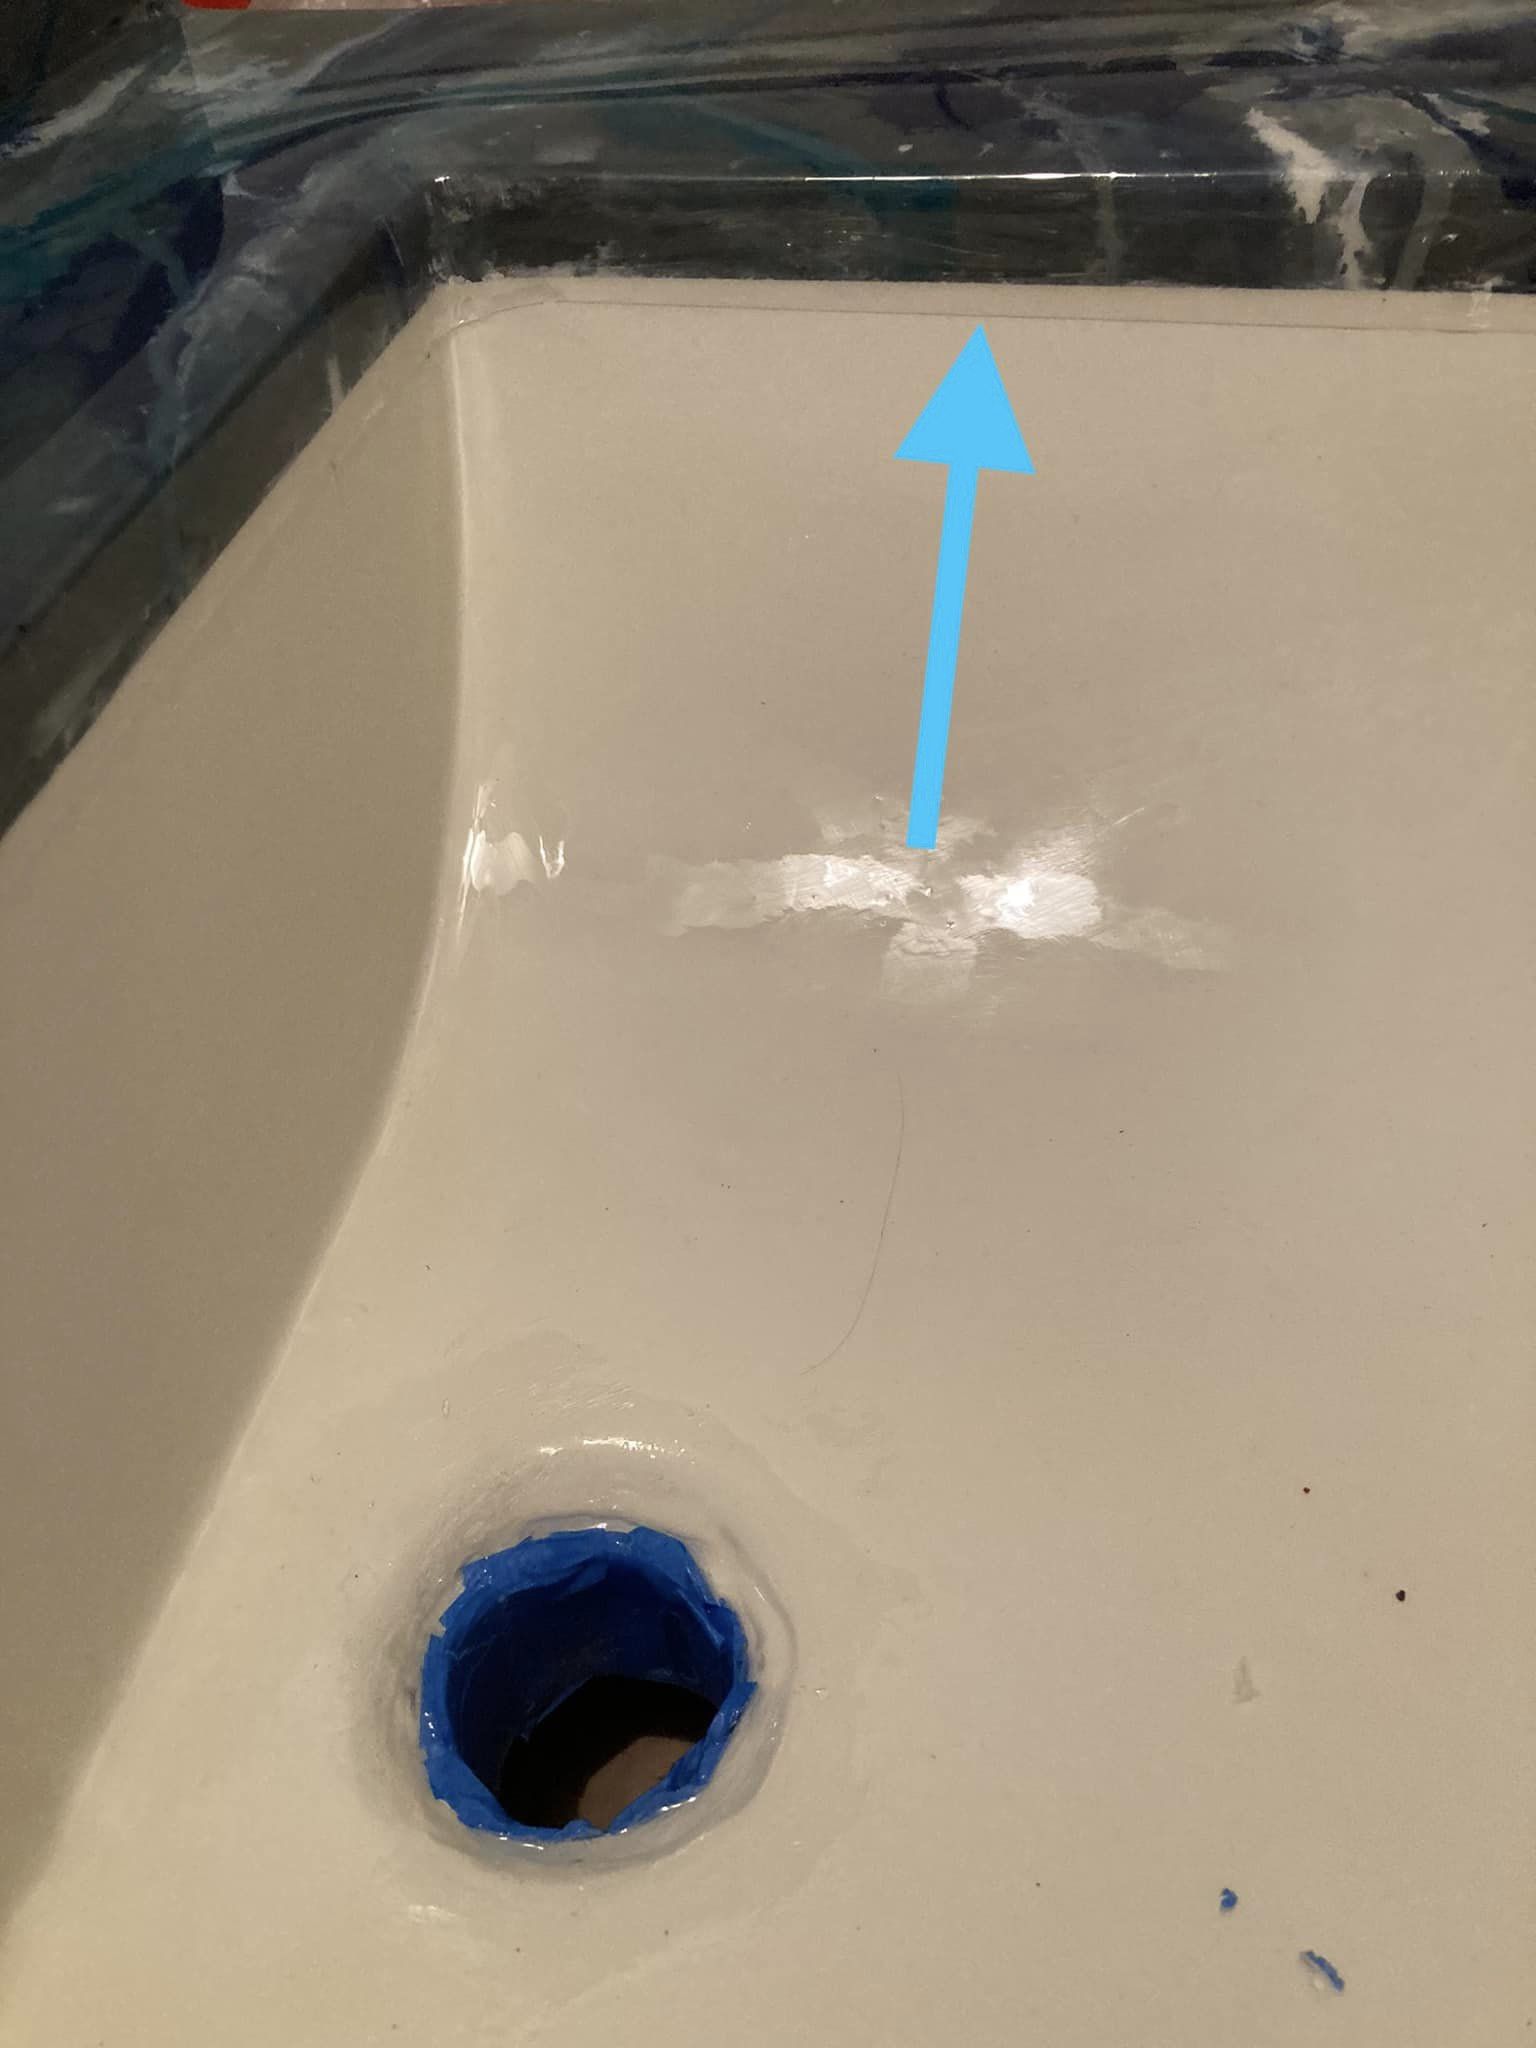
How can I fix the tape line on my resinpoured vanity top without causing more issues with the resin?
8 months ago
Last Updated: October 15, 2024
Hey, hope this is the right place to ask! I’m in the middle of working on a resin-poured vanity top and ran into a little snag. I added an extra coat of resin to fix a problem, but I forgot to remove the tape around the sink area before it set, so now there’s a noticeable line. Any ideas on how to smooth that out? I was thinking about adding a bit more resin to blend it, but worried it might just drip down. What do you think?


We tend to be our own toughest critics when it comes to our work. Maybe give it a few days or even a week to see if it still bothers you?
Can’t believe it’s been a week 😅 and of course, he will definitely notice
I would recommend leaving it as is – chances are no one else will even notice except for you. Working with resin can be tricky (as you are aware) and having a consistent line will look better than multiple drips.
Sand the wet surface and gradually move to a finer grit to restore the shine
Wonders if it will pass through the ‘thinner’ layer though. He’s worried about grinding through the layer before while trying to make it smoother.
Hey , using a sturdy backing while sanding can help you work down to the lip. Then, as you get closer, switch to a finer grit to blend without removing too much of the base layer. Not sure how thick the base layer is, though.
I see it, but what worries me is getting the angle slightly off. If I do, it will quickly wear down the original layer.
Check out these contour sanding grips at https://a.co/d/i3Mepss, they might be helpful.
Gently sand it down. Begin with a coarse grit and gradually move up to 1000 grit or higher. 👍🏼
Those colors are great. Did you also apply resin to the sink? I’m curious about how well the sink will endure. I’m thinking of doing the same to my vanity…
I decided to paint the non-white part with countertop paint first, followed by acrylic paint, and finished with a clear coat of resin. As for the white section of the sink, I gave it a coat of white paint. The only issue I’ve noticed so far is a slight yellowing from the resin, which is common with resin products. If your kit is relatively new and the side B is not very yellow, the violet in side A should be able to neutralize it quite effectively. I would assume that it may not withstand constant exposure to a straightener or hot tool very well, although I haven’t tested it and frankly, I don’t want to risk it. I had to use a dremel tool to make some adjustments where the stopper goes in at the bottom, so it fits properly.
Hey Carolyn, good to hear from you!
Hey , have you checked out Countertopepoxy.com? Their resins are top-notch, I’ve been using them for about 6 years now. It’s the thickest one I’ve ever used.
Thanks a lot, !
Hey , here is a project I completed earlier this week!
This particular one is perfect for a contractor sink purchased from Lowe’s. It includes mdf, sink, resin, all for under 200.
You’re only noticing that because you already know about it 🙂
Is the sink resin too? Or is the sink bowl pink? If it’s both resin, you might be able to use compound and small buffing pads to try and buff out the line. It depends on the thickness and how thick the pink layer is. Personally, I usually just build new tops from MDF and buy a new sink from Lowe’s or Home Depot. I’ve been working on epoxy counters and vanities for about 6 years.
You could also try sanding it down and then applying a clear coat of UTC. Another option is to use Coval, which is a good spray option that doesn’t require using the entire amount because it’s not a two-part mixture.