How can I fix the low-hanging microwave in my new place that the previous owners improperly installed?
12 months ago
Last Updated: June 23, 2024
Hey, just wanted to share that I recently moved into a new spot and the microwave is hanging so low it’s practically begging to be bumped into. Looks like the previous owners didn’t quite nail the installation – I even tried tightening the bolts, but no luck in lifting it up. Any ideas on how they managed to mess this up, and any suggestions on how I can raise or fix it?
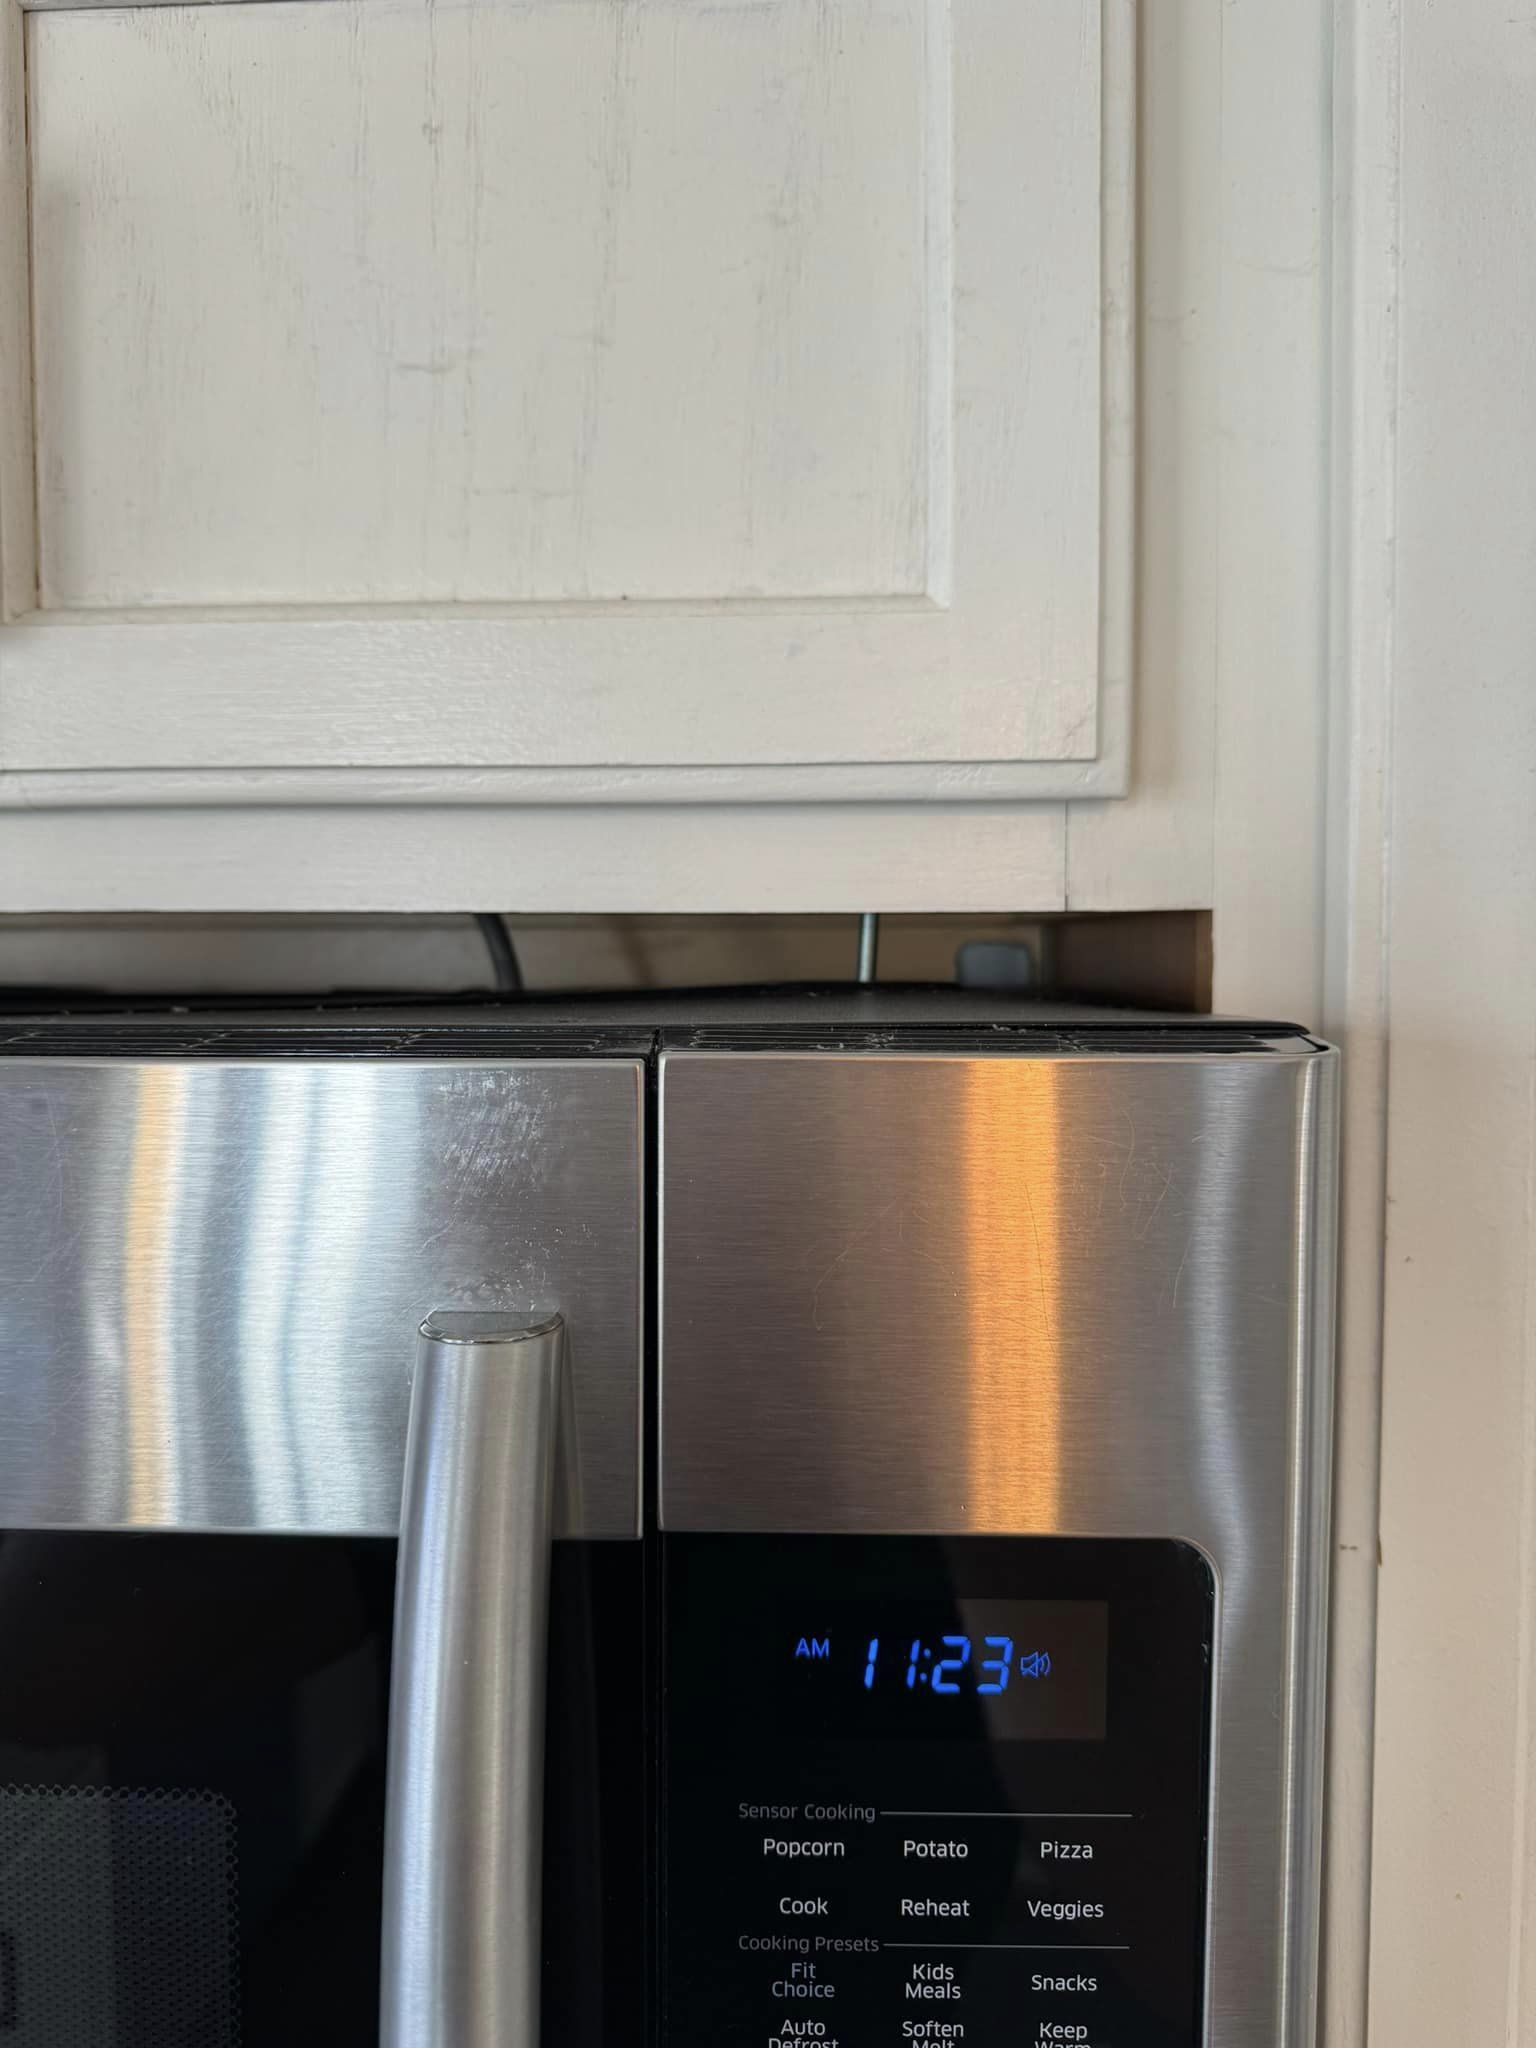
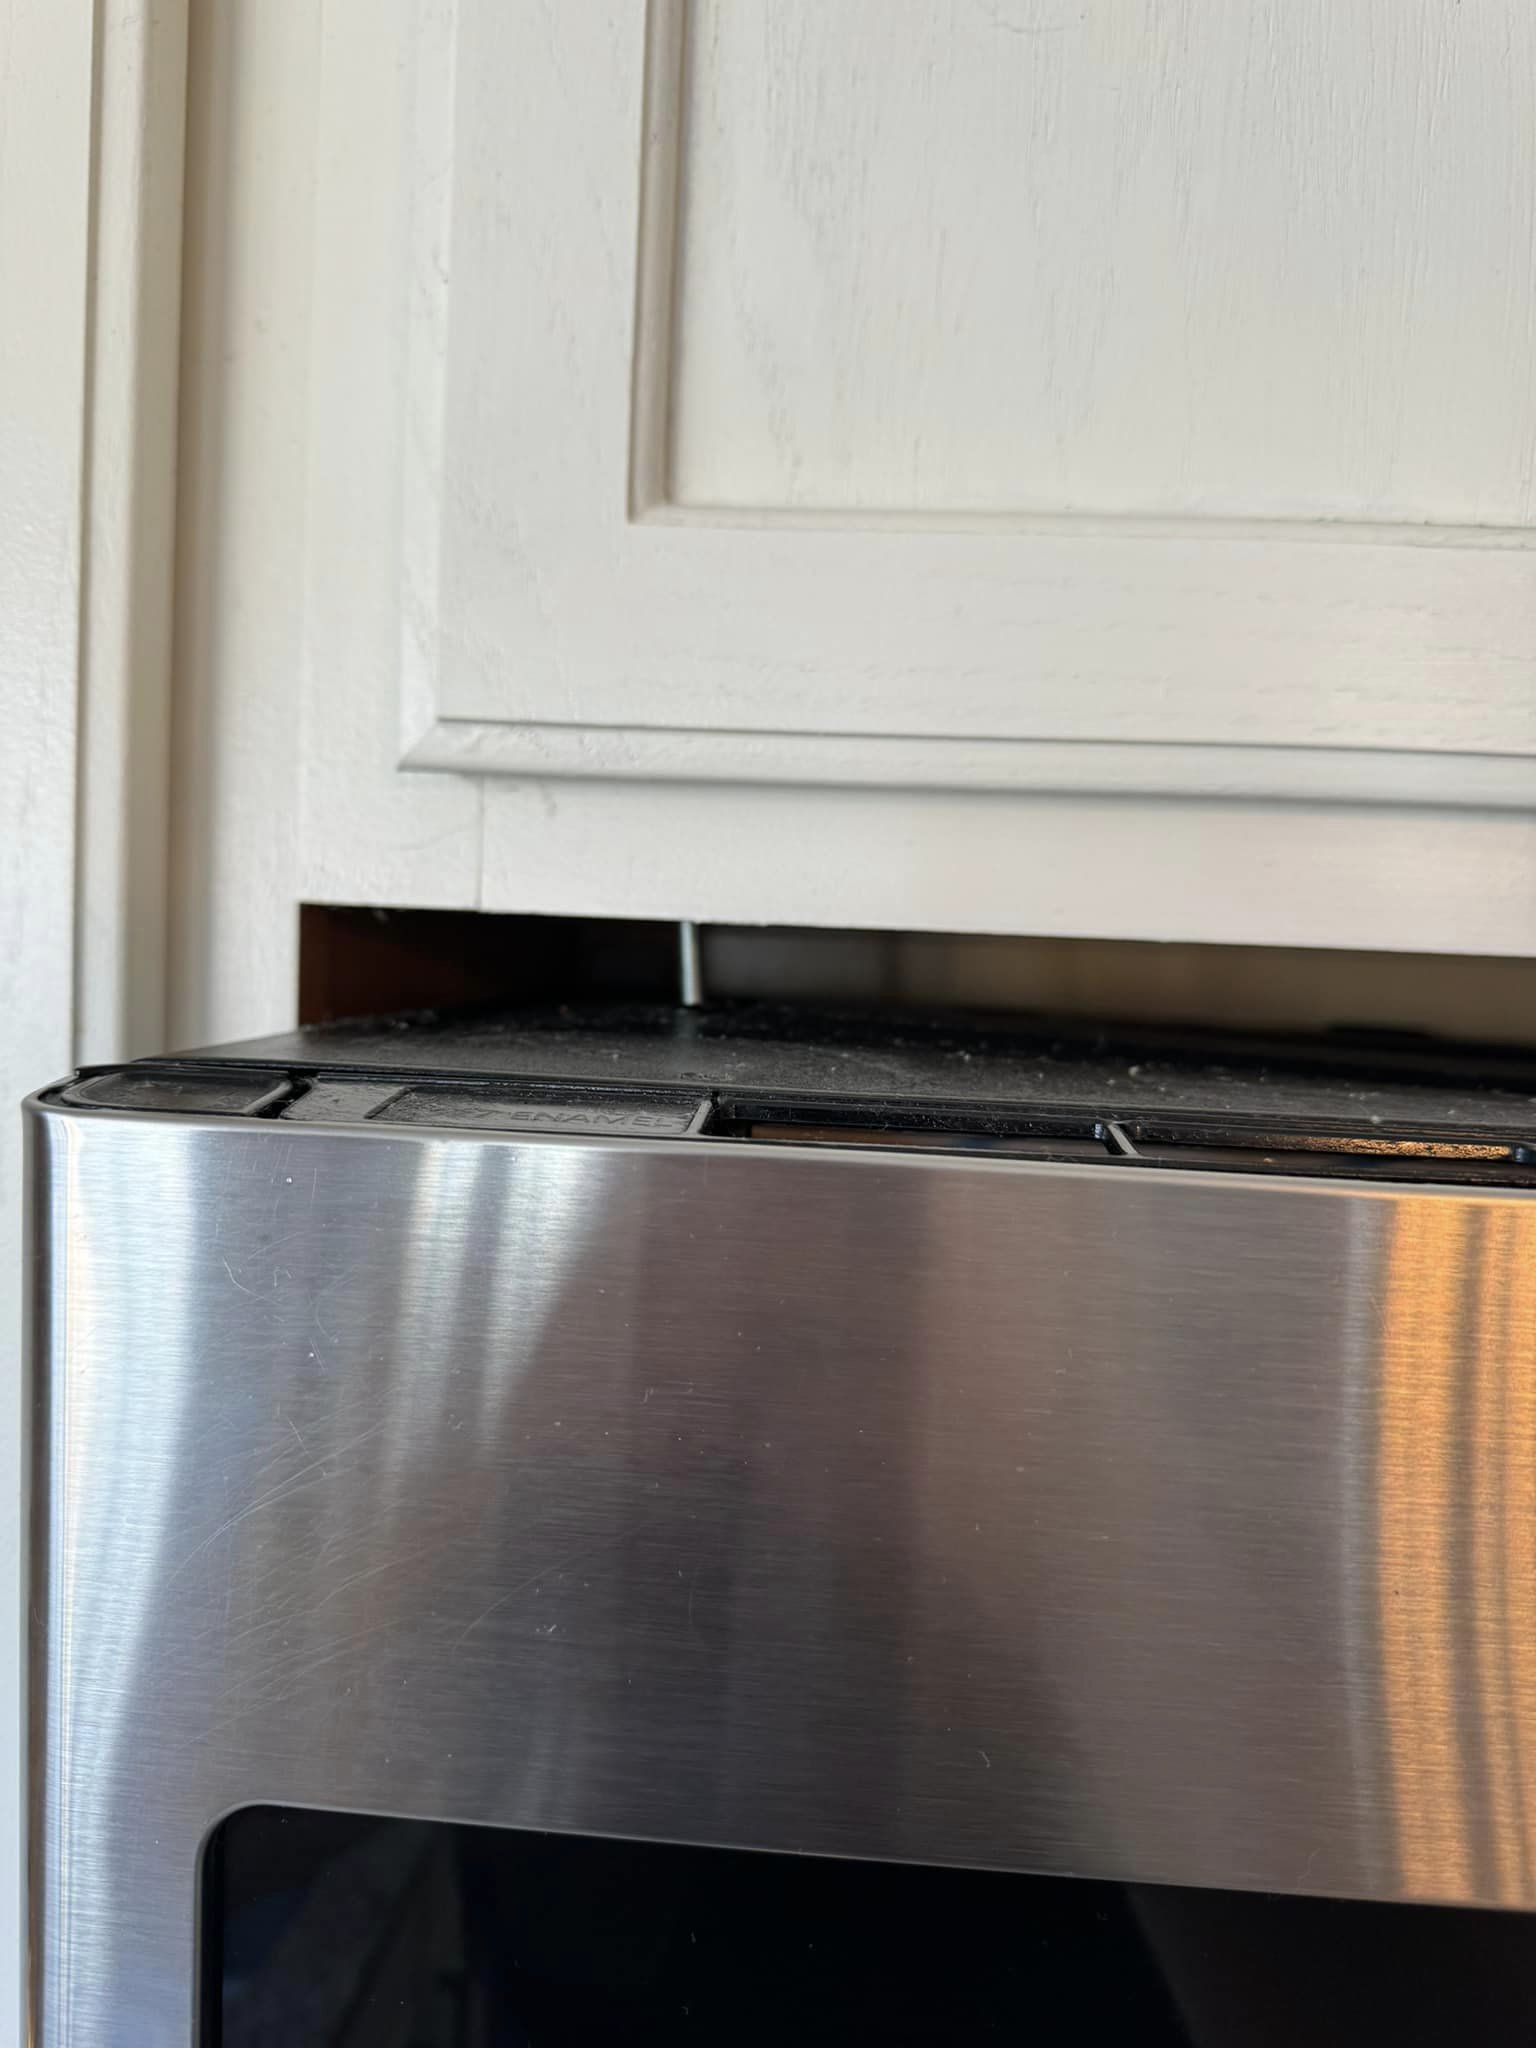
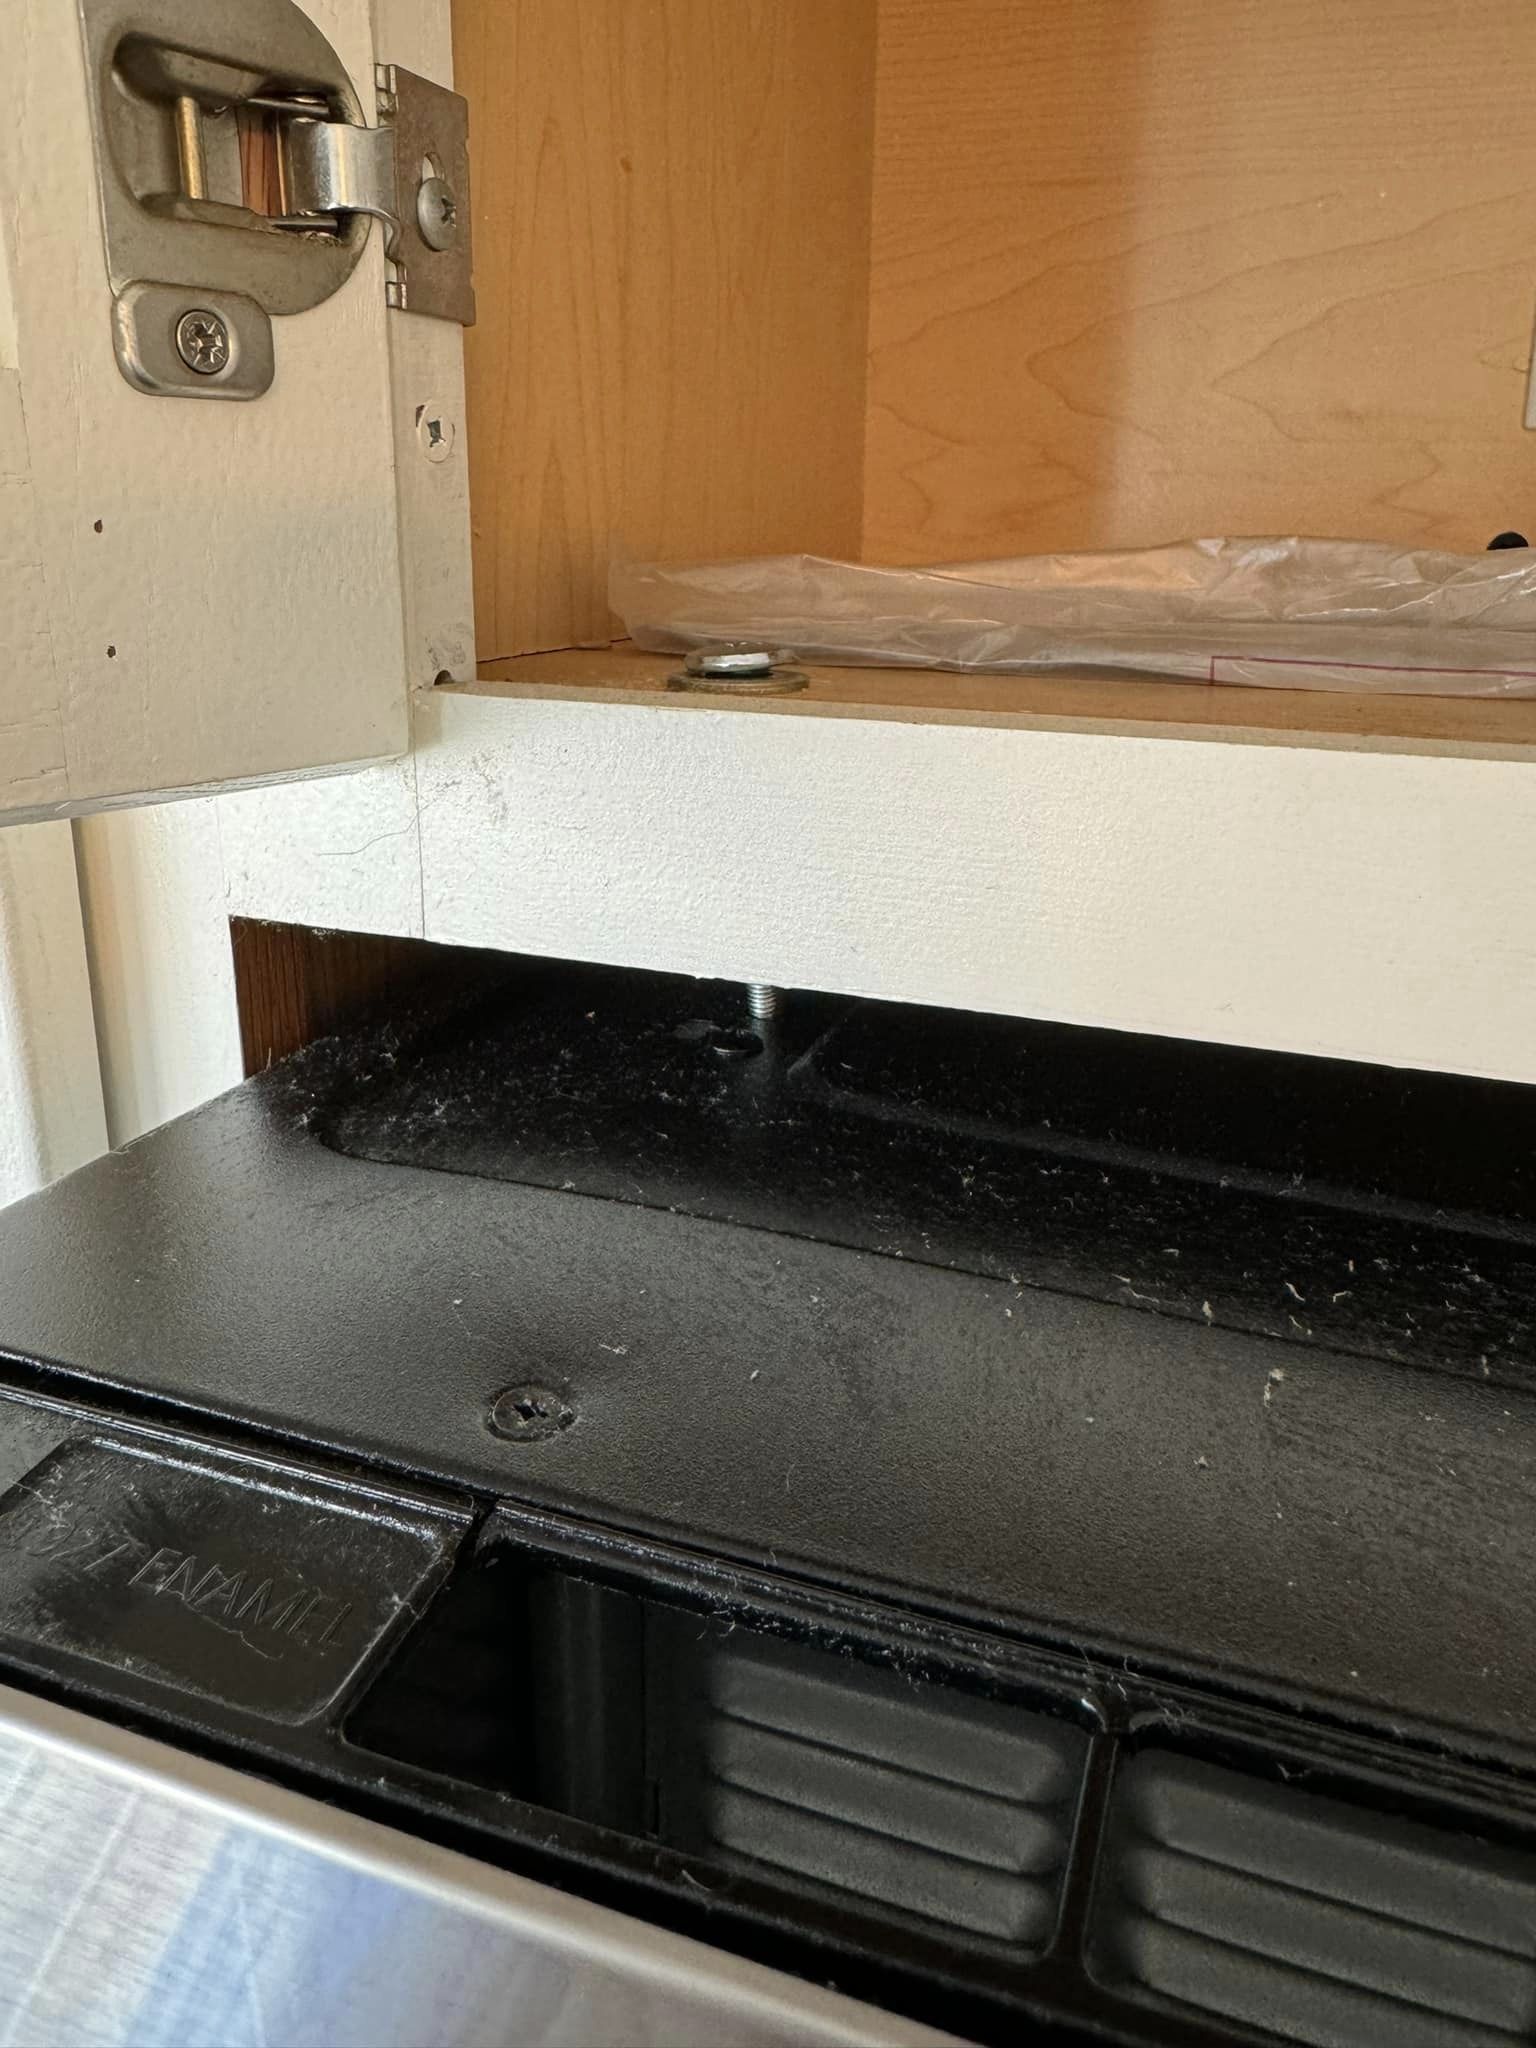
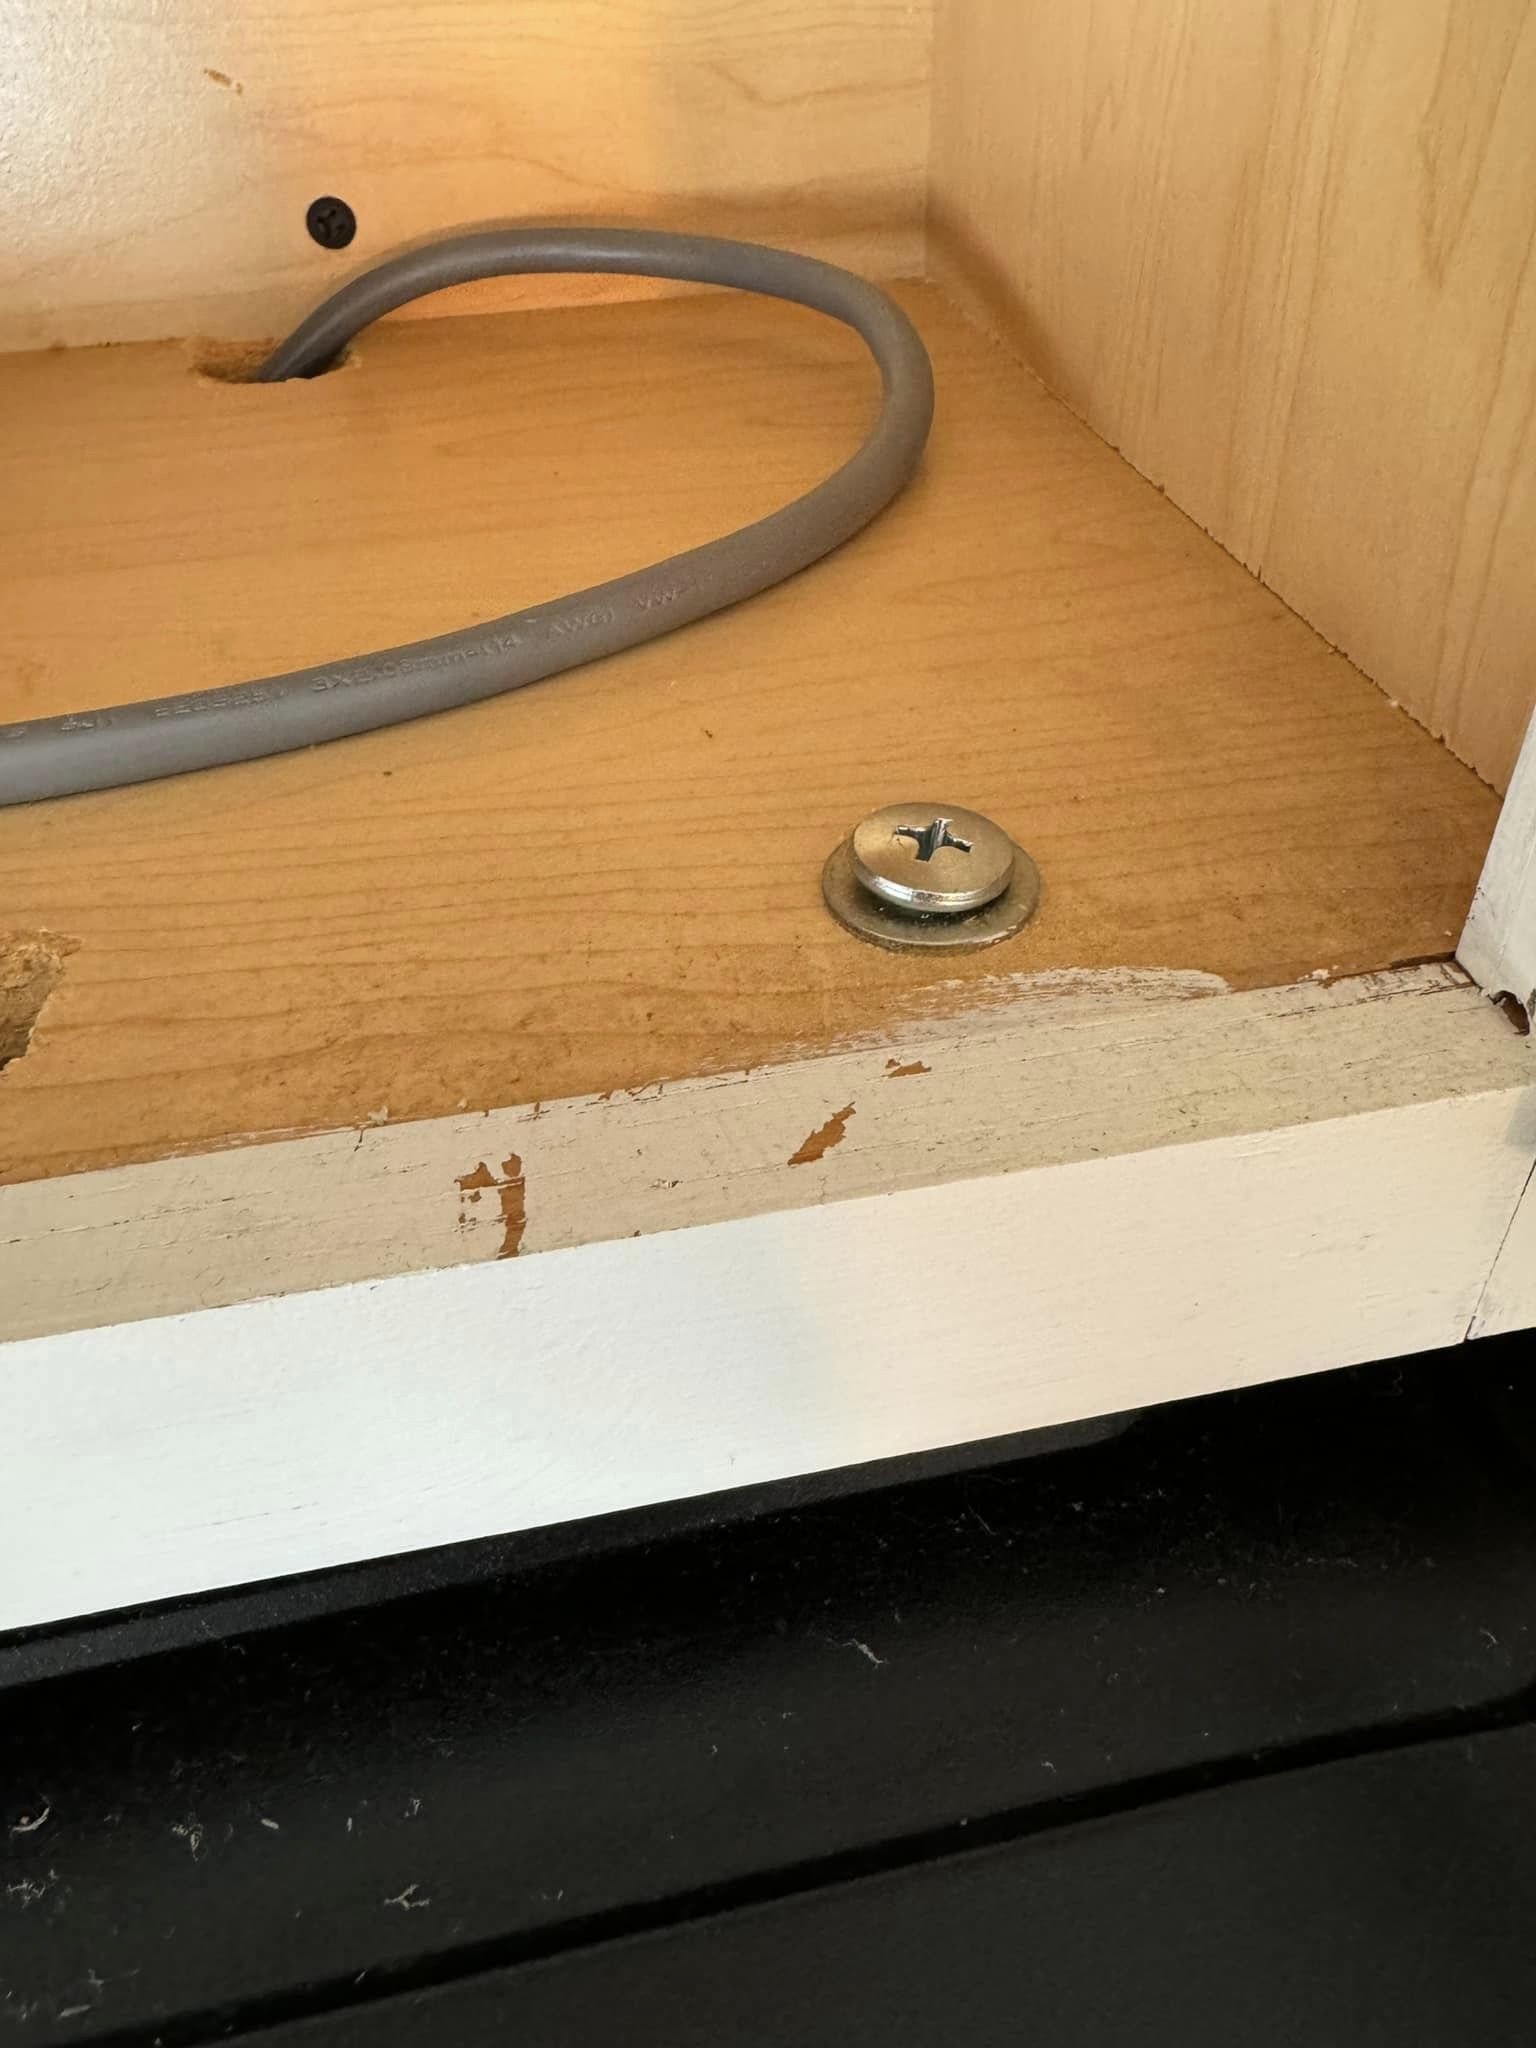
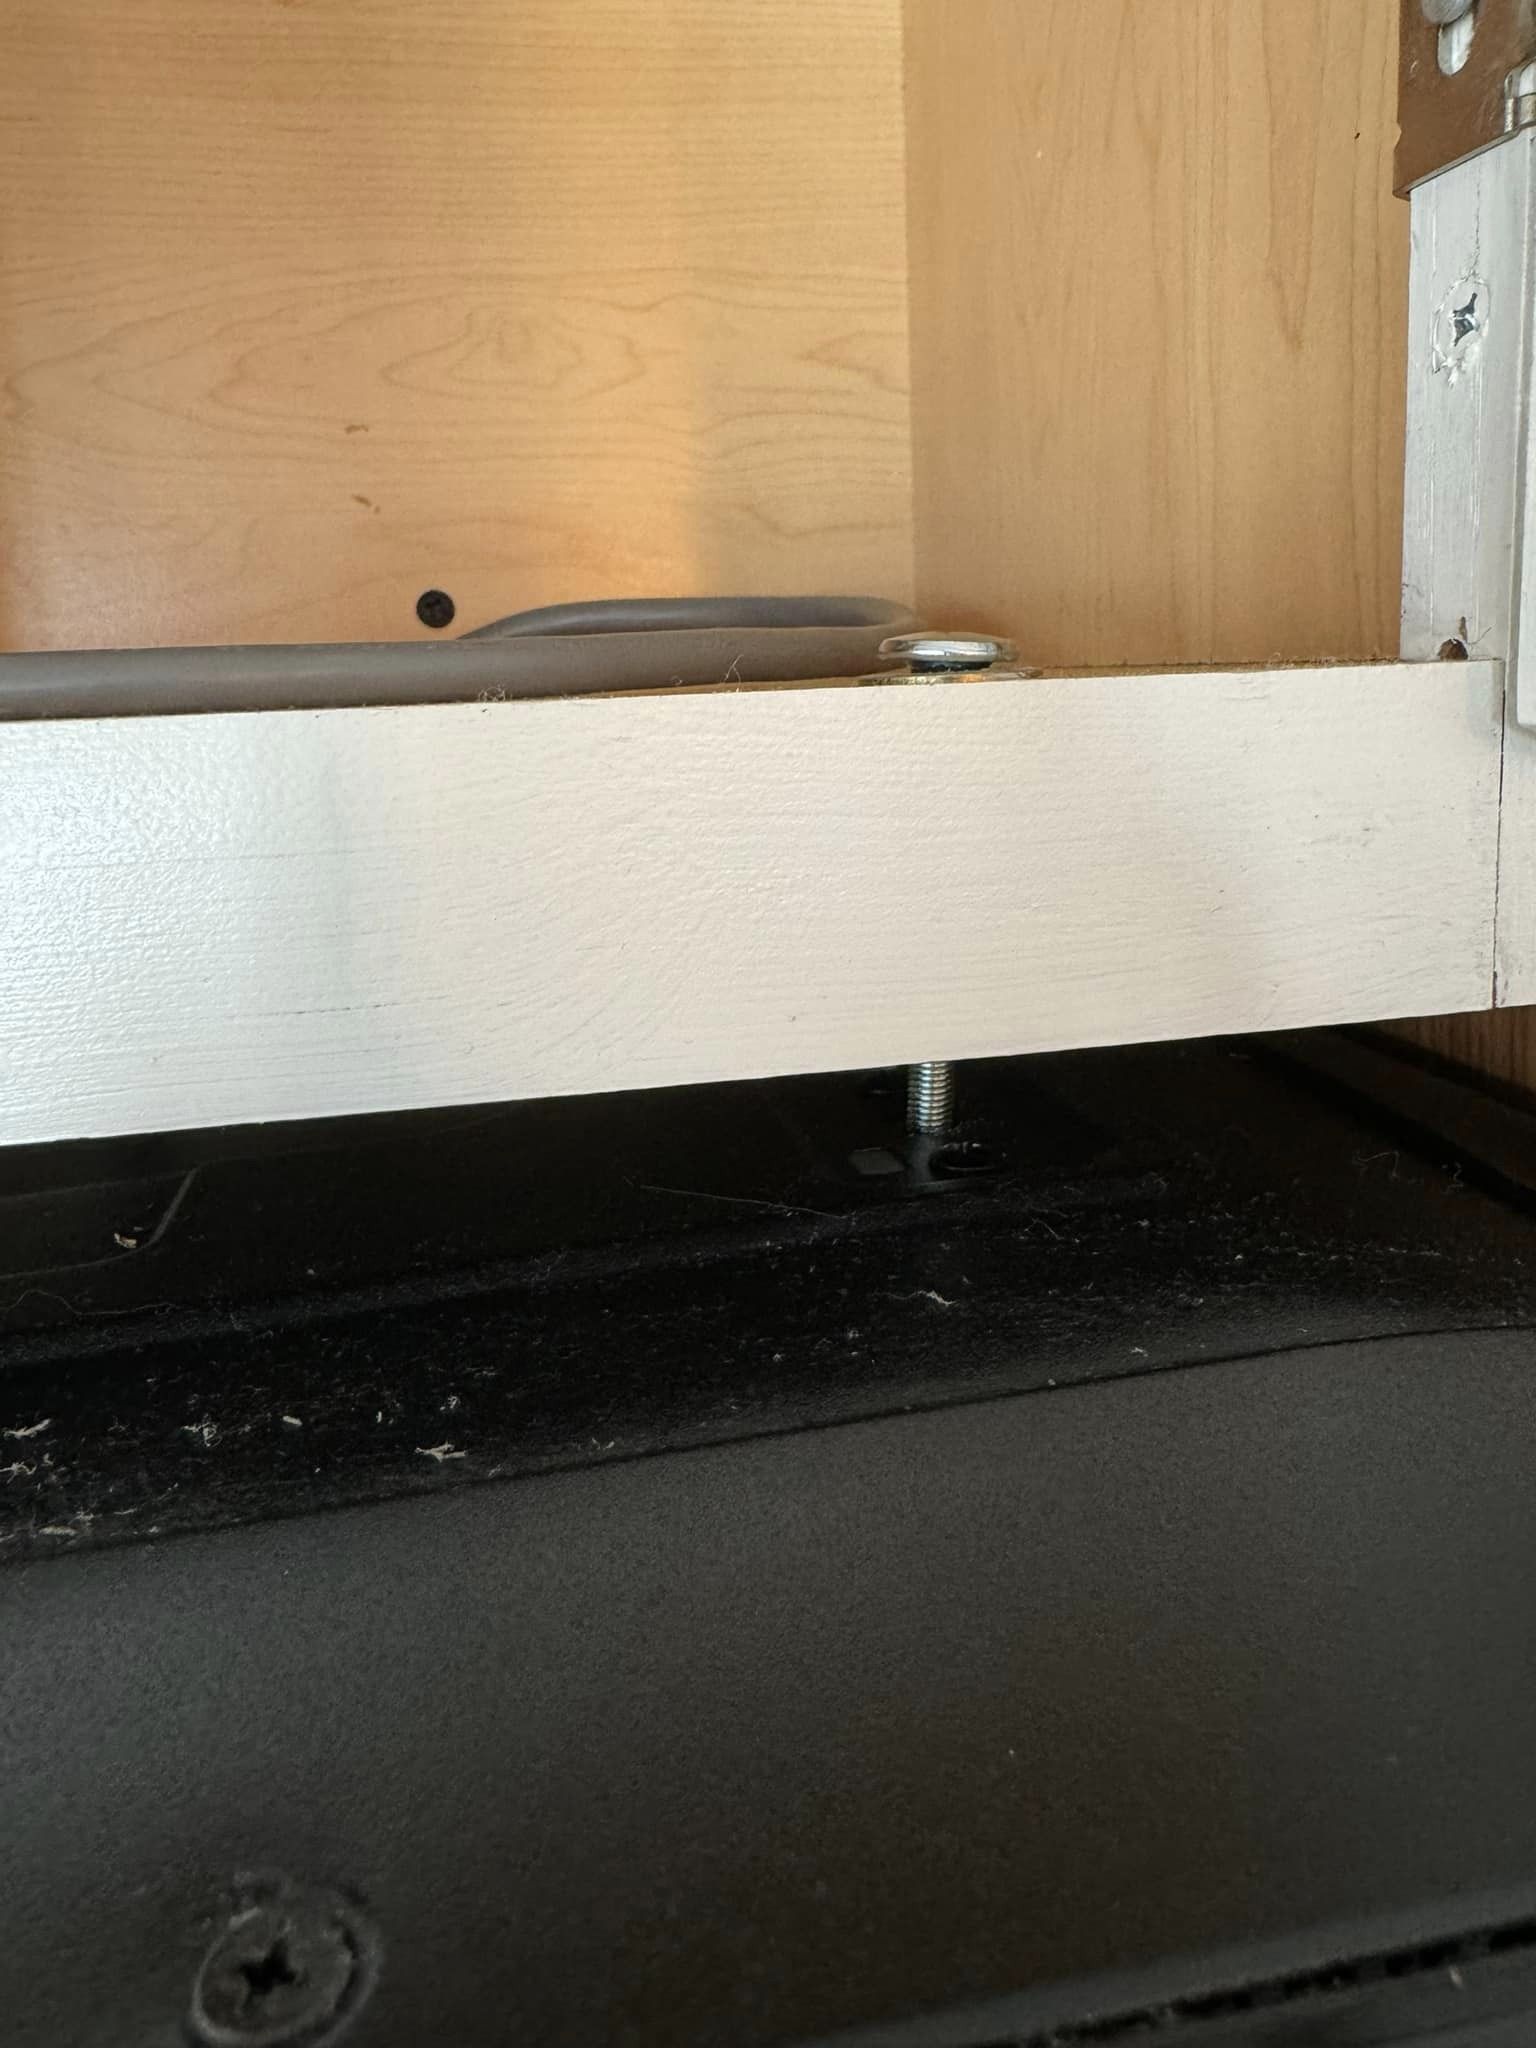
At the back, there needs to be a track. You’ll need to unscrew the top, tilt the front of the microwave downwards, and lift the back off of the track. After that, you’ll need to uninstall and reinstall the track higher up on the back.
Definitely, . The wall mounting bracket was put up too low.
Yep, that’s how it’s done!
Taking the microwave down and lifting it back up is actually pretty easy, you just need to raise the bracket by the same distance it’s off right now. If you’re not comfortable doing it yourself, you can always just add a small piece of trim haha.
Make sure to have two people with you and place a blanket or pillow on your stove top in case it accidentally slips or falls.
Make sure to have extra toggle bolts ready, as chances are only one screw will be attached to the stud when you take out the old bracket, with the other two screws being toggle bolts.
After taking out the old bolts, the butterfly section slips down behind the wall and becomes unusable.
Haha! 2 people decided to join last minute!
Just became first-time homeowners! I helped them all by myself. 😂🏡
Make sure to grab a blanket and pillow just in case things get a little messy! 😂😂😂
Me too… But don’t forget that some of us would have had the MW ready for installation, making it easier for the installer to secure it in the allocated space.
I echo ‘s sentiment. Not sure how your backsplash looks, but ideally it should extend all the way up to avoid a gap between the backsplash and the new microwave. A simple solution would be to add trim where the gap is. If you prefer not to move it, this is a good alternative.
Hey , that’s not very good ‘advice’ at all! The microwave looks like it’s barely hanging on those screws. Are you seriously suggesting to cover it up with trim until it falls and injures someone, instead of fixing it properly? Come on, man!
Those screws seem really long. I’m not so sure it’s just ‘barely hanging on.’
Hey Josh, no need to get all worked up… The wall bracket is actually what’s holding the weight. The top mount screws are there to prevent it from tipping forward. Let’s try to keep the comments respectful, especially since you may have wrongly offended someone.
I was polite but direct, but hey, if that’s how you see it. If you’re okay with someone inexperienced giving bad advice to a DIYer that could potentially cause harm, then that’s your choice 🤷♂️
“… “yeah.. you’re pretty sharp, my friend” …. Was that respectful? Take it easy. This is just one of the many threads we’ll come across during our time here. We’ve already spent more time on it than it deserves… Chill out. We’ll eventually find some common ground, I’m sure
Already mentioned that he tightened them more. I highly doubt it’s barely holding on. The reason it’s not moving up is because the bottom bracket is too low, as previously pointed out, which is why I agreed with him. I don’t think my advice is that bad, especially since there might be missing information like the back splash and how much effort is willing to put into fixing this – it would require two people to do it safely. Perhaps he has no experience with tiling the back splash. Maybe when he moves the microwave, there will be a gap between the back splash and the bottom of the microwave. Maybe he can’t find matching back splash. There are a lot of unknowns based on the pictures posted. What I do know is that adding trim will cover the gap. And if the screws are loose, I trust the OP will be able to decide if they are too loose or not.
I completely agree with you! 🙌🏾
I totally agree, . There are many factors to consider. The original poster could easily remove a screw and test the threading to make sure it’s strong enough. If not, most hardware stores carry bolts up to 6 inches long, which should work. The crucial question is whether it’s vented or recirculating. If it’s vented, that presents a whole new challenge. The goal is to minimize the venting.
Take it out and reposition the wall bracket higher.
The microwave mount was placed too low by the installers, simply tightening the screws won’t fix the issue.
Just go ahead and place a piece of wood trim there, and you’re good to go.
There’s a wall bracket that supports the weight. The bolts you see are mainly to prevent it from tilting forward. You’ll have to remove it, readjust the wall bracket. Check out this video to see how it’s installed… https://www.youtube.com/watch?v=Hmg5osApacg
You can clearly see the bracket… that doesn’t seem right. I’m guessing they used the old microwave bracket to hang up the new one.
I remember once this happened to me when I was installing a microwave. The bolt was supposed to go into an internal socket. As I was tightening the final bolt, the internal socket broke with only about half of the way to go. I couldn’t tighten the bolt any further, nor could I remove it. The internal socket just kept spinning. I used a Dremel to cut the head off, then I threaded on a nut. By gripping the protruding threads with a pair of vice grips, I was able to tighten the nut down and secure the microwave to the cabinet.
The correct answer has been given several times… I enjoy seeing that.
Hacks hacks hacks. Reinstall it correctly. Maybe the holes were drilled in the wrong place.
Bring it down and hang it up correctly. There’s a bracket screwed into the wall behind the microwave that the back bottom rests on, then screws on top hold it in place. Perhaps the bracket was initially installed too low. You might need shorter screws for the top if they can’t be tightened any further.
Totally agree with on this!
There are typically several different length pieces included. If you’re missing pieces, you can always add a trim board below the cabinet to fill the gap.