How can I fix a dropped corner in my tiled tub without it looking bad, and what’s the best finish for the window section inside the shower?
1 year ago
Last Updated: June 6, 2024
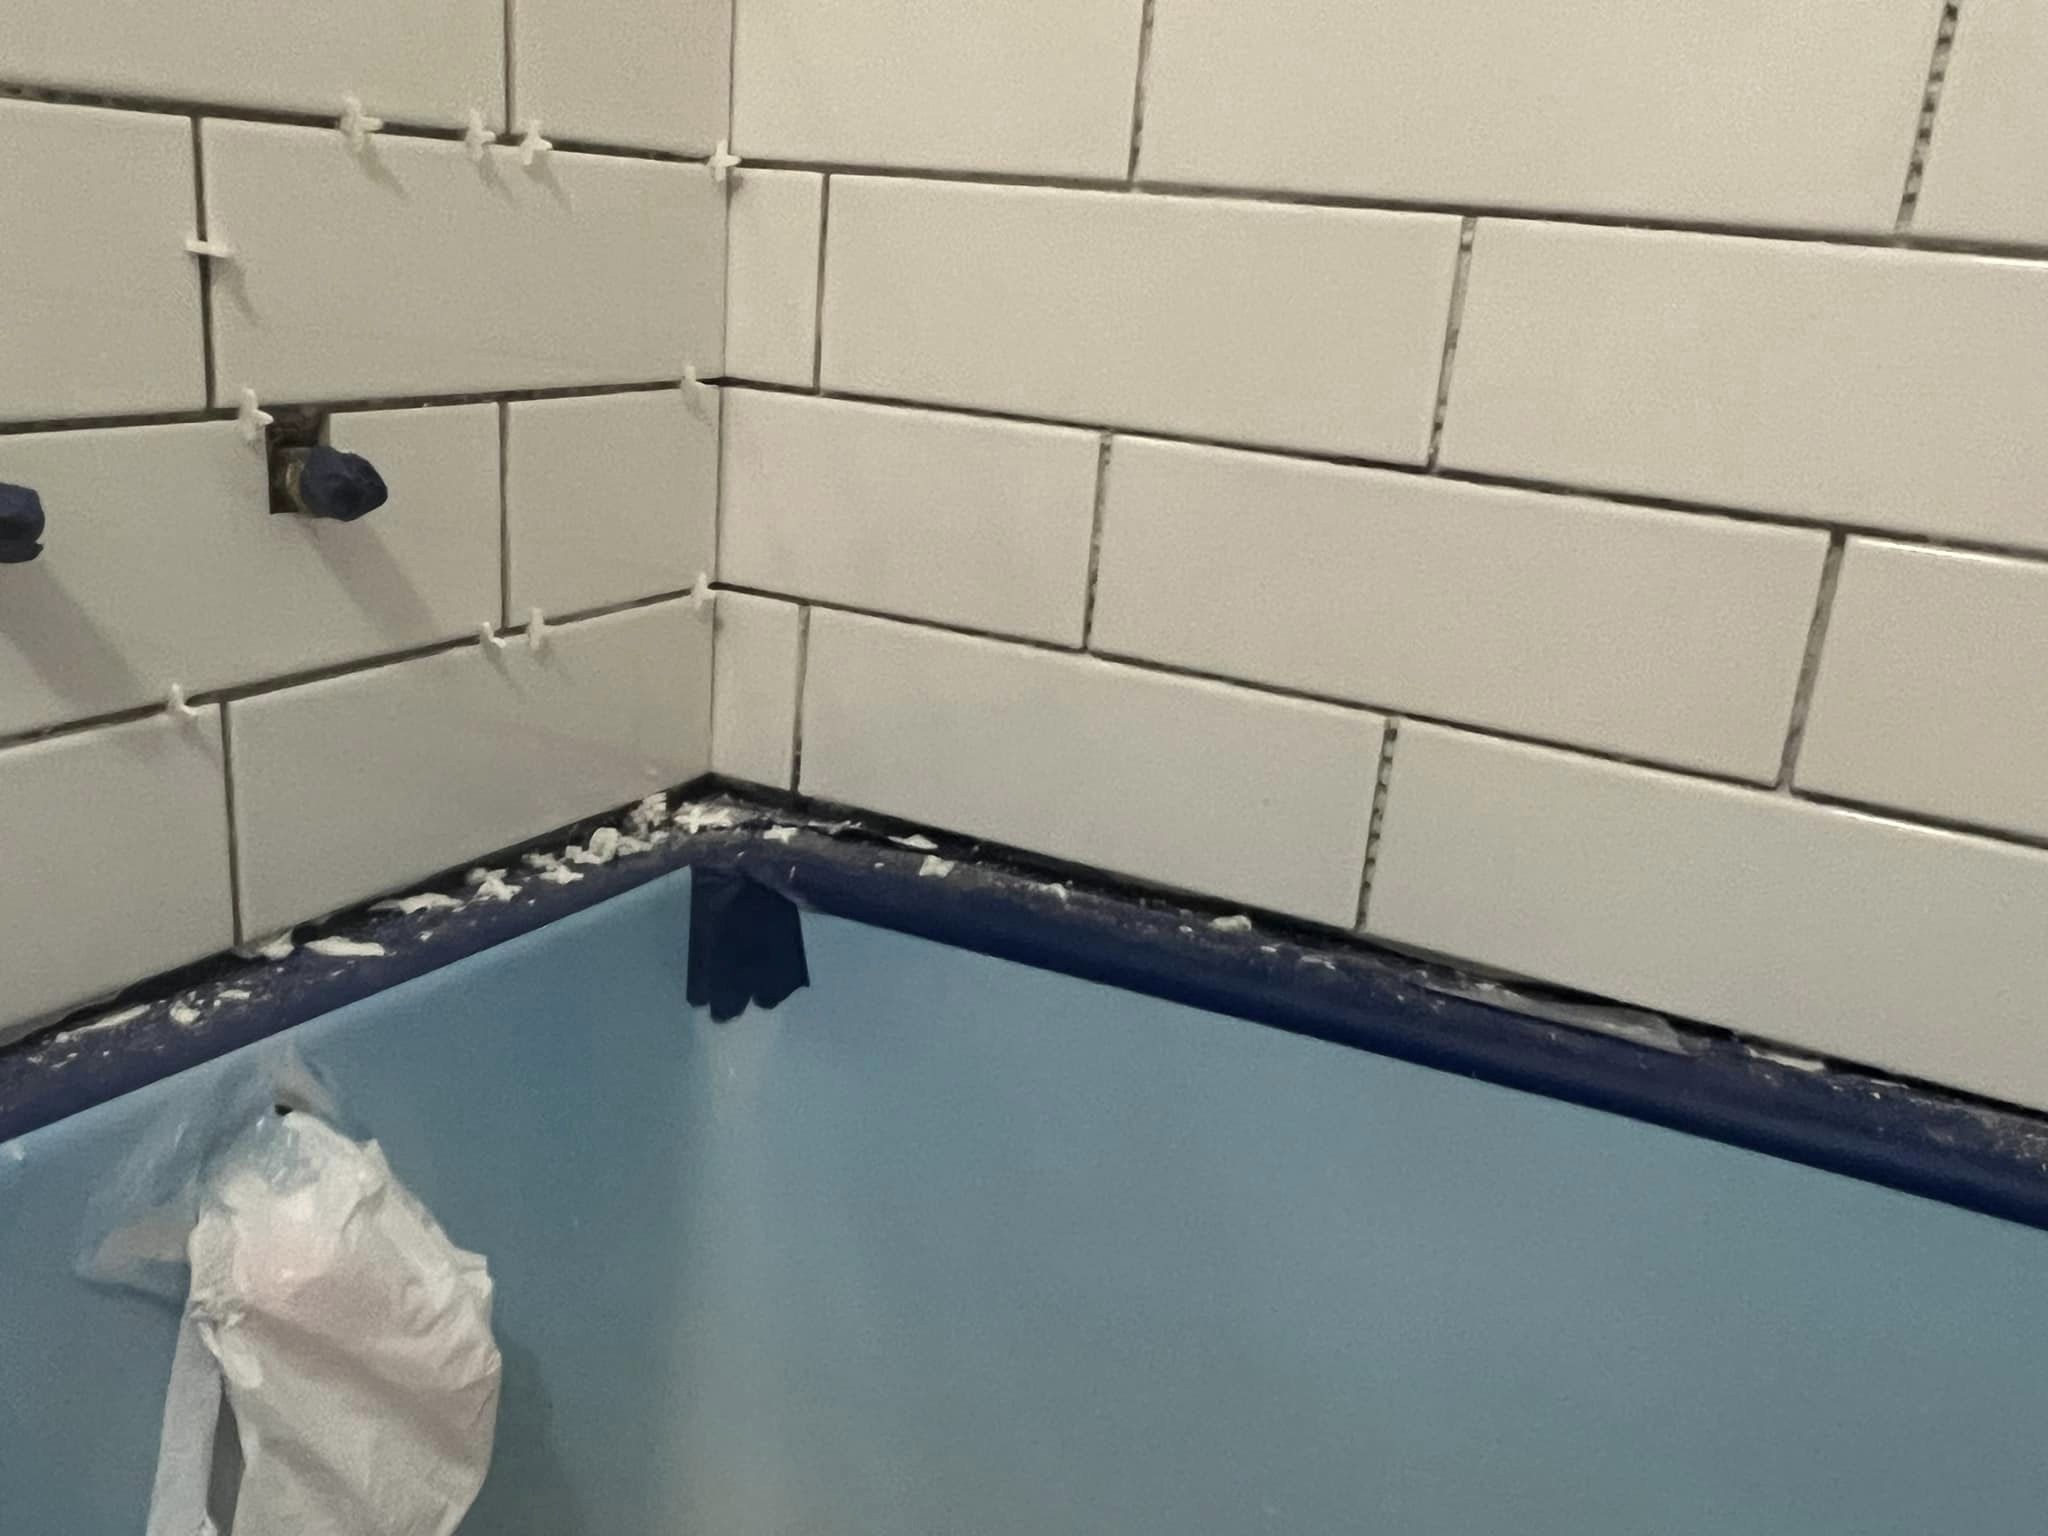
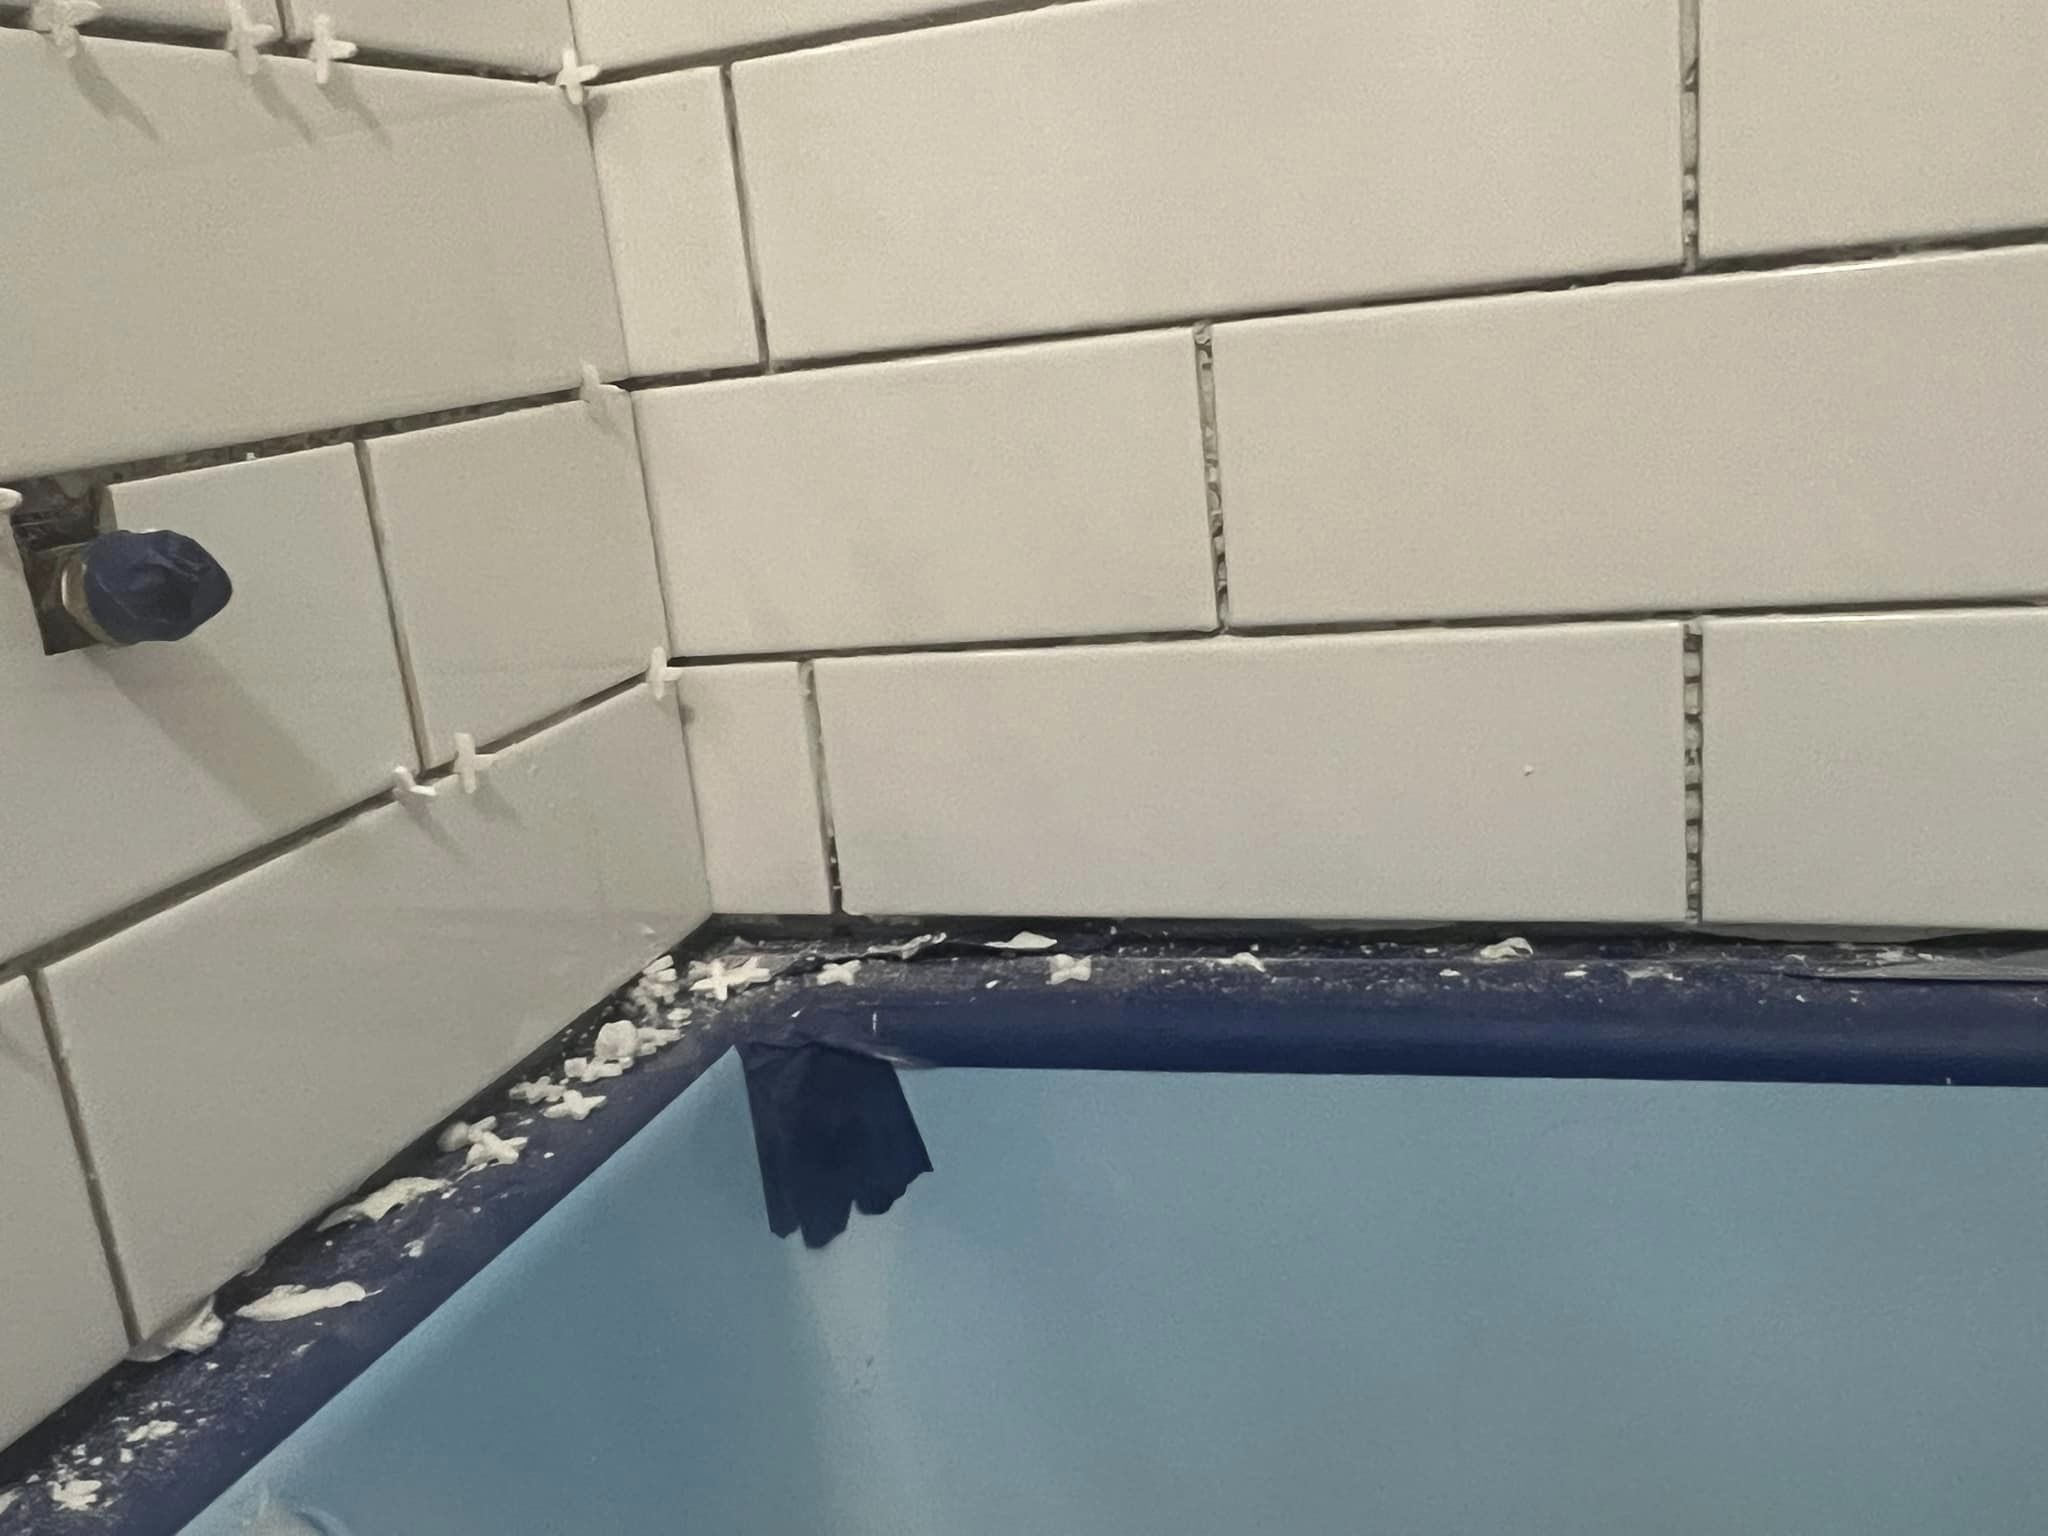
Hey, I could use some advice. We installed our tub following all the proper steps and made sure everything was perfectly level. However, as we started tiling, we noticed that the front right corner dropped slightly and we couldn’t adjust it at that point. It’s almost a 3/4 inch gap, and I’m worried that using backer rod to fill it in might not look great.
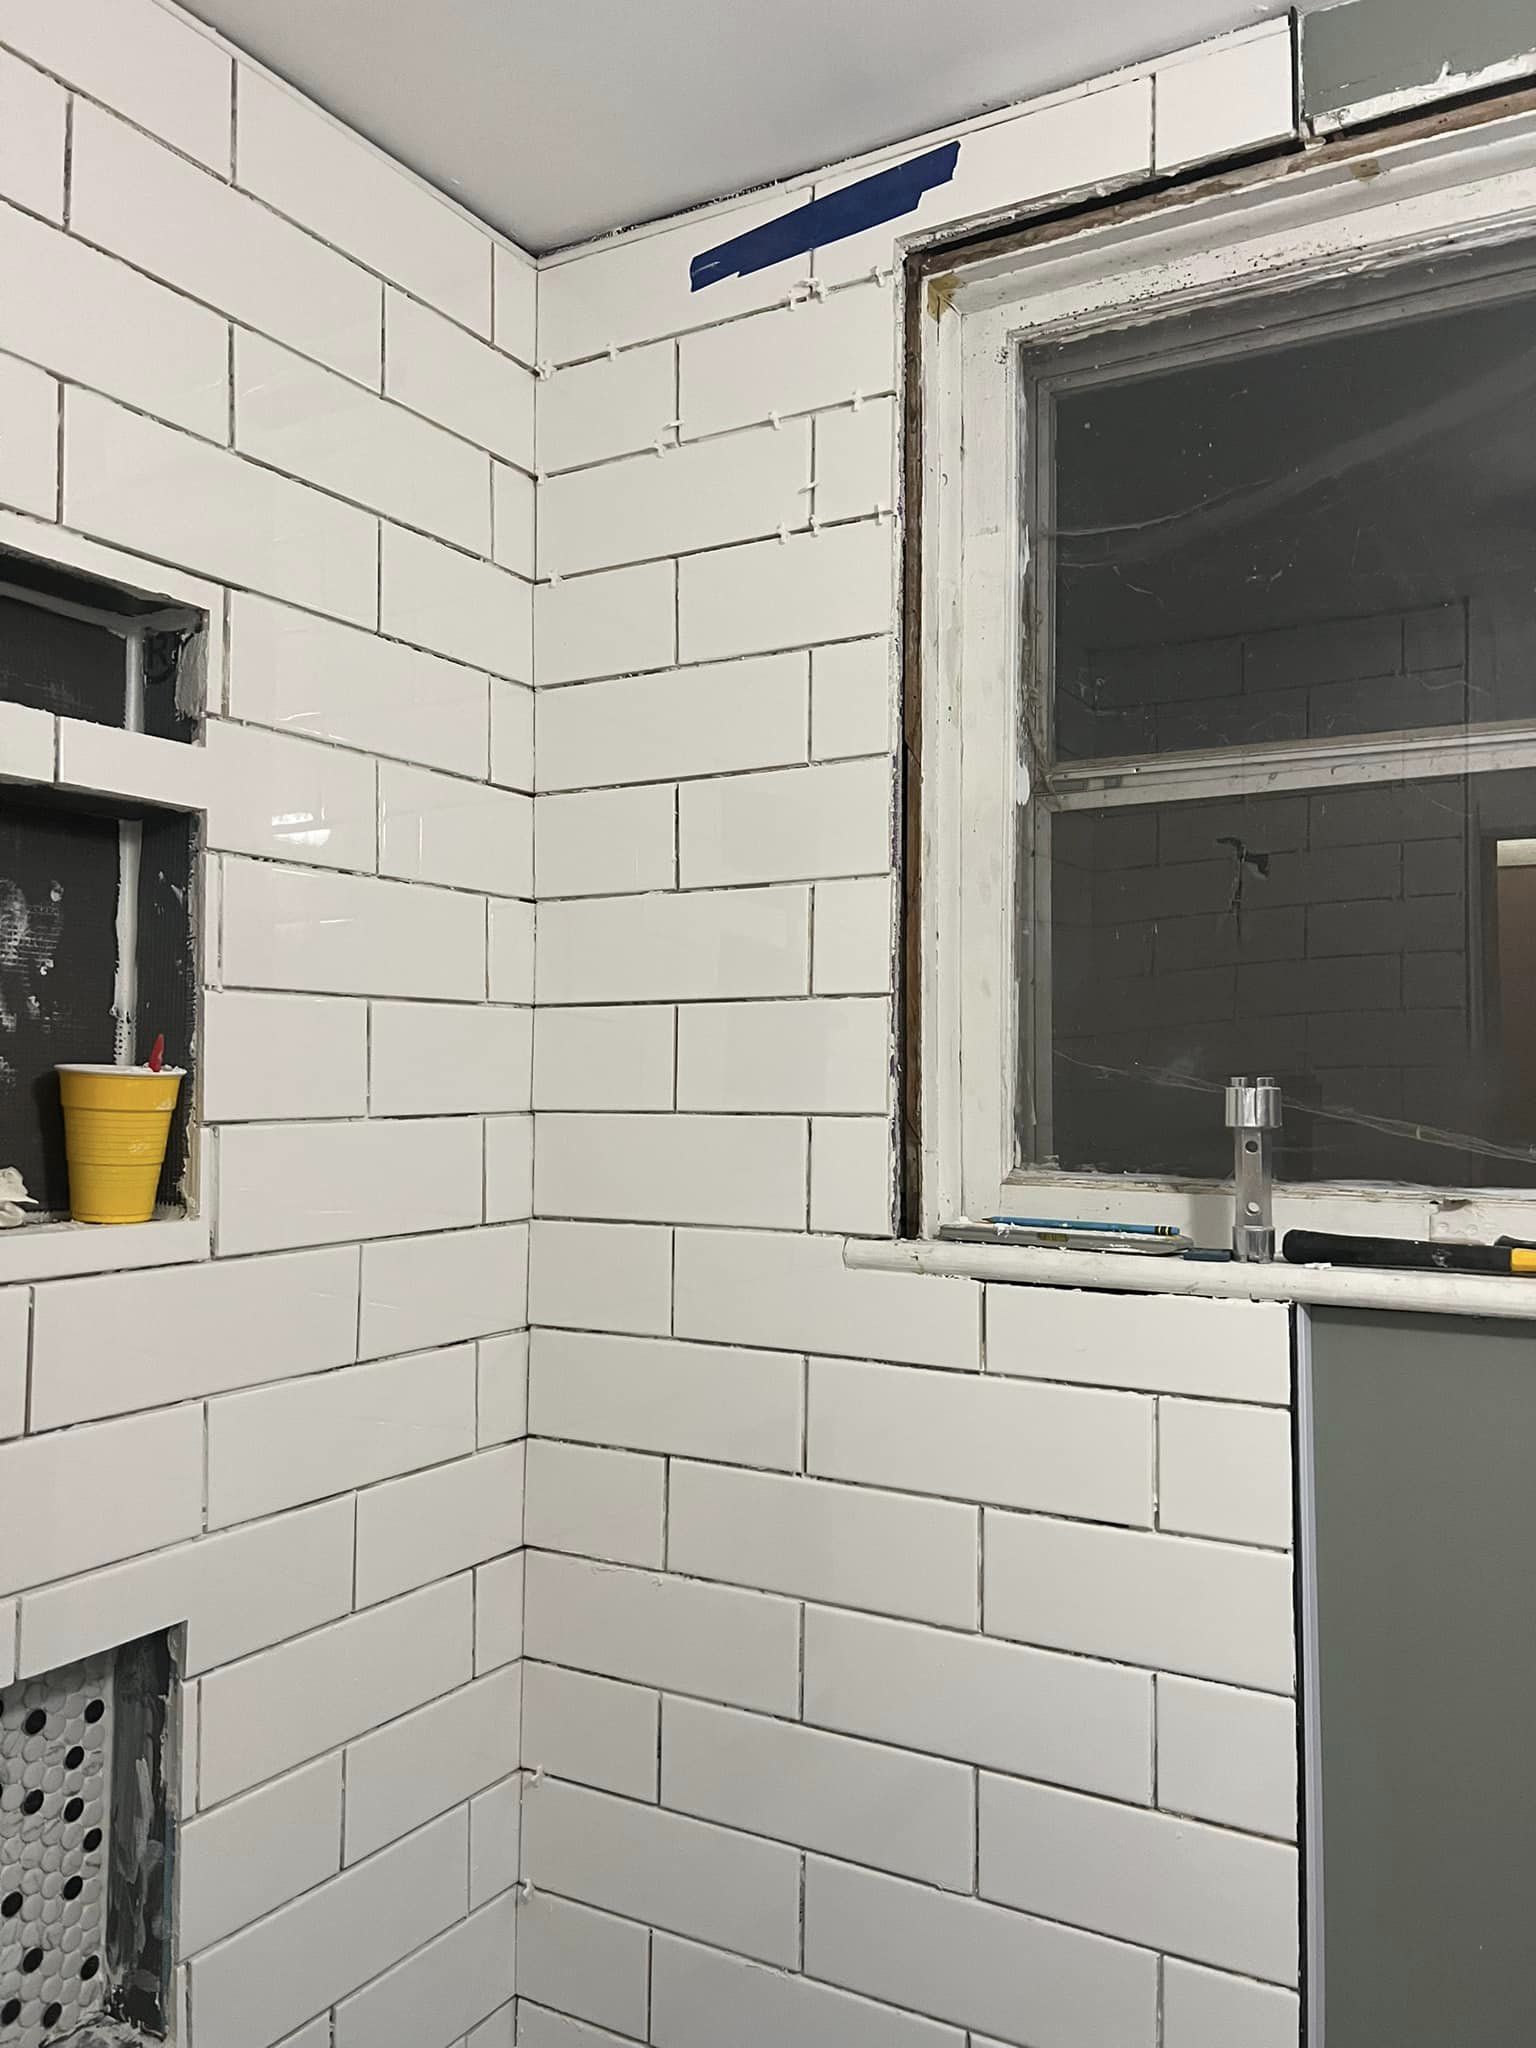
My first question is, what’s the best way to fix this issue and make it look even again? And my second question is about the finish or transition for the window section inside the shower, since the opposite side has wall trim. Any suggestions would be greatly appreciated! Thanks in advance for your help.


Start with cut pieces at the bottom instead of full pieces. If you used full pieces, it could have been hidden.
I can relate to this! We had a similar issue with our cast iron tub being slightly off in the front back corner… creating dips. To address this, we began the first row with cut tiles to ensure they were level and hide the imperfections of the tub.
So, you’re telling me that one corner of your tub mysteriously sank 3/4 inch?
Yeah, , it did happen. We discovered it after the backer board was already in place and sealed. We noticed it when we started tiling and used a laser level. It was level initially, but only dropped in the front right corner.
Hey, did experience a footing break? Is there a way to access it from below?
I’m puzzled by how it happened because nothing was broken. The floor seemed solid and all.
Just making sure – you did use mortar to set the tub, right?
Is the bathtub not leveled?
Now, grab some caulk and seal it up. You won’t be able to repair it.
It would have been better to trim the window completely before beginning the tiling process.
So, now you have a couple of choices:
1: Begin again
2: Remove the bottom row and opt for wider subway tiles
3: Replace the bottom row and cover it with marble or PVC trim
4: Use caulk or a generous amount of grout
Wait, how could a tub sink 3/4 inch only in one corner? From the pictures, it seems level until you reach about a foot from the corner. I’d worry about the tub possibly bending.
Hey , the front edge looks pretty level.
Hey , the level isn’t as straight as it should be. Maybe try adding shims under one end of the level.
Hey , if you look at the level you can tell it’s a bit off.
The tub was perfectly level at first, but when we installed the cement backer board and prepared for tiling, we realized that the front corner had shifted slightly.
Decided to test the tub’s stability by placing a level on the lip from side to side and front to back.
No content
I made sure the tile was level and everything, but the tube is what caused the corner to be unlevel.
Specifically in that front right corner
I’m just not understanding that the front outer edge of the tub is level.
Simply checks the gap. A spirit level will indicate if it’s truly slanted. The tub could have ended up slanted due to that gap, or maybe a small error in cutting the tiles that became more noticeable as you continued across the wall.
While working on the tub, we ended up having to add a backer board over the original lath due to space constraints, which caused the wall around the window to stick out.
No content
It’s important to make sure the front edge of the tub is even, while the back edge against the wall is not uneven.
Oh wow, that sounds like a challenge! I suggest removing the bottom 3 or 4 courses, cutting out the backboard, resetting the tub, reinstalling the backer, sealing the seam, and applying red guard. It’s definitely going to be tough to remove that tub though.
Unfortunately, I won’t be able to do that right now. That’s why I’m exploring other alternatives instead of removing anything.
Honestly, I’m open to any suggestions except for completely tearing everything out and beginning anew.
Honestly I can’t do it right now, I just can’t afford to.
Check for small pieces of tile by either applying caulk or carefully cutting.
That is definitely not level. Try raising the end of the level to center the bubble. You’ll clearly see how far off it is just by the length of the level, not even counting the foot beyond it.
The back became uneven sometime after installing the backer board. Everything was level when the tub was installed.
Did you not see it after finishing the first row of tiles? Or did it happen later?
Hey , we did see some action when we began laying the tile and decided to continue since the backer board was already in place and sealed. I wanted to avoid having small pieces of tile at the bottom…
Hey , have you seen any activity in that corner when you push on the tub?
No activity
Cut out the drywall on the end of the tub where it sagged and place shims under the feet. Lift it up.
Is it possible to attach a ceramic molding around the bottom row of tile? You might encounter challenges around the window. It is recommended to trim the window first before tiling. Before proceeding, remove the tile around the window frame and retile after trimming.
Are you planning to trim the window with tile, similar to this?
Cut open the area behind the tab where the taps will be placed and shim it.
Hey, did you remember to put a ledger strip on the wall for the tub to sit on? It needs to be on all three walls, secured to each stud with two screws. Did you overlook this step?
What did you use to set the tub? Sand mix? Perlite? I’ve heard some folks are using canned spray foam. If you opt for spray foam, it’s recommended to fill them halfway with water overnight and place a temporary cleat on the top of three sides.
My suggestion is to do it correctly
So, did you place it with water halfway on a base of low expansion foam?
Make sure to address that with grout