How can I effectively remove years of gunk and glue from my stairs as I attempt to transition from carpet to stained hardwood without losing my mind?
Oh man, I’m knee-deep in this project to switch out my carpeted stairs for beautiful stained hardwood, and I’m hitting a major snag. I’ve never taken on anything like this solo before!
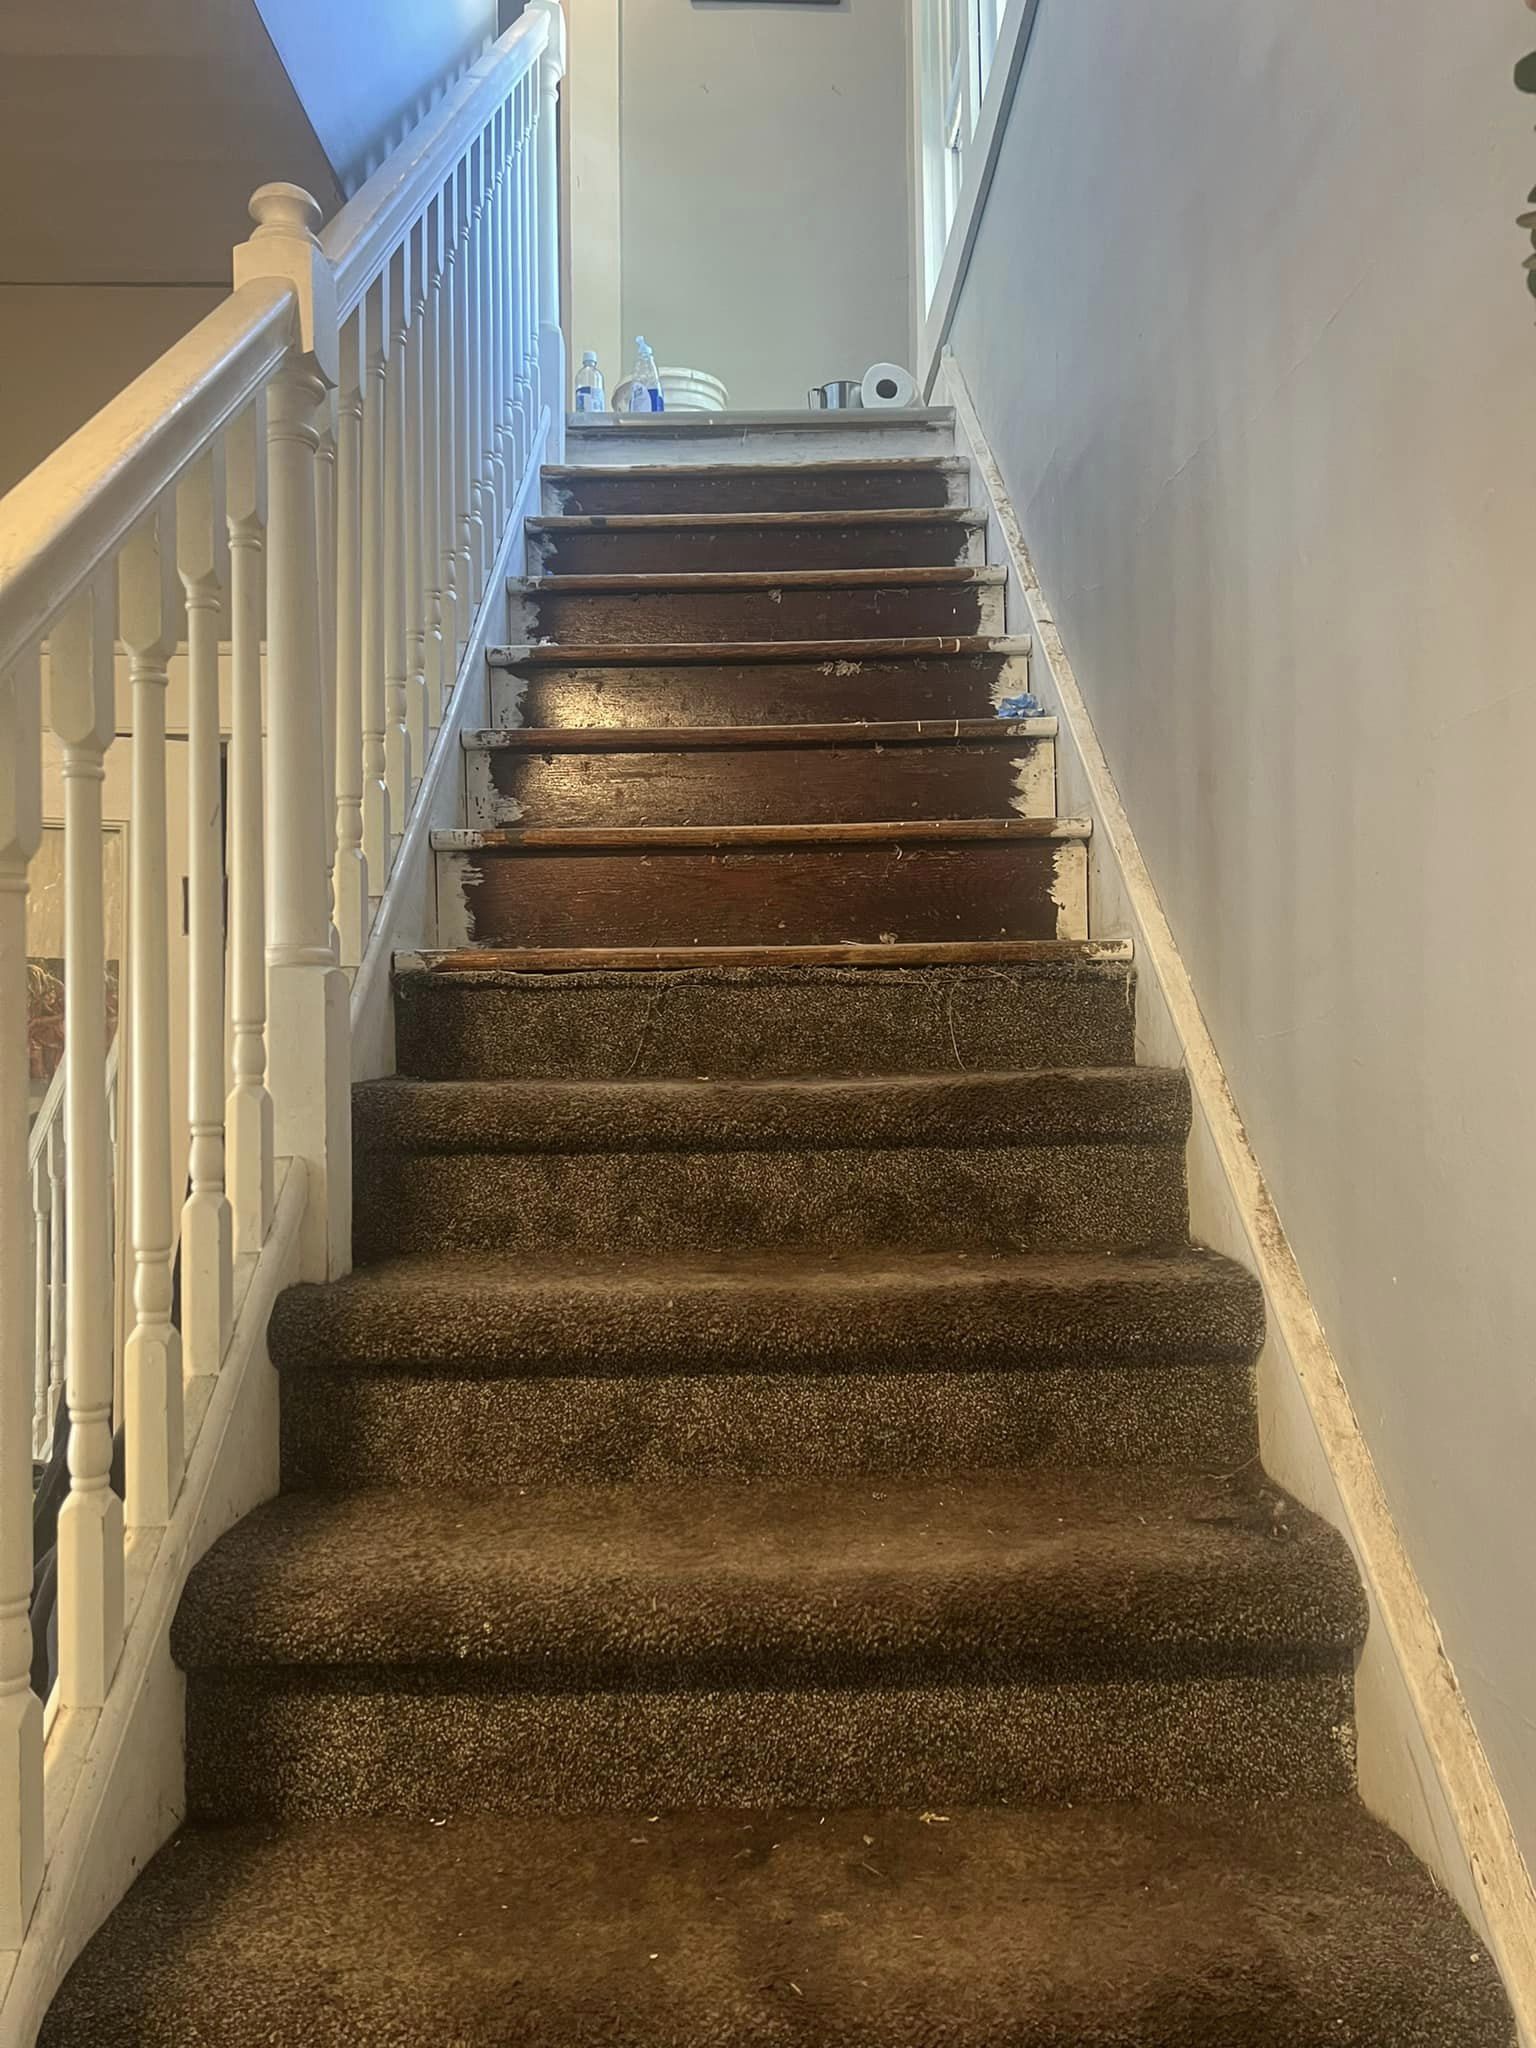
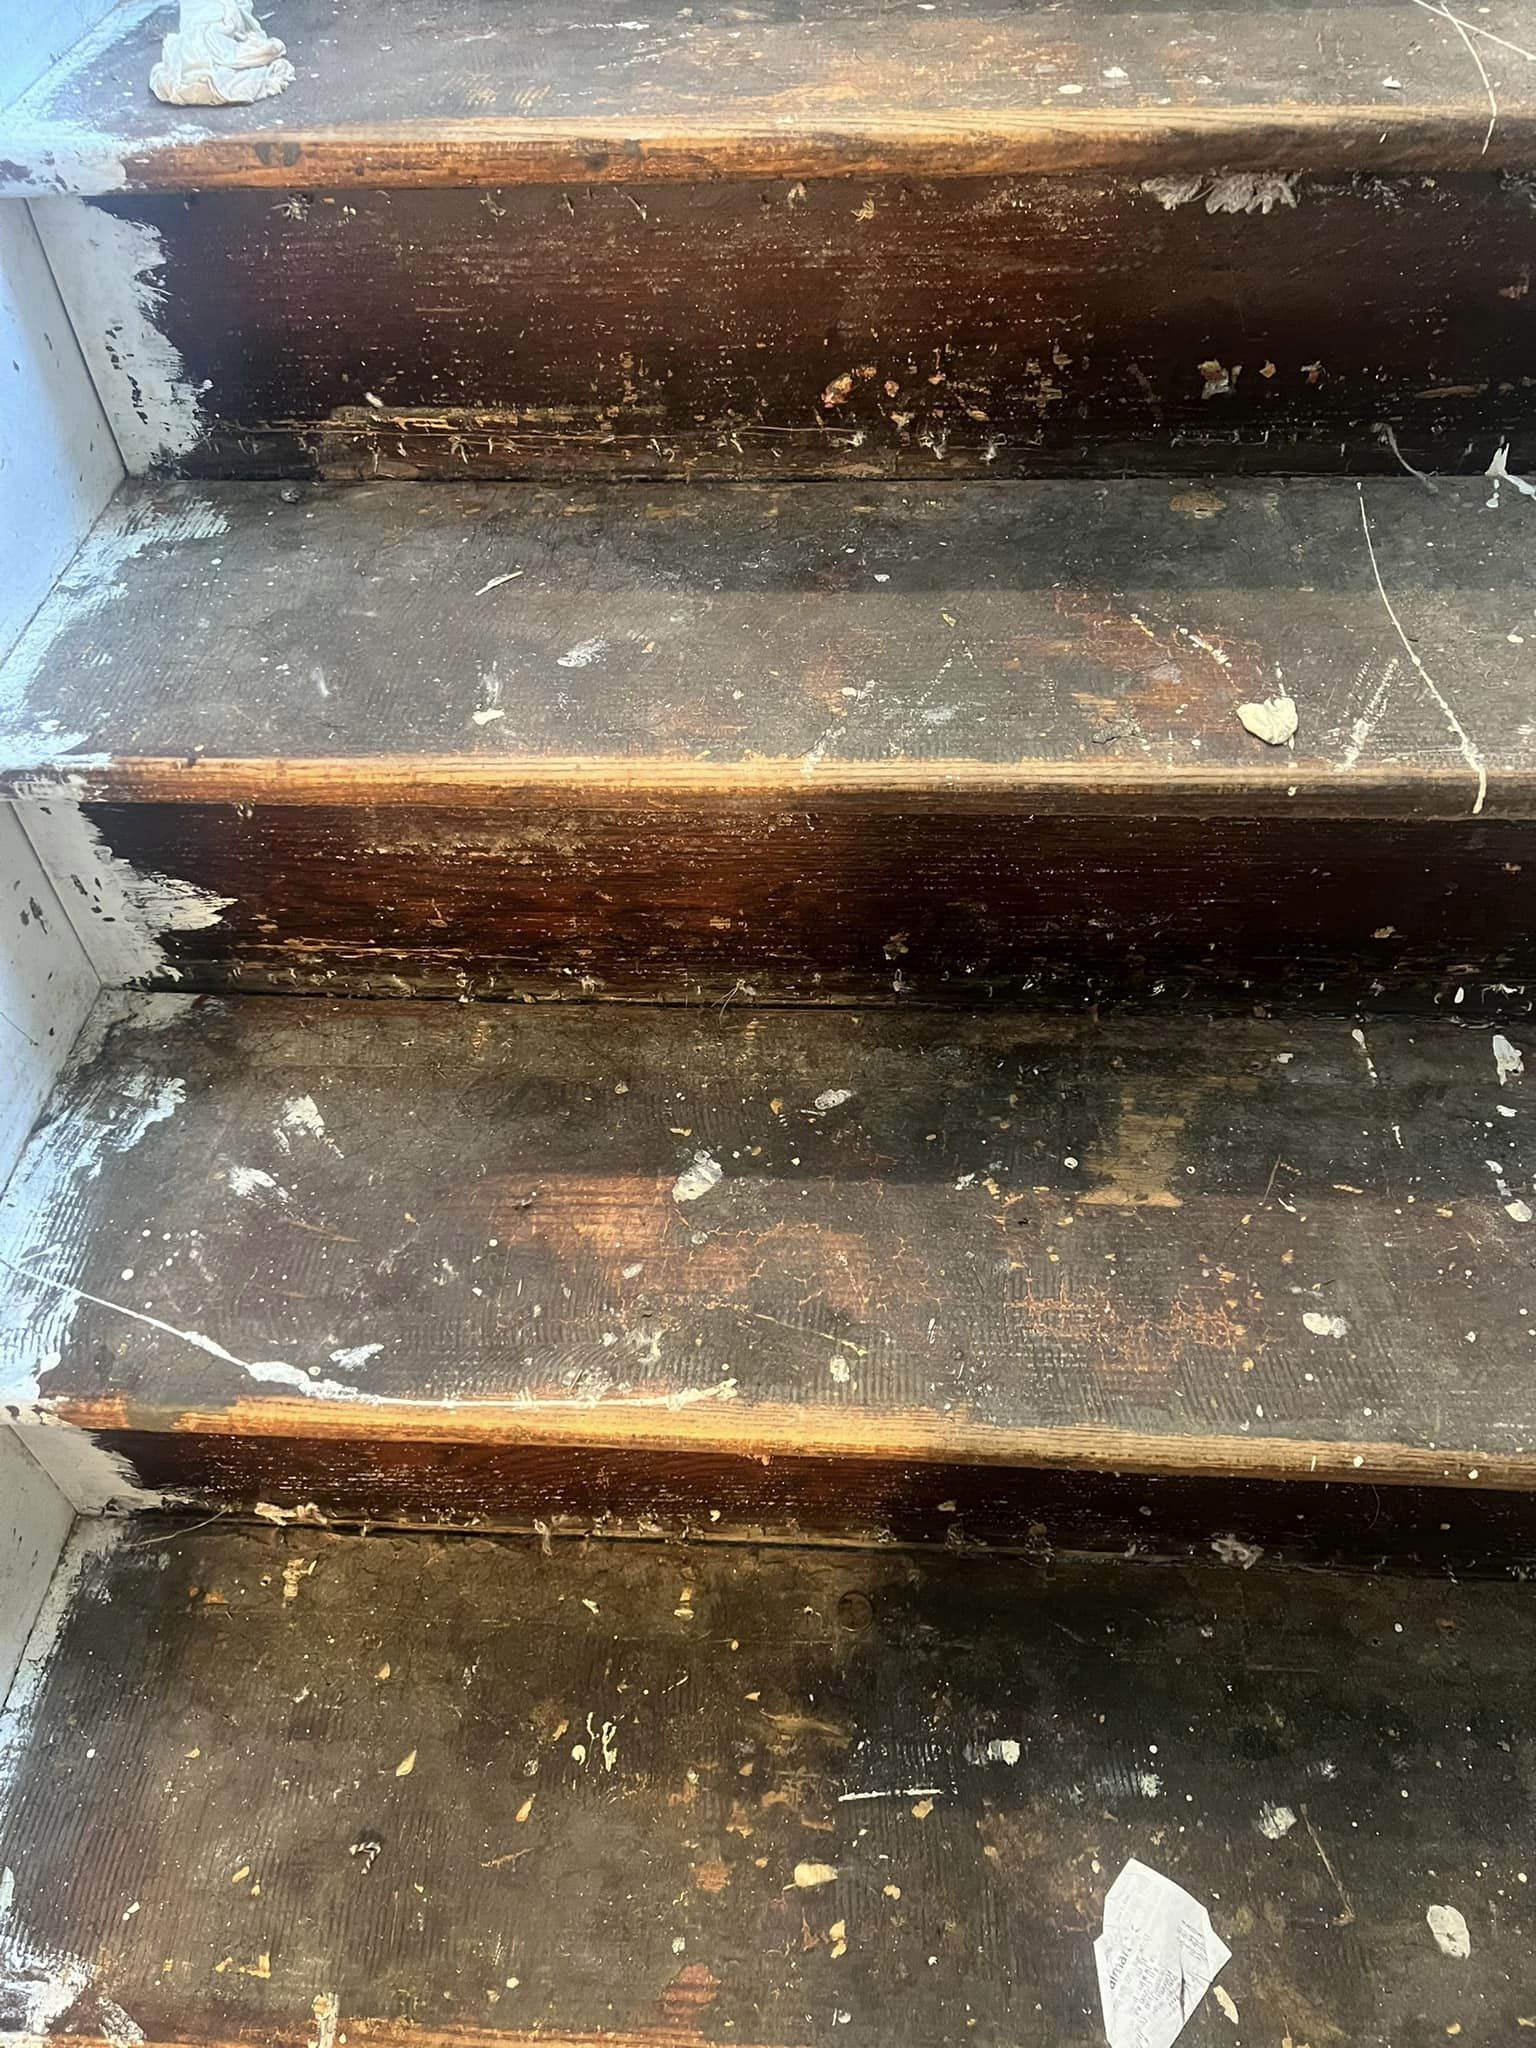
I managed to tear out half the carpet, but now I’m stuck dealing with all this stubborn glue that’s refusing to budge. It’s like there’s a decade’s worth of grime stuck on those stairs. Any foolproof tricks for getting rid of this mess without losing my sanity?
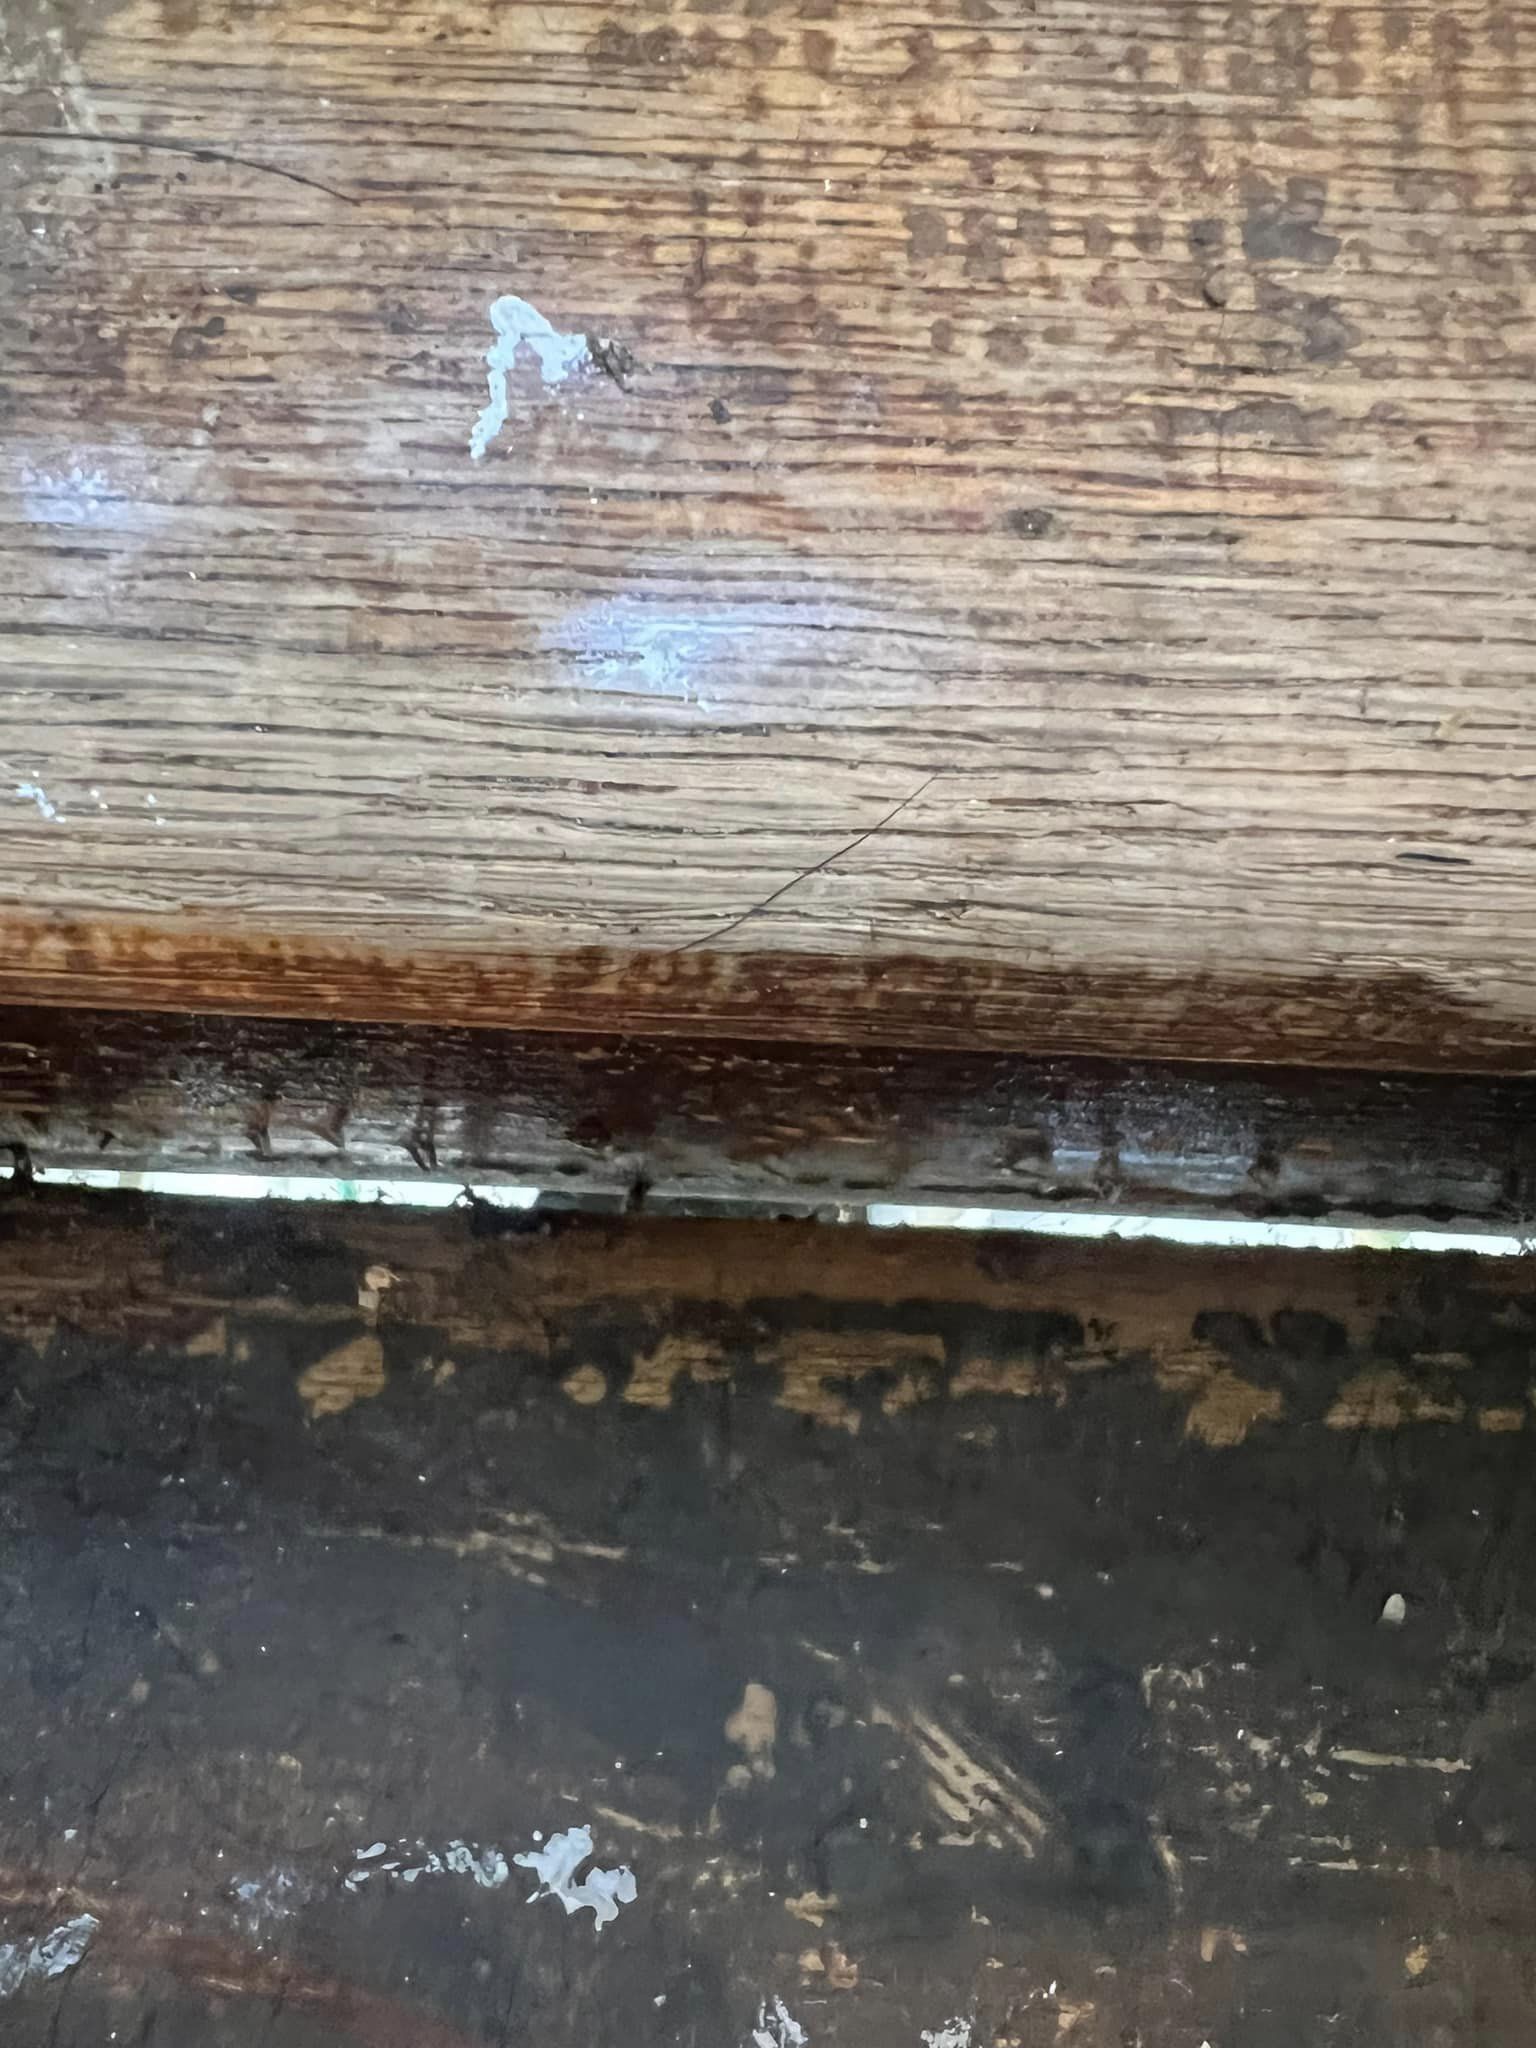
I’ve been experimenting with the top step, trying to scrape off all that gunk, but it feels like an endless battle. Should I throw in the towel and just buy stair treads instead? And what about that pesky gap between stairs – any special trim I should consider? I’m feeling totally lost and on the verge of giving up, which isn’t my style at all… 😫😩

Try renting an edger from Home Depot and grabbing some 50 g sandpaper and 100 g sandpaper for your orbital palm sander, then move on to staining. The edger can really cut down on your time.
Stair projects can be really tough – at some point, it might be a good idea to hire a professional so you don’t mess up what you already have. Sanding them yourself is no easy task
Sanding might not be too bad, but scraping off all that gunk is going to be the real challenge 😅
Hey , you have the option to sand it off.
It’s all part of the process. Hang in there. Keep scraping and sanding until you’re satisfied. If possible, consider renting or purchasing a flooring screener or any tool to make the job easier. You’ll appreciate it in the long run.
Just grab that orange product to peel it off, then sand it down and restain it
Definitely go for the orange solution. It’s a potent acid, so be careful with the fumes and skin contact. It works wonders though. Avoid orbital sanders as they can’t reach corners or sand with the grain. Invest in a belt sander and cornering sander for better results. Best of luck!
Also… make sure to fully commit with the oak. Opt for a high-quality oil and apply 5 coats. Polyurethane is not ideal as dirt easily accumulates in the corners. Consider using linseed oil.🤷♂️
That orange stuff didn’t work out?
Hey, I’m new to this. So, you’re saying oil alone is fine for stairs? Won’t they become slippery?
The citricide didn’t do much for me. I ended up getting a stripper and it’s working better.
Should I apply linseed oil before or after staining?
Looking for a sander?
My husband found an angle grinder with a sander attachment to be extremely helpful and efficient for sanding our deck. Just ensure you are familiar with how to operate an angle grinder and always wear the necessary PPE as they can pose risks.
It seems like those are pine stairs, I recommend taking them out and replacing them with oak. It will require less work and you’ll be much happier. Pine tends to have an uneven appearance due to its softness. After that, you can add a thin veneer and paint the stairs white.
Definitely doesn’t long for pine, it’s way too delicate for stairs. I would have guessed oak instead 😂
definitely doesn’t long for pine, it’s way too delicate for stairs. I would have guessed oak instead 😂
Reminds me of a pine tree
Mentioned it’s a red oak staircase.
Is sure it’s oak.
Pick up some adhesive remover like goof off or goo gone from Lowe’s or Home Depot. Simply follow the instructions provided and be sure to wear the appropriate PPE. Allow the recommended time to pass, scrape it off (you may need to repeat this process) using a putty knife, then let it dry before sanding. The odor can be strong, but this method has been effective for me.
Following
If it’s tar, we ended up using a steamer to remove the wallpaper. It was quite messy, but it did the trick and allowed us to save the hardwood floors underneath.
Take off the board and flip it to check out the other side.
I really admire how you tackled this problem. Sometimes the simplest solution is the best.
If you take off the tread, it’ll make it easier to do the job. I think flipping them over could really cut down on the amount of work you have to do. As for the riser, you could opt to use a thin sheet of painted plywood if you prefer a white riser
Consider giving a wallpaper steamer a shot.
Electric sanding machine
What type of flooring is at the top of the stairs? It doesn’t seem to be hardwood. I’m thinking of using the same flooring on the stairs for a cohesive look…
Oh, that grey laminate is only on the upper floor, . Our main level has natural hardwood and we want it to match that.
Good luck with that! I’m not a fan of the top silver stair nosing you’re considering for your project, but it will definitely add an interesting touch. Sometimes in renovations, you have to reassess and change course, especially when it comes to stairs. We redid ours 3 years ago with LVP and we’re really happy with how they turned out.
Hey, , where exactly is that top silver stair located?
Hey Sue, I think you may have missed a key word in the text. Take a look at the second picture and you’ll see what I’m talking about. Personally, I believe it would be better to have silver down the stairs instead of hardwood up the stairs, especially with the silver nosing potentially ruining the transition. But everyone has their own preference.
I was confused about what “nosing” meant, so I was searching for the silver to try and understand it, but I can’t find any silver anywhere 🙂
Was mentioning that silver carpet bar thing at the top of the stairs.
Oh my goodness, I must be extra blind today! Thank you so much! Lol
Just wanted to cheer you on a bit… Hang in there!!😊 You can do it!! 💪😁
(you’re currently in the process of putting in hard work…. quite literally)
Hey , just wanted to say I really appreciate you!
No content
Those stairs are going to be the ones you proudly declare, “I did this! It was all me. I created this beauty!”
For removing the sticky residue, try using Citristrip, covering it with saran wrap and letting it sit. Then use a carbide scraper. Once that’s done, sand, stain, and reseal. You can do it!
I tried citristrip but it didn’t do much. I never thought of using Saran wrap. What a genius idea! 💡 🧠 💥
Hey , have you given this a try? Did using the Saran Wrap make a difference?
I’m actually currently working on my own stairs too. I got a budget-friendly heat gun to melt the glue, and my stairs had many layers of paint. I used a scraper to remove it all, and now I’m in the process of sanding
Spent a solid 2 hours today applying stripper and doing some scraping. Tomorrow is all about sanding and hoping for the best. Can’t believe I’m only halfway done though, still more to go through. 😅😅😅😅😅😅
I’ll keep you posted on how it goes if you want to follow along on this journey. 😂
Have you tried using a heat gun along with the stripper? It’ll speed up the process significantly.
Now you understand why they chose to carpet the stairs. 😉
It’s definitely doable, but it will require a lot of hard work. The gray residue is the remains of the old carpet padding. Scraping it off is the best approach. Use hard plastic scrapers, like the ones used for Teflon pans, which should be gentle on the stairs. If you have to resort to metal scrapers, round the edges to prevent damage. The treads likely have varnish, so a good varnish stripper will remove most of it. Look for a low VOC stripper, and make sure to ventilate the area well. Once you’ve removed the residue, check for cracks in the treads or risers. Use colored epoxy to fill in any cracks. For larger cracks, match the epoxy color to your stain for a seamless look. Be cautious not to overapply the epoxy, as it will be harder to sand. A stainable wood filler is better for repairing riser cracks. Lightly sand the surfaces, using a gentle touch with sandpaper no heavier than 180 grit. Use a random orbit sander for the main areas and a sanding block or oscillating tool for corners. Have foam sanding blocks on hand for the bullnose of the treads. You will need patience and pain relief for this project. To address gaps, glue and screw the tread to the riser, or use quarter round or trim molding to conceal them. Make sure to match the trim to the oak stairs and stain it before installation. Fill any imperfections with stainable wood filler, sand lightly, clean thoroughly, and start finishing from the bottom or top depending on your staircase layout. For the finish, opt for marine grade epoxy or polyurethane with a satin or semi-gloss finish for durability and forgiving coverage. Best of luck with the project, and don’t forget to share pictures when you’re finished! 😎
I have a couple of suggestions for filling the gap between your tread and risers. One option is to use basic quarter rounds, while the other suggestion is to use a simple OG trim molding. It’s best to use the smallest piece that will cover the gap, and if you don’t have a wire nailer, I recommend using glue to attach these pieces. Even if you do have a wire nailer, I still suggest using glue for most of the holding.
Thanks for the thorough instructions, ! Much appreciated.
If I were you, I would try to locate the same wood type that matches what you already have downstairs. Then, have a staircase specialist create treads using the same material. I’m not sure where you are, but here in Seattle, we have a few places that offer that service.
I just finished a job using laminate material. The stair shop made the nosings and I attached them to a board, then cut it to size.
Null
Hey , these are amazing! They’re so beautiful!
Wow, that seems really nice. I upgraded our old staircase with laminate and got the coordinating nosing. It was decent, but I prefer how yours turned out. I might have to give that a shot for our upcoming home.
Hey , it’s definitely a worthwhile investment!
My treads were plywood, so I decided to replace them. Instead of changing the risers, I just covered them with peel-and-stick tiles. I made sure to apply extra glue and used clamps to prevent them from peeling off over time.
To strip them down to bare wood, the easiest way might be to use a handheld sander. Start with a 36-grit sandpaper to clean it up, and then gradually move up to 120 grit or higher for a smooth finish.
As for mine, I did a pre-stain treatment, applied the stain, and added 4 coats of polyurethane. After that, I used a sanding pad to give it a nice shine.
That looks fantastic! 👍
Wow, there’s a ton of work to do. I think I’ll put new oak stair treads on them
If it were me, I’d remove them and install new ones. We’re actually in the process of doing the same thing with our basic pine stairs, it’s not worth the effort.
My floors weren’t in as bad shape as yours under that awful carpet, but here’s the project I completed before.
What next?
Sand it down?
I totally understand your frustration! I got stuck with our stairs too because of those nail spots. Someone recommended using oxalic acid, so fingers crossed!
I’d suggest getting new treads. It’s not worth the hassle.
Look for a ‘Mastic remover’ or a multipurpose remover in the paint section at Home Depot. It’s designed to remove flooring adhesive specifically.
Let it sit for 3 hours, then return to easily scrape it off. I used it on 800 square feet just last week
Make sure to sand it properly
I’m getting ready to tackle this project myself (renovating basement stairs). Reading your post and comments is making me nervous! Best of luck to both of us!
Hey, it’s .
Sand the stairs with an orbital sander. Make sure to buy plenty of sanding pads.
Maybe give a heat gun a try to soften it up and then you can scrape it off.
Is it possible to remove the treads and flip them over?
That’s an amazing idea! I wonder if it’ll actually work.
I personally prefer a carbide scraper like this one from HD. Here’s the link: https://www.homedepot.com/p/Warner-2-3-8-in-Carbide-100X-Soft-Grip-Scraper-with-Knob-205324/205053046?g_store=&source=shoppingads&locale=en-US&pla&mtc=SHOPPING-BF-CDP-GGL-D24-024_037_TOOLS_SAFETY-NA-Multi-NA-PLALIA-NA-NA-NA-NA-NBR-NA-NA-NA-FY21_Sundries_PLALIA&cm_mmc=SHOPPING-BF-CDP-GGL-D24-024_037_TOOLS_SAFETY-NA-Multi-NA-PLALIA-NA-NA-NA-NA-NBR-NA-NA-NA-FY21_Sundries_PLALIA-71700000075826646-58700006498654207-92700058683660975&gclid=CjwKCAjw38SoBhB6EiwA8EQVLkpFqeSyqPHEvce8MOIipe4_zUHC7FdZKUdDvcTd5jV1HWHRalsWHBoCMawQAvD_BwE&gclsrc=aw.ds
I think using a power sander would be the way to go. Placing a piece of quarter round could help cover up the gaps.
Another option could be to hammer the board towards the tread from underneath to close the gap.
If you choose to use their paint or stain, there’s no need for priming. Make sure to use their surface prep for cleaning. Check out the All-In-One Paint by Heirloom Traditions Group.
You could try using a reciprocating saw with a scraper blade or a rotary hammer with a chipping blade.
Check out this YouTube video, it shows exactly what I did
https://youtu.be/AI1poE8dn10?si=_qage0NFMKJLw2IS
For the gaps, you have the option of using caulk and once it’s dry, it’s ready for painting. Another choice is to go with beading/trim. As for the gunk, the best solution is using a sander to achieve a smooth surface for your new paint job, even though it’s a bit of work, the end result will be worth it. X
Give Goo-Gone a shot.
I did that. You can’t remove the black completely. All you can do is gently scrape and sand it until it’s smooth. After that, I added oak caps on top. You may need to trim the bullnose to accomplish this.
It seems like you have ‘carpenter grade’ steps to deal with. That’s the same situation we faced. We decided to install new stair treads and risers to cover them up.
No content